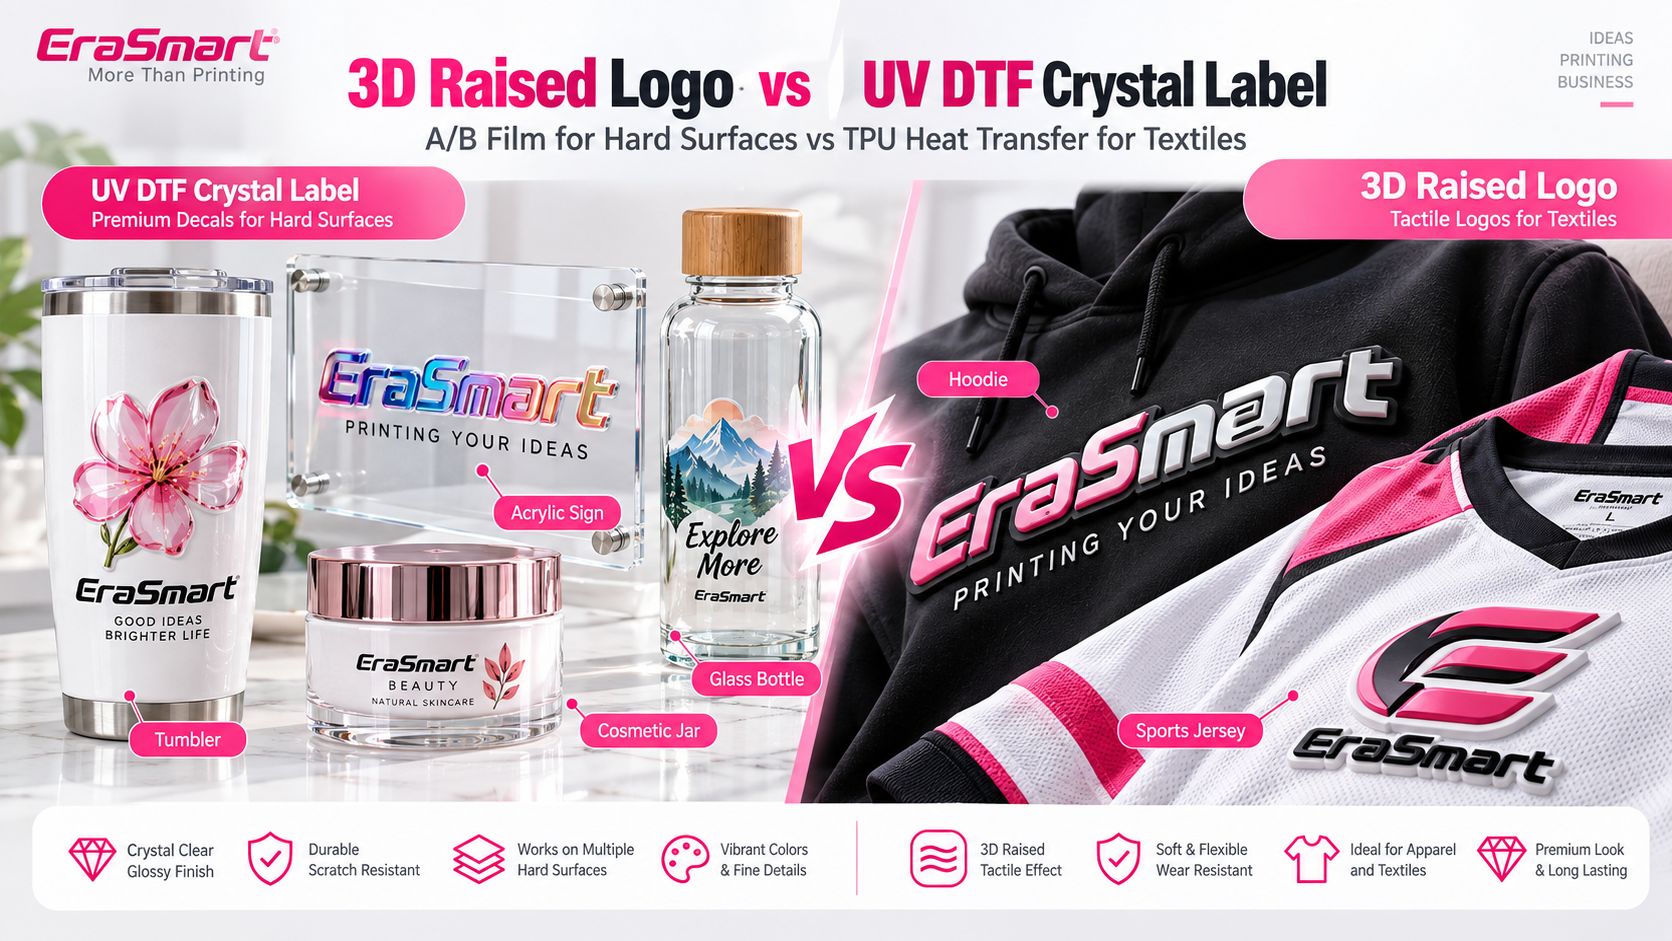
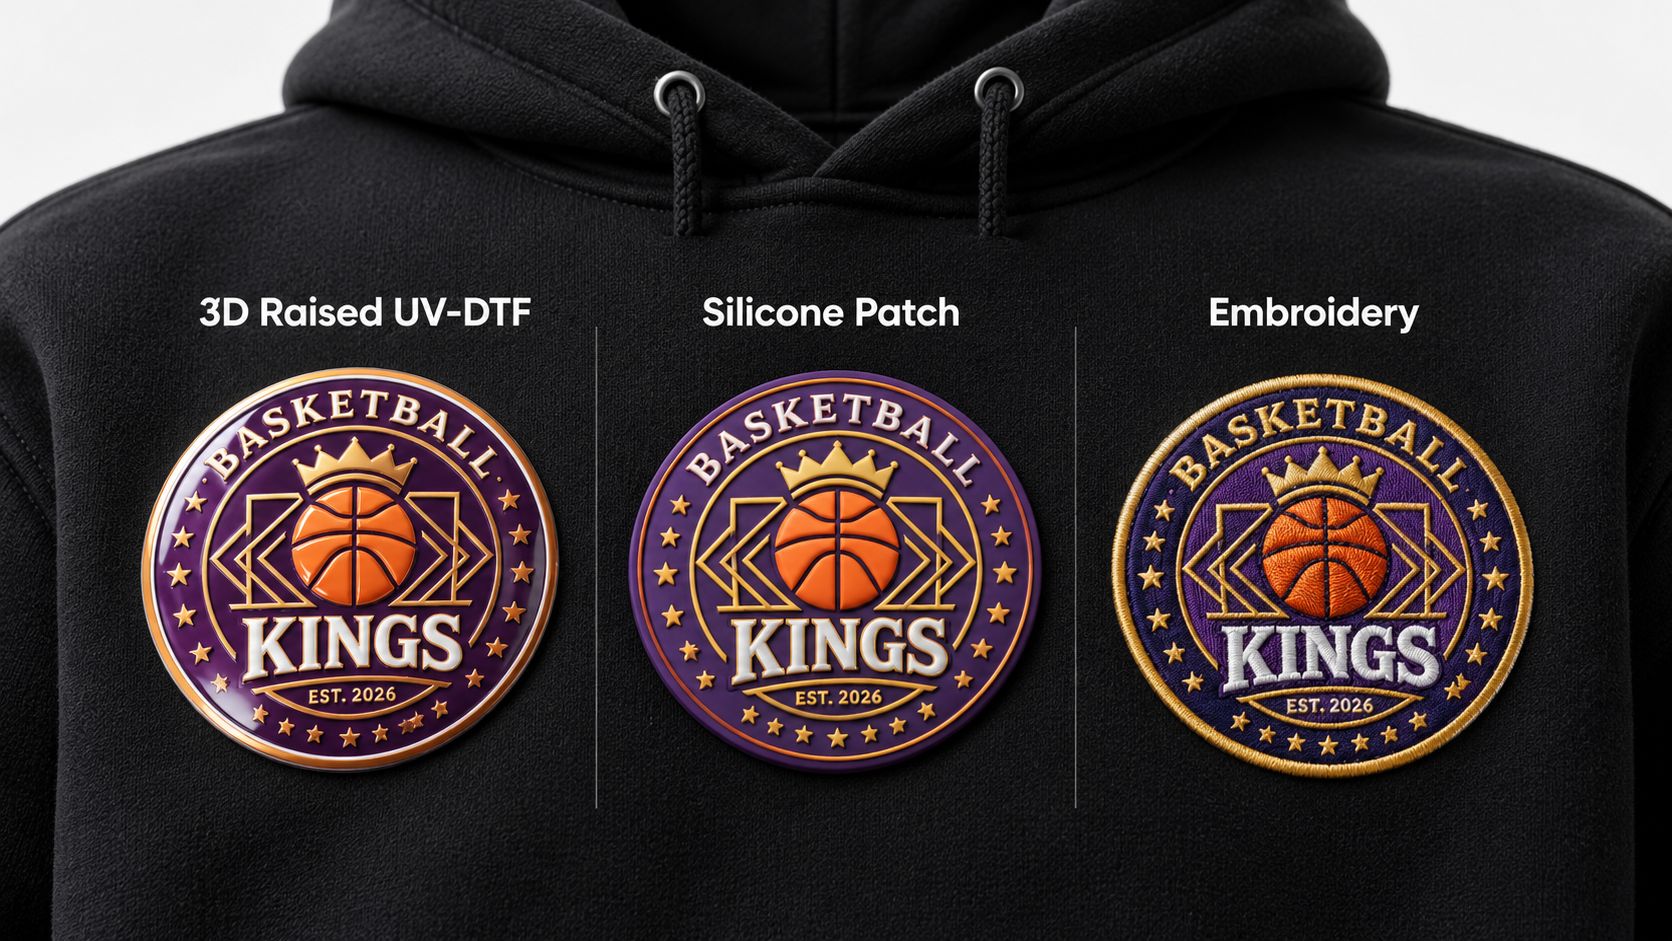
Printing a good 3D raised logo is only half of the job.
The finished badge still needs to be bonded to the garment with the correct combination of temperature, time, pressure and peel method.
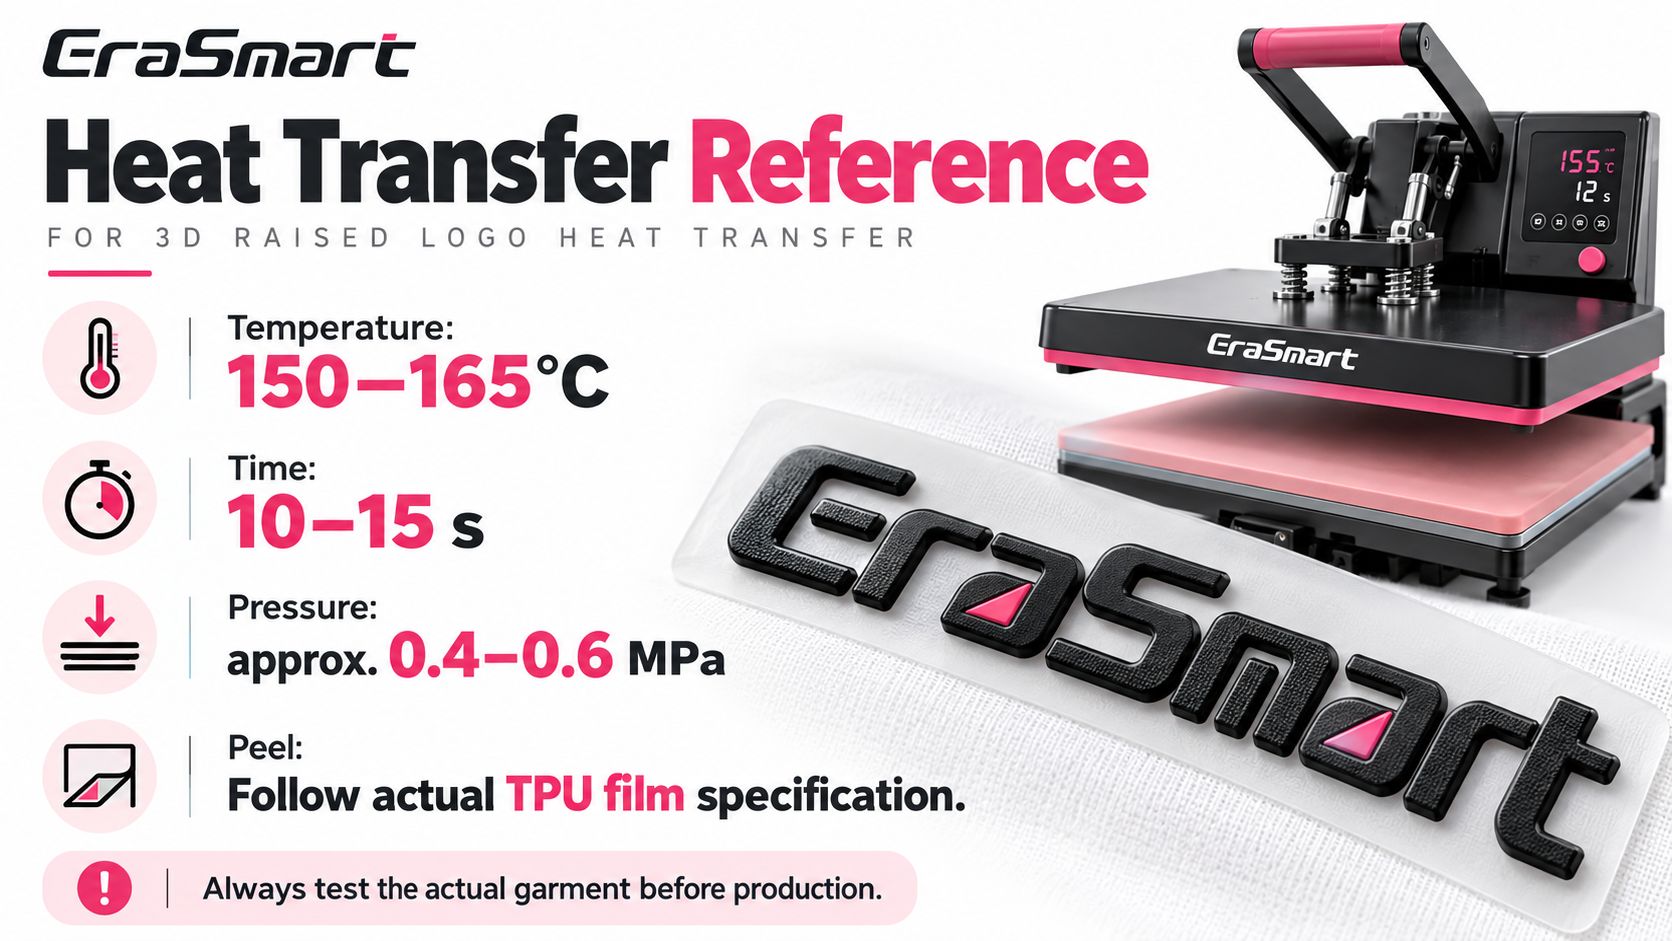
For the EraSmart 3D raised-logo TPU transfer workflow, a practical reference range is:
- Temperature: 150–165°C
- Time: 10–15 seconds
- Pressure: approximately 0.4–0.6 MPa
- Peel: follow the actual TPU carrier-film specification

These are reference production conditions, not universal settings for every garment.
The final recipe should always be validated using the actual:
- TPU transfer film
- TPU hot-melt adhesive layer
- raised-logo thickness
- garment fabric
- prensa de calor
- production batch
A lightweight T-shirt, thick hoodie, sublimated polyester jersey and structured cap do not behave exactly the same under heat and pressure.
This guide explains how to adjust the process for each product and how to troubleshoot the most common transfer problems.
If you still need to understand how the badge is printed, cured and contour cut before heat transfer, start with Cómo crear logotipos en relieve 3D con una impresora UV DTF: flujo de trabajo completo.
The Four Variables That Control Heat Transfer
A successful heat transfer depends on four variables working together:
Temperature + Time + Pressure + Peel
Changing only one variable without understanding the others can create new problems.
Temperatura
Heat activates and softens the TPU hot-melt adhesive so it can bond with the textile surface.
Too little heat may leave the adhesive only partially activated.
Too much heat can damage the garment, distort the TPU structure or increase dye-migration risk on polyester.
Tiempo
The adhesive needs enough time at the required temperature to create a stable bond.
A press that is hot enough but opened too quickly may still produce weak edge adhesion.
Presión
Pressure pushes the activated adhesive into close contact with the textile surface.
Even when the temperature is correct, poor pressure distribution can leave one side of the badge properly bonded while another edge lifts later.
Cáscara
The carrier film must be removed according to the behavior of the actual TPU transfer system.
Depending on the film, that may mean:
- hot peel
- warm peel
- cold peel
Do not copy the peel method from another film.
EraSmart 3D Raised Logo Heat-Transfer Reference
For the flexible UV / TPU workflow described in the EraSmart Solución de impresión de logotipos en relieve 3D, use the following as a starting point:
| Variable | Configuración de referencia |
|---|
| Temperatura | 150–165°C |
| Tiempo | 10–15 seconds |
| Presión | Approx. 0.4–0.6 MPa |
| Cáscara | Follow the actual TPU film specification |
These settings should be treated as a starting production window.
The best final recipe depends on the complete system.
Why TPU Hot-Melt Adhesive Is Important
The 3D raised logo is not simply a sticker placed on top of the garment.
Its bonding system relies on a TPU hot-melt adhesive layer.
During heat pressing, the adhesive softens and becomes capable of bonding to the textile surface.
With the correct combination of heat and pressure, the adhesive makes intimate contact with the fibers.
After the press opens and the system cools according to the required peel process, the TPU layer forms the bond that holds the 3D badge in place.
This is one of the reasons the 3D raised-logo workflow is fundamentally different from standard UV DTF crystal labels.
Crystal labels normally use:
Standard UV Ink + Crystal Label A/B Film + Hard-Surface Transfer
The raised textile workflow uses:
High-Flexibility UV Ink + TPU Transfer Film + TPU Hot-Melt Adhesive + Heat Press
For the complete comparison, see the EraSmart Impresión de logotipos en relieve 3D con tecnología UV DTF.
Before Heat Pressing: Inspect the Badge First
Do not use the heat press to try to fix a badly produced badge.
Before transfer, inspect the printed and contour-cut logo.
Controlar:
- raised height is consistent
- CMYK is aligned with the white structure
- varnish is fully cured
- contour-cut edge is clean
- TPU film is not damaged
- adhesive surface is clean
- no dust or oil is present
If the white structure itself is uneven, review Cómo las capas de tinta blanca crean efectos elevados 3D en la impresión UV DTF.
If the problem is White / CMYK / Varnish registration or the cut line, see the 3D Raised Logo Artwork Guide.
Should You Pre-Press the Garment?
A short pre-press can be useful in some production situations.
Its purpose is normally to:
- flatten wrinkles
- remove surface moisture
- stabilize the application area
- create a more even pressing surface
This can be especially useful in humid conditions.
However, do not automatically add a long pre-press to every garment.
Extra heat exposure can be undesirable for:
- heat-sensitive polyester
- sublimated jerseys
- delicate synthetic fabrics
Treat pre-pressing as a process variable that should be validated with the actual garment.
How to Heat Press a 3D Raised Logo onto a T-Shirt
T-shirts are generally the easiest garment to work with because they usually provide a relatively flat application surface.
Step 1: Position the Shirt
Place the shirt so the print area lies flat on the platen.
Avoid placing:
- side seams
- collar seams
- thick hems
directly underneath the logo area if they interfere with pressure.
Step 2: Position the Badge
Align the 3D logo at the required location.
Typical positions include:
- left chest
- center chest
- sleeve
- lower front branding
Confirm placement before pressing.
Step 3: Apply the Reference Settings
Begin within the validated production window:
150–165°C
10–15 seconds
approximately 0.4–0.6 MPa
Step 4: Peel Correctly
Remove the carrier according to the actual TPU film specification.
Do not assume hot peel or cold peel.
Step 5: Inspect
Check the full perimeter of the badge.
There should be no:
- lifted corners
- burbujas
- loose areas
- bordes distorsionados
Cotton T-Shirts vs Polyester T-Shirts
Do not assume every T-shirt needs exactly the same recipe.
Cotton is generally more tolerant of heat.
Polyester may be more heat sensitive and can introduce other problems such as dye migration.
A cotton/polyester blend introduces another variable.
The safest approach is to qualify each garment family before bulk production.
How to Heat Press a 3D Raised Logo onto a Hoodie
Hoodies introduce one of the most common causes of failed transfers:
uneven pressure.
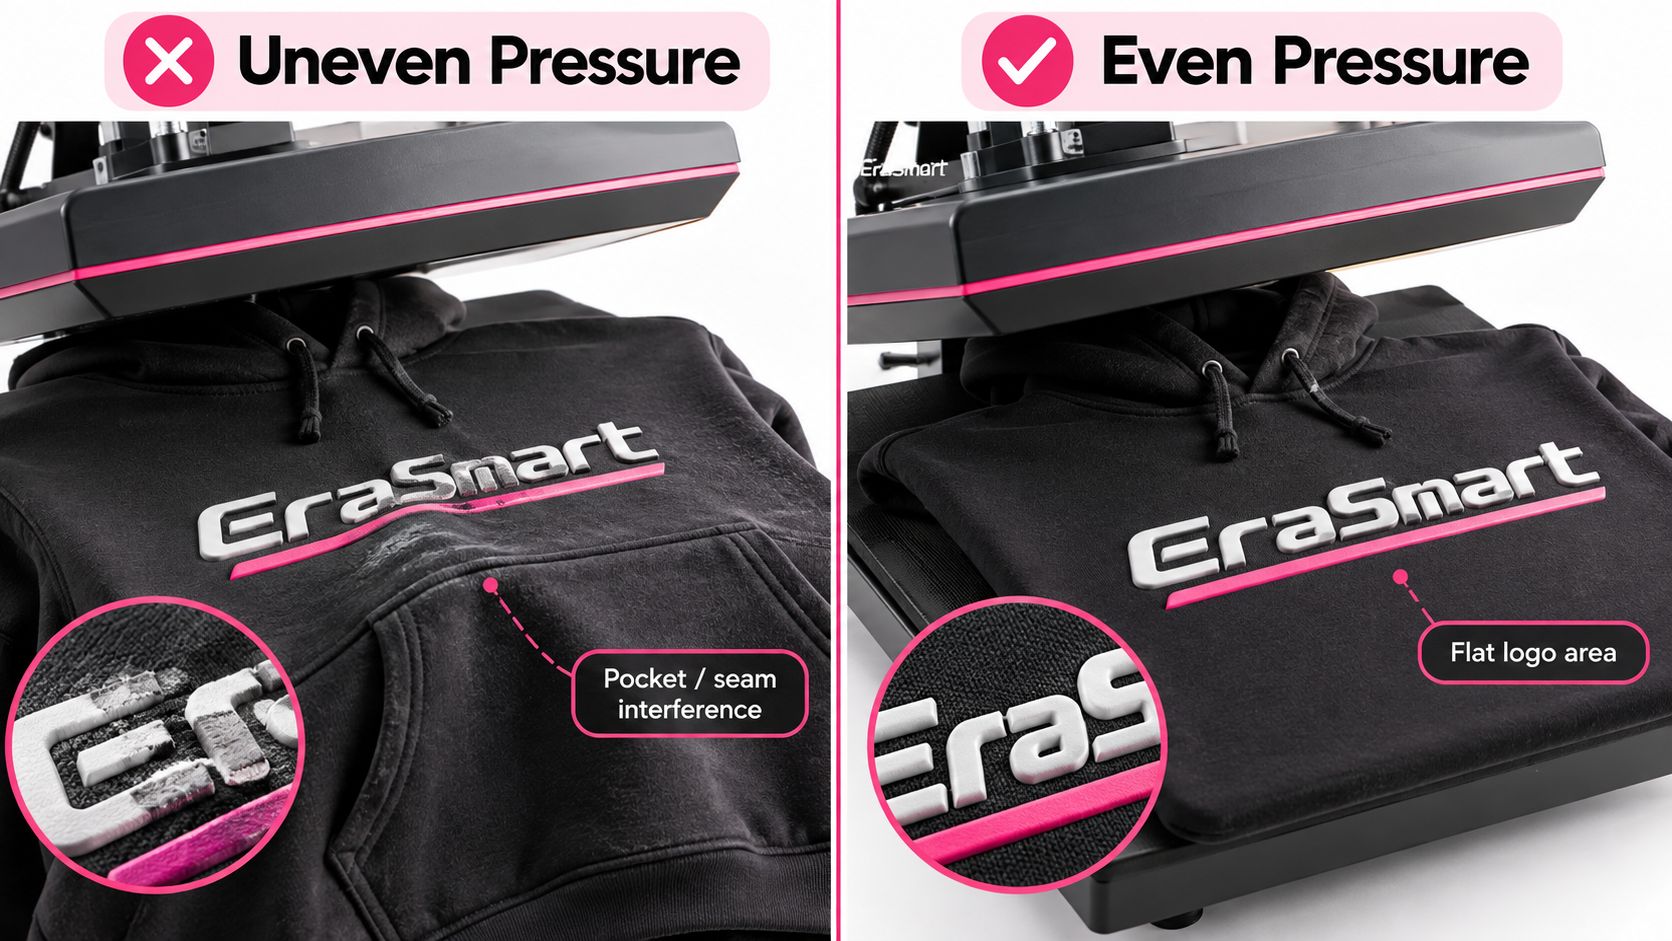
The problem is often not the logo or adhesive.
It is the garment construction.
A hoodie can contain:
- thick pouch pockets
- drawstrings
- seams
- zippers
- multiple fabric layers
- thick fleece
These raised areas can prevent the upper platen from applying even pressure across the actual logo.
Wrong Setup
If a thick seam or pocket sits under one side of the badge:
- one side receives full pressure
- the other side receives less pressure
The logo may look attached immediately after pressing, but the weak edge can begin lifting later.
Better Setup
The actual logo area should be the flattest and most evenly supported area under the press.
Depending on the garment and equipment, this may involve:
- threading the hoodie onto the platen
- moving seams away from the application area
- using a smaller platen
- using an appropriate firm support pad
The goal is simple:
The badge should receive even contact across its entire surface.
Zip Hoodies Need Extra Attention
A zipper can create a major pressure obstruction.
Do not press a large badge across a zipper unless the complete process has been specifically designed for that application.
For chest logos beside a zipper, make sure the zipper is not raising one side of the press.
Heat Pressing 3D Raised Logos onto Sports Jerseys
Sports jerseys are an excellent application for raised logos, but polyester garments require more testing than ordinary cotton apparel.
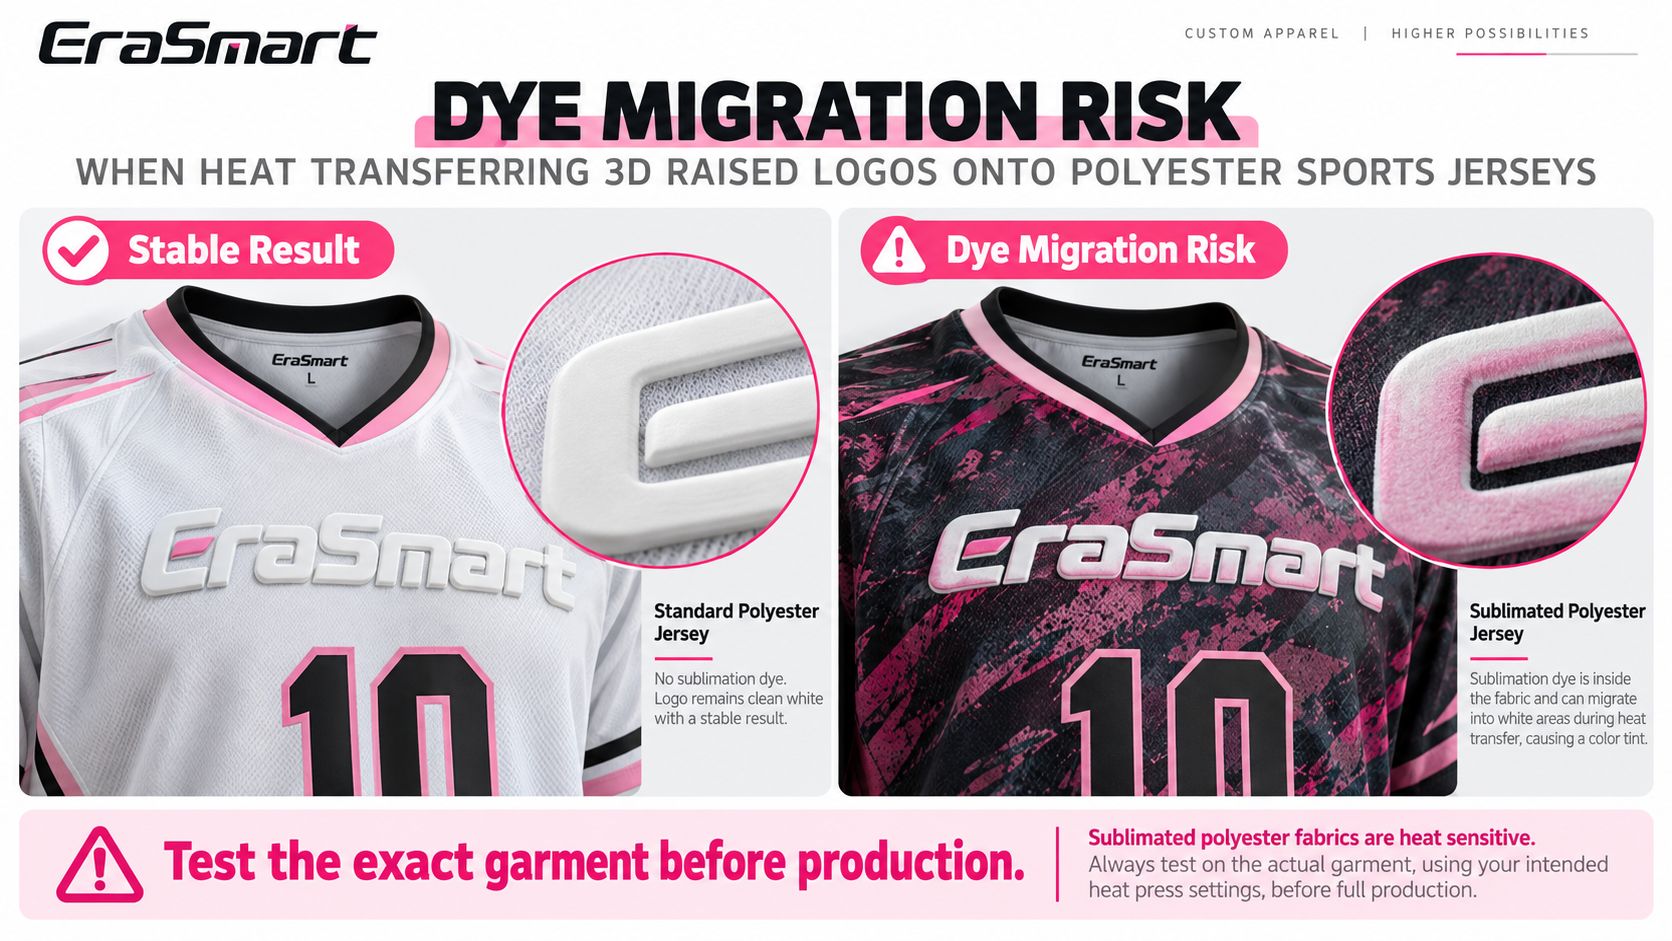
There are two separate concerns.
Heat Sensitivity
Polyester may:
- distort
- shrink
- develop gloss marks
- show platen impressions
under excessive heat.
Dye Migration
Sublimated polyester creates an additional problem.
The dye used to color the garment can become mobile again under heat.
That dye may migrate into light-colored areas of the transferred logo.
A clean white logo can begin looking:
depending on the jersey color.
Standard Polyester vs Sublimated Polyester
A normal white polyester jersey may behave very differently from a dark sublimated jersey.
The fact that both labels say “100% polyester” does not mean they have identical heat-transfer behavior.
That is why production testing should use the actual garment batch whenever possible.
Do not approve a dark sublimated jersey job only because the transfer worked on an unrelated piece of white polyester fabric.
How to Reduce Dye-Migration Risk
Do not automatically solve adhesion problems by increasing temperature.
En cambio:
- confirm the TPU film specification
- begin within the validated temperature window
- use only the heat exposure required for proper bonding
- test the exact garment
- inspect the sample after cooling
- inspect again after sufficient time has passed
Some migration can become more visible after the transfer has been sitting for a while.
How to Heat Press 3D Raised Logos onto Caps
Caps are fundamentally different from T-shirts.
A cap does not provide a flat pressing surface.
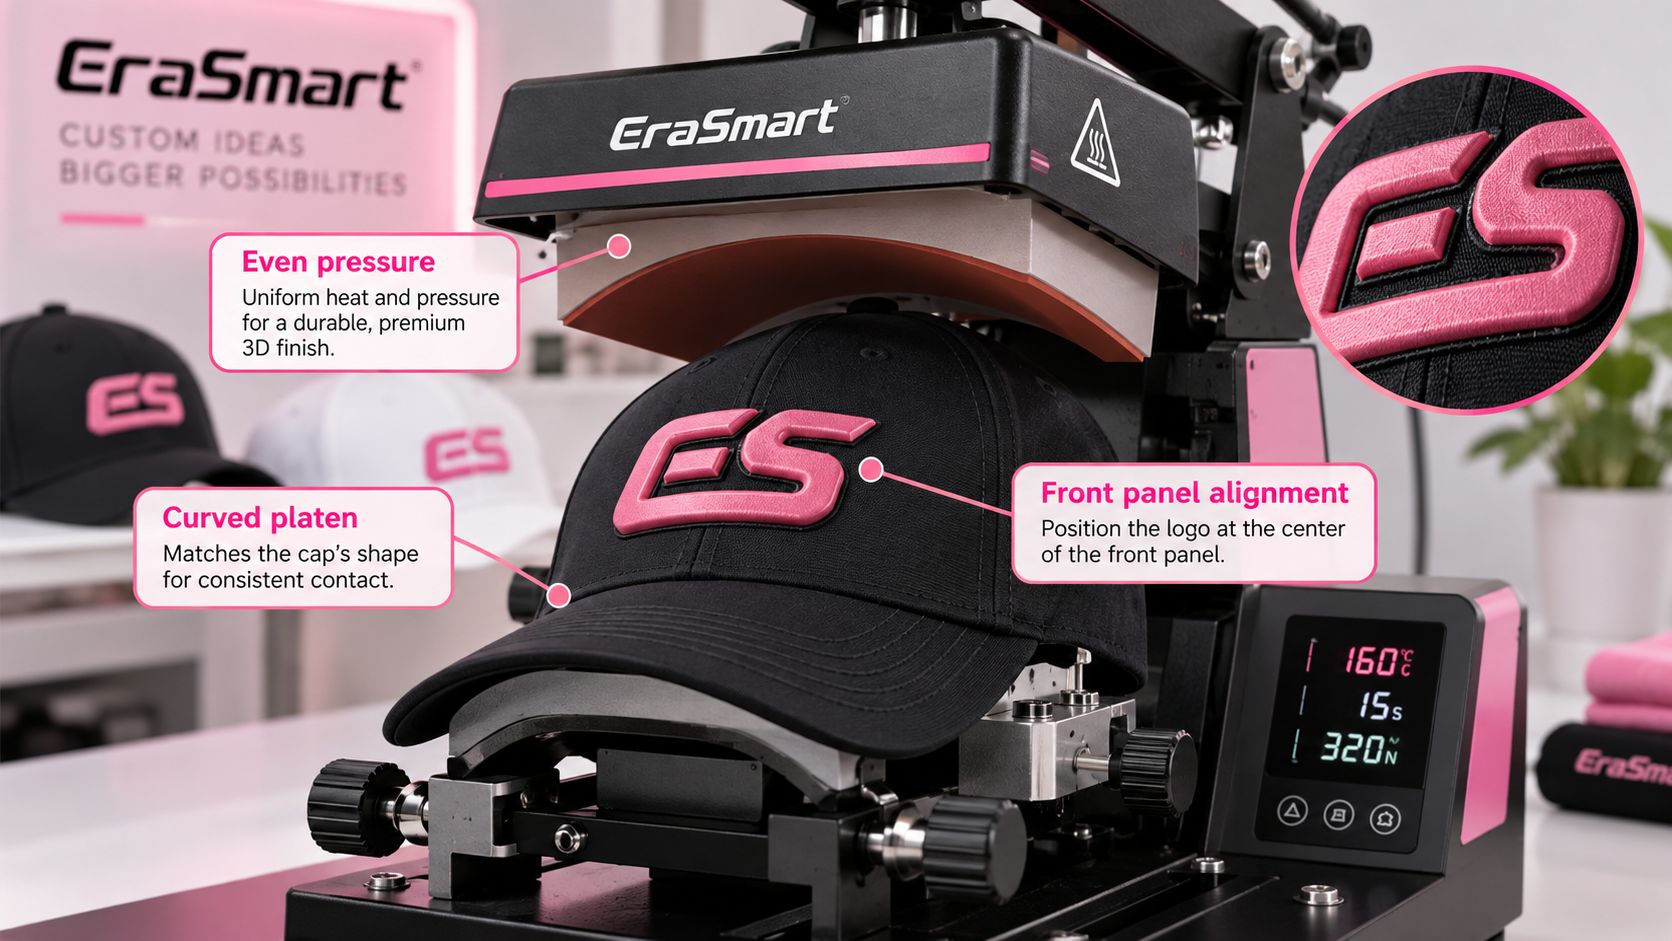
The front panel has:
- curvatura
- seams
- crown structure
- varying stiffness
A flat press surface may create gaps between the heated platen and parts of the badge.
Use a Surface That Matches the Cap
A cap heat press or suitable curved platen helps maintain contact across the front panel.
The transfer area should be supported from underneath so the logo receives even heat and pressure.
Positioning Matters
Place the logo so that:
- the complete badge sits on a supported region
- major seams do not interfere with bonding
- the raised structure follows the front panel cleanly
Do Not Copy Flat-Garment Pressure Directly
The nominal transfer range may be similar, but the way the pressure reaches the badge is different.
For caps, pressure distribution matters as much as the numeric setting.
Structured Caps vs Soft Caps
A structured baseball cap and a soft unstructured cap can behave differently.
The crown material, seam construction and backing can all affect heat transfer.
Run an actual sample before approving bulk production.
Why More Heat Is Not Always Better
When a transfer does not bond correctly, the instinctive reaction is often:
Increase the temperature.
That can create new problems.
Excessive heat may contribute to:
- garment scorching
- polyester dye migration
- surface gloss marks
- TPU distortion
- raised-logo flattening
- fabric deformation
Likewise, increasing both temperature and time at once makes troubleshooting harder because you no longer know which variable solved—or caused—the problem.
A better process is to change one variable at a time.
Pressure Is Often the Hidden Variable
A heat press may display the correct temperature and still produce a poor transfer.
Why?
Because the real pressure at the badge is not always what the operator expects.
Las posibles causas incluyen:
- uneven platen
- seam under the garment
- hoodie pocket
- zipper
- curved cap
- poor garment loading
- badge partly outside the pressure zone
Read the Failure Pattern
If the entire badge is weak:
Controlar:
- temperatura
- tiempo
- presión
- adhesive activation
If only one side lifts:
Controlar:
- garment obstruction
- platen alignment
- pressure distribution
If only one corner lifts:
Check that specific area first instead of increasing the entire press temperature.
How Do You Know Whether Pressure Is Correct?
The important result is uniform contact across the complete badge.
The edges should bond as reliably as the center.
After pressing, inspect the perimeter carefully.
If you see a repeated pattern where:
- center bonds well
- perimeter is weak
the issue may be pressure or edge contact rather than insufficient temperature.
Peel Method: Hot, Warm or Cold?
Do not treat peel temperature as a personal preference.
It is part of the film system.
Different TPU transfer materials can require different peel behavior.
Hot Peel
Carrier is removed soon after the press opens.
Warm Peel
Carrier is removed after partial cooling.
Piel fría
Carrier remains in place until the transfer has cooled significantly.
Using the wrong peel timing can cause:
- levantamiento de bordes
- distorted badge
- partial separation
- adhesive disturbance
The correct rule is:
Follow the actual TPU film specification.
Do not copy the peel method from another supplier’s film.
What Should You Check Immediately After Pressing?
A transfer is not finished just because the carrier has been removed.
Inspect the garment carefully.
Edge Adhesion
Check the complete perimeter.
Buscar:
- lifted corners
- open edges
- vinculación incompleta
Raised Height
The 3D structure should remain clearly visible.
Excessive pressing should not crush the badge into a flat graphic.
Surface Finish
Controlar:
The surface should not show unexpected wrinkling or damage.
Fabric Condition
Inspect the surrounding garment for:
- scorch marks
- shiny press marks
- discoloration
- contracción
- distortion
Alineación
Make sure the badge has not shifted during pressing.
Common 3D Raised Logo Heat-Transfer Problems
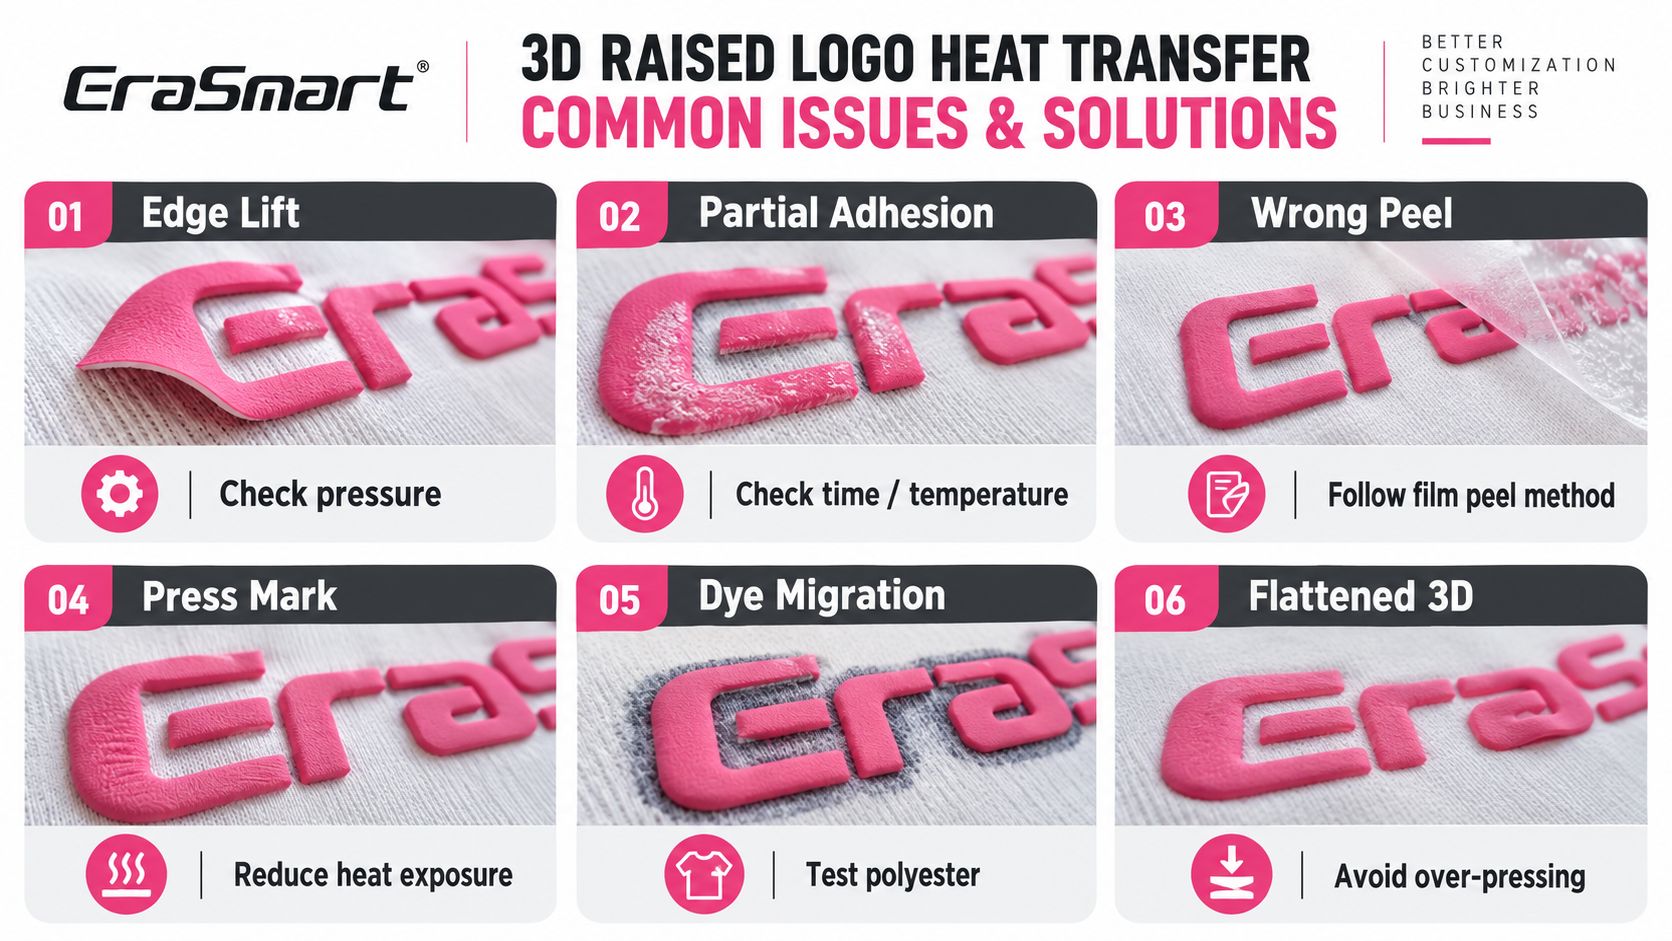
Problem 1: Edge Lift
Symptoms
One or more edges are not fully bonded.
Controlar
- presión
- application-area flatness
- temperatura
- tiempo
- adhesive contamination
If only one edge fails, investigate pressure distribution first.
Problem 2: Partial Adhesion
Symptoms
Some parts bond while others remain loose.
Controlar
- presión desigual
- insufficient heat
- insufficient dwell time
- seams or pockets under the transfer zone
Problem 3: Badge Lifts During Peel
Symptoms
The badge follows the carrier film during removal.
Controlar
- método de pelado
- peel temperature
- adhesive activation
- transfer time and pressure
Do not immediately press again until you determine whether the film should have been hot, warm or cold peeled.
Problem 4: Press Mark on the Fabric
Symptoms
A shiny rectangle or platen mark remains around the transfer.
Possible causes
- excessive heat
- excessive dwell time
- heat-sensitive fabric
- excessive pressure
Test a lower heat exposure within the permitted process range.
Problem 5: Dye Migration
Symptoms
Dark garment color begins appearing through light-colored parts of the badge.
Common on
- sublimated polyester jerseys
- dark polyester
- some high-dye-load fabrics
Test the exact garment before production.
Problem 6: 3D Structure Becomes Too Flat
Symptoms
The badge loses its intended raised appearance after pressing.
Controlar
- excessive pressure
- excessive temperature
- excessive dwell time
Remember that the goal is to bond the TPU adhesive, not crush the raised structure.
Should You Re-Press a Weak Edge?
A second press may sometimes be part of a validated process, but do not use re-pressing as the default fix for every failure.
First identify the cause.
If the real problem is:
- incorrect film
- contaminación
- garment incompatibility
- wrong peel timing
another press may not solve it.
It can also expose the garment and raised logo to unnecessary additional heat.
Quality Testing After Heat Transfer
A production sample should be evaluated as a finished garment, not just as a badge.
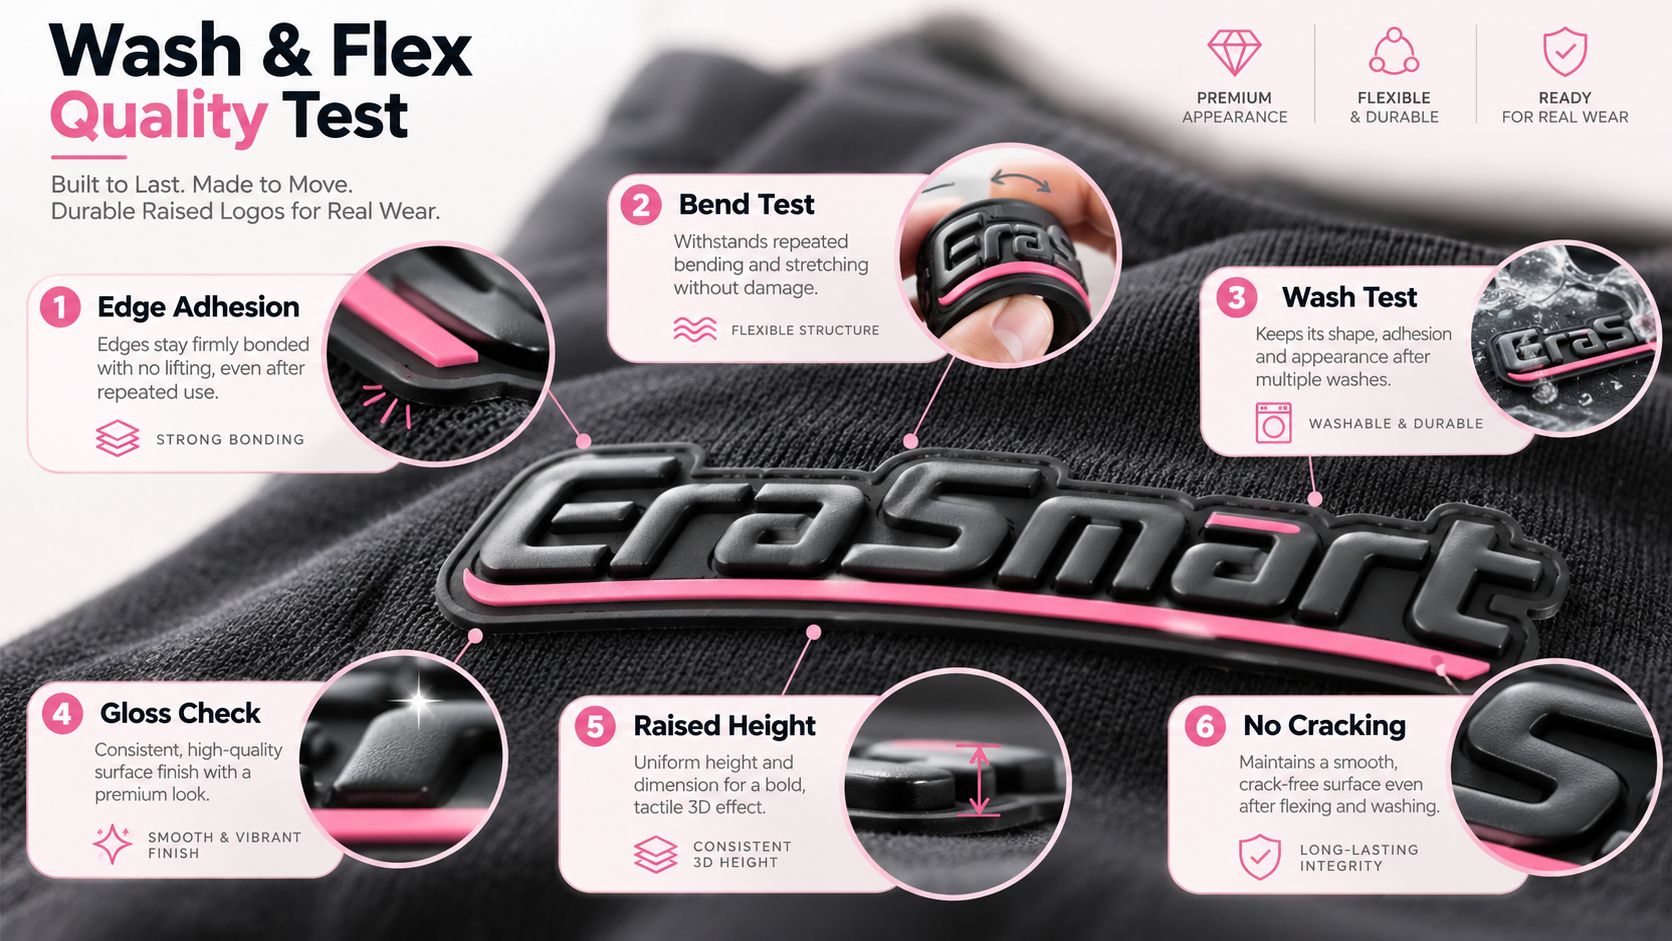
1. Edge-Adhesion Test
Inspect and gently manipulate the perimeter.
The edges should remain firmly bonded.
2. Bend Test
Flexiona la prenda de forma natural.
Buscar:
- agrietamiento
- blanqueo
- delamination
- permanent distortion
The 3D raised-logo system uses high-flexibility UV ink and TPU materials specifically because the finished decoration must move with textile products.
3. Wash Test
A commercial production process should include representative wash testing.
Inspeccionar:
- levantamiento de bordes
- agrietamiento
- color change
- gloss change
- deformación
- adhesion loss
Do not publish a fixed number of guaranteed wash cycles unless the actual ink, TPU film, adhesive, transfer settings and garment have been tested under an appropriate documented method.
4. Gloss Check
The varnish surface should remain consistent.
Unexpected dull areas may indicate:
- transfer damage
- surface abrasion
- incorrect processing
5. Raised-Height Check
Confirm that the intended 3D relief has not been excessively compressed.
6. Crack Inspection
Inspect corners, tight curves and thin raised elements carefully.
These areas often reveal structural problems first.
Production Testing: Use the Actual Garment
One of the most important rules in heat-transfer production is:
Do not qualify a job using only a “similar” garment when the real product is available.
Test the actual:
- garment style
- tela
- color
- production batch
This is especially important for polyester and sublimated sportswear.
Two garments with the same fiber-content label can behave differently because of:
- dyes
- revestimientos
- knit structure
- fabric weight
- manufacturing finish
A Practical T-Shirt Test
For a new T-shirt:
- use the validated TPU logo
- begin within the 150–165°C reference range
- select a suitable dwell time within 10–15 seconds
- establish consistent pressure
- follow the required peel method
- inspect adhesion
- bend test
- wash test
Only then save that combination as a production recipe.
A Practical Hoodie Test
In addition to the normal transfer test:
- identify pockets and seams
- load the garment so they do not interfere
- verify the logo area is flat
- check edge pressure carefully
- inspect every side of the badge after transfer
If one side repeatedly fails, changing the platen setup may be more useful than increasing temperature.
A Practical Jersey Test
For polyester or sublimated jerseys:
- test the exact garment color
- start conservatively within the validated heat window
- confirm bonding
- inspect for dye migration
- check the sample again after cooling
- evaluate fabric marking
- wash test before bulk production
A Practical Cap Test
For caps:
- choose a suitable cap platen
- support the curved front panel
- position the logo away from problematic seams where possible
- check full contact
- press using the validated TPU settings
- inspect both the center and outside edges
Heat Transfer Is Only One Part of the 3D Raised-Logo System
Strong adhesion cannot compensate for an incorrectly printed badge.
The final result depends on the complete workflow:
Artwork Preparation
↓
Structural White Mask
↓
High-Build Flexible White Ink
↓
Flexible CMYK
↓
Barniz
↓
Controlled LED-UV Curing
↓
Contour Cutting
↓
TPU Heat Transfer
↓
Quality Testing
los Impresora EraSmart A2 UV DTF provides the printing platform for this workflow when configured with the appropriate flexible ink, TPU film and production system.
Final Heat-Transfer Checklist
Before production, confirm:
Badge
- print is fully cured
- raised structure is stable
- contour edge is clean
- TPU adhesive is uncontaminated
Prenda
- application area is flat
- fabric has been tested
- seams do not interfere with pressure
- polyester migration risk has been evaluated
Prensa de calor
- temperature is stable
- pressure is even
- platen matches the product
- timer is accurate
Process
- temperature is within the validated range
- dwell time is correct
- pressure is appropriate
- peel method matches the TPU film
Finished Product
- no edge lift
- no cracking
- no garment scorching
- no unwanted press marks
- no dye migration
- 3D height remains visible
- wash performance has been validated
Conclusión final
The best heat-transfer result does not come from using the highest temperature or the strongest pressure.
It comes from controlling the complete system.
For the EraSmart flexible 3D raised-logo workflow, 150–165°C, 10–15 seconds and approximately 0.4–0.6 MPa provide a practical reference window, but the final production recipe must match the real TPU film, adhesive system, badge thickness and garment.
Remember:
T-shirts need a flat transfer area.
Hoodies need even pressure despite seams and pockets.
Polyester jerseys need dye-migration testing.
Caps need pressure that follows the curved front panel.
And every TPU film needs the correct peel method.
For the complete process before heat transfer, read How to Make 3D Raised Logos with a UV DTF Printer.
For white-layer height building, continue with Cómo las capas de tinta blanca crean efectos elevados 3D en la impresión UV DTF.
For file preparation and RIP setup, see the Guía de ilustraciones del logotipo en relieve 3D: configuración de capas de blanco, CMYK y barniz.
And for the complete application and equipment solution, explore Impresión de logotipos en relieve 3D con tecnología UV DTF y el Impresora EraSmart A2 UV DTF.
Preguntas frecuentes
What temperature should I use for a 3D raised logo?
For the EraSmart TPU raised-logo workflow described here, the reference range is approximately 150–165°C. Final settings must be tested with the actual TPU film and garment.
How long should I heat press a 3D raised logo?
A practical reference range is 10–15 seconds. The exact dwell time depends on the TPU adhesive system, garment and press.
What pressure should I use?
Approximately 0.4–0.6 MPa is the current reference range for this workflow. More important than simply increasing pressure is maintaining even contact across the complete badge.
Should I hot peel or cold peel the TPU carrier?
Follow the actual TPU film specification. Different carrier systems may require hot, warm or cold peel.
Why does one edge of my 3D logo keep lifting?
Uneven pressure is a common cause. Check seams, pockets, zippers, platen alignment and garment loading before simply increasing heat.
Can I apply a 3D raised logo to polyester?
Yes, but heat-sensitive and sublimated polyester should be tested carefully for dye migration, distortion and press marks.
Can I put a 3D raised logo on a hoodie?
Yes. The main challenge is achieving even pressure around pockets, seams and thicker fabric areas.
Can I heat press a 3D raised logo onto a cap?
Yes, but a suitable curved cap platen or cap press is recommended so heat and pressure can follow the front-panel shape.
Why did my 3D logo become flatter after pressing?
Excessive pressure, temperature or dwell time may compress or distort the raised structure. Use only the transfer conditions required for reliable TPU adhesion.
Should I pre-press the garment?
A brief pre-press can help flatten wrinkles or remove moisture, but it should be tested with the actual fabric, especially on heat-sensitive polyester.
How do I know if the transfer is strong enough for production?
Evaluate edge adhesion, bending, cracking, surface finish, raised height and representative wash performance on the actual garment before bulk production.
How many washes will a 3D raised logo last?
Do not assign a universal wash-cycle guarantee without testing the complete production system. Durability depends on the flexible UV ink, TPU film, adhesive, heat-transfer recipe, garment and washing conditions.