ผู้ผลิตเครื่องพิมพ์อิงค์เจ็ทขนาดเล็ก

86-18566233796 [email protected]

บล็อก How to Print the Correct Colors: A Practical Guide for DTF, UV, and UV DTF Printing

How to Print the Correct Colors: A Practical Guide for DTF, UV, and UV DTF Printing

June 28, 2026 บล็อก

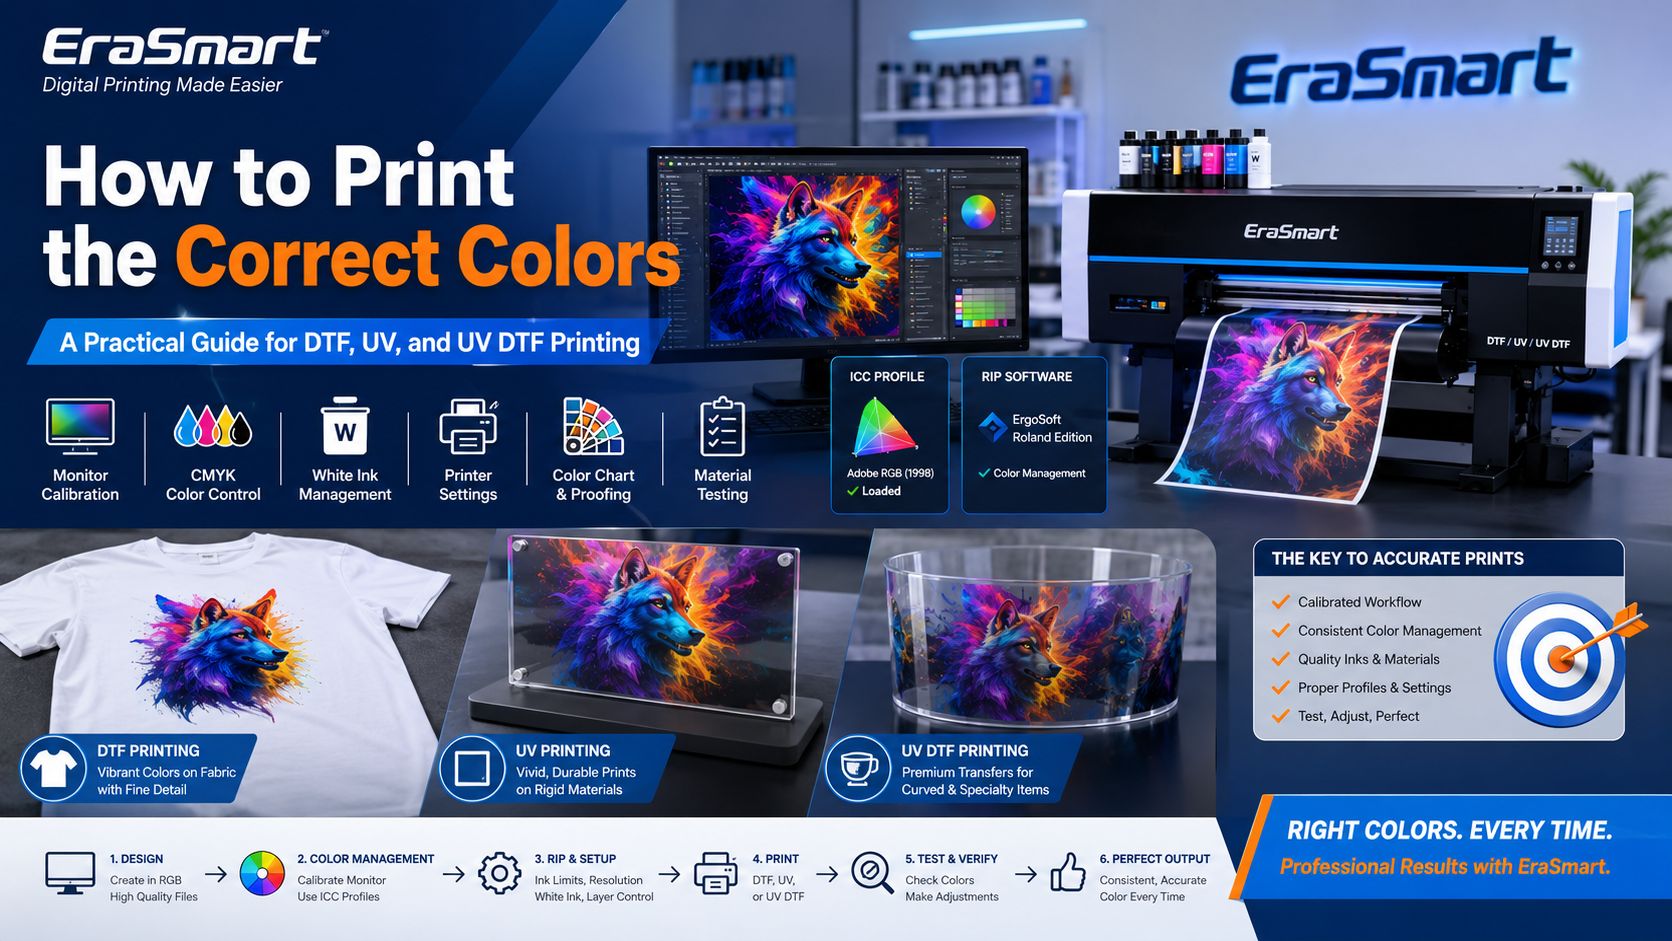
Printing the correct colors is one of the most common challenges in digital printing. A design may look bright and accurate on a computer screen, but the final printed result may appear darker, duller, warmer, cooler, or slightly different from what the customer expected.

This does not always mean the printer is defective. Color difference can happen because screens, printers, inks, materials, lighting, software settings, and human perception all handle color differently. Even in professional printing, the goal is not always to match every screen perfectly. The real goal is to build a stable workflow that produces predictable, repeatable, and commercially acceptable colors-

For EraSmart customers, color control matters across different workflows. A เครื่องพิมพ์ DTF must reproduce vibrant apparel graphics on cotton, polyester, blends, dark garments, hoodies, tote bags, and sportswear. A เครื่องพิมพ์ยูวี must print accurate colors on acrylic, glass, metal, wood, plastic, phone cases, signs, and packaging samples. A เครื่องพิมพ์ UV DTF must create consistent stickers, labels, cup wraps, bottle decals, and hard-surface transfers with CMYK, white ink, and varnish.

This guide explains why printed colors look different and how to improve color accuracy in real DTF, UV, and UV DTF production.

Quick Answer: How Do You Print More Accurate Colors?

To print more accurate colors, you need to control the full workflow:

  1. Use high-quality artwork files.
  2. Prepare artwork at the correct print size.
  3. Understand RGB, CMYK, and printer color limits.
  4. Use proper RIP settings.
  5. Use the correct ICC profile or print curve.
  6. Use matched ink, film, powder, and materials.
  7. Maintain the printhead and ink system.
  8. Control white ink carefully.
  9. Test print before production.
  10. Record successful settings for repeat orders.

The key point is simple: color accuracy is not controlled by one setting only. It is controlled by the complete production system.

Why Printed Colors Look Different from the Screen

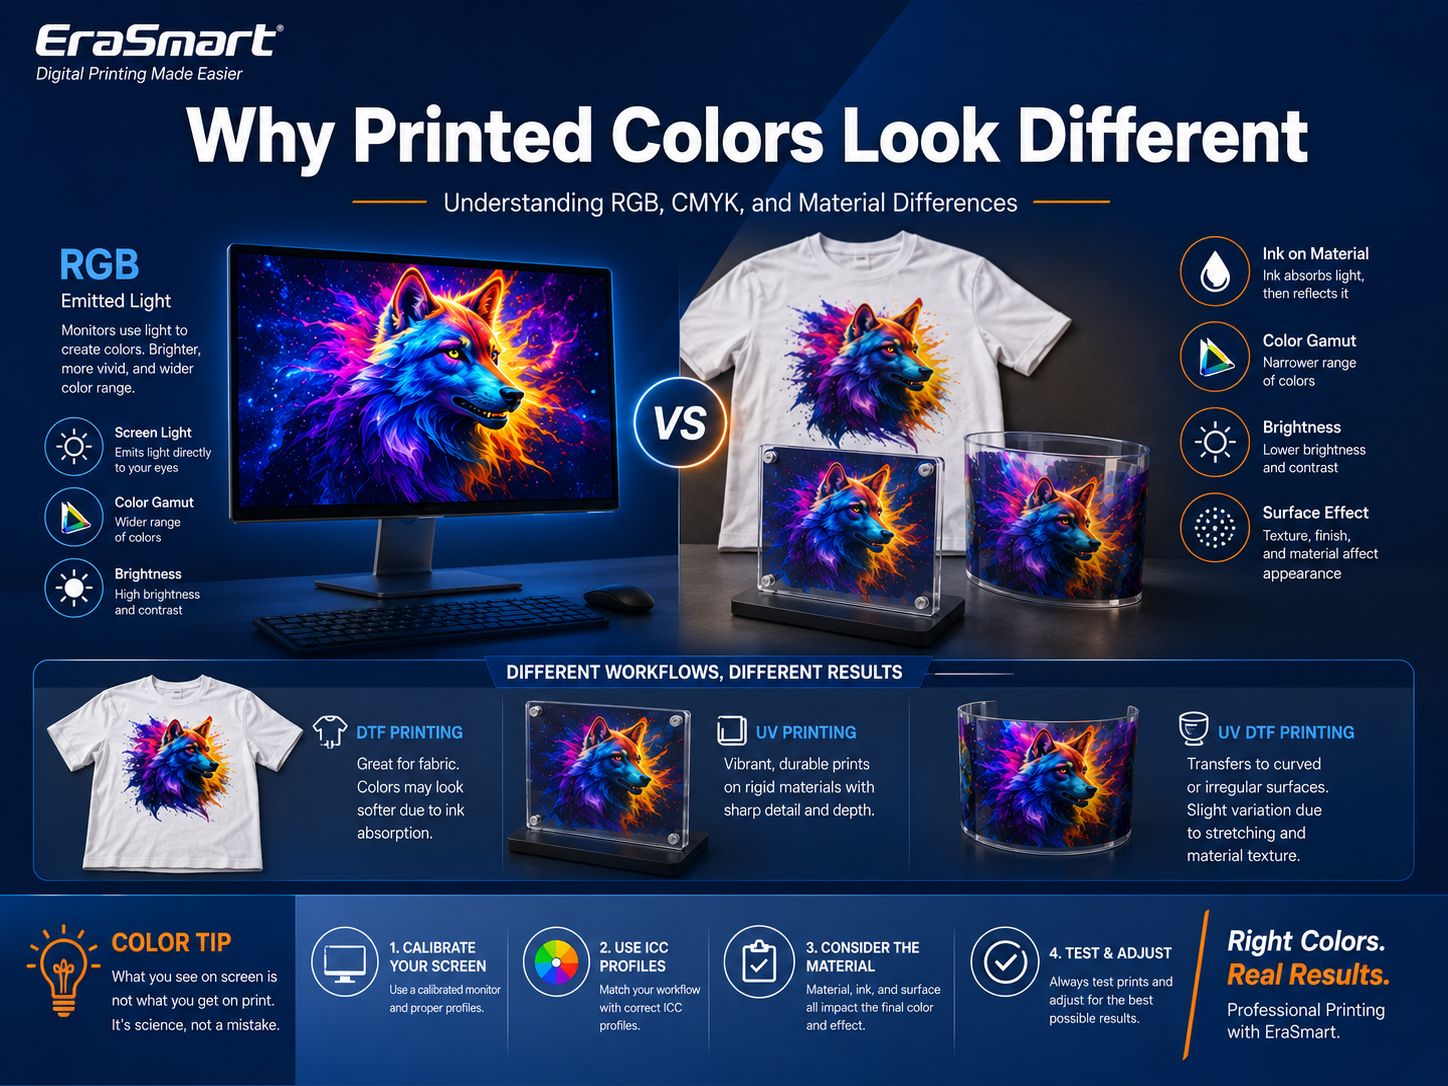
A screen and a printer create color in different ways.

A screen uses light. It creates color through RGB: red, green, and blue light. This is why colors on a monitor or phone screen can look very bright, especially when the screen brightness is high.

A printer uses physical ink on a real surface. Most digital printing workflows use CMYK: cyan, magenta, yellow, and black ink. DTF, UV, and UV DTF workflows may also use white ink, varnish, film, adhesive powder, curing, pressing, or transfer layers.

Because screen color and printed color are created differently, an exact match is not always possible.

Common reasons include:

  • monitor brightness is too high
  • artwork is created in RGB but printed in CMYK
  • printer color gamut is smaller than screen color range
  • wrong RIP settings
  • wrong ICC profile or print curve
  • poor artwork quality
  • incompatible ink or consumables
  • material color affects the result
  • surface texture changes color appearance
  • white ink layer is too weak or too heavy
  • printhead nozzles are clogged
  • curing or pressing settings are inconsistent
  • lighting conditions are different
  • temperature and humidity affect production stability

This is why professional printing focuses on workflow control, sample approval, and repeatable settings instead of relying only on what the design looks like on screen.

What Does “Correct Color” Really Mean?

In real production, “correct color” does not always mean the print looks exactly the same as a customer’s phone screen. Different phones, monitors, tablets, and laptops can display the same image differently.

A better definition is:

Correct color means the printed result is visually close to the approved reference, consistent across repeat production, and suitable for the final product and customer expectation.

ตัวอย่างเช่น:

  • A T-shirt print should look vibrant and consistent after heat pressing.
  • A logo decal should stay close to the approved brand color.
  • A UV-printed acrylic sign should have strong opacity and clean edges.
  • A cup wrap should look bright after transfer and application.
  • A repeat order should match the previous approved sample as closely as possible.

For a printing business, color control is not only a technical issue. It directly affects customer trust, product quality, repeat orders, and profit.

Step 1: Start with a Good Artwork File

Good color starts before printing. A low-quality file cannot produce a professional print just because the printer is high quality.

Before printing, check:

  • file resolution
  • ขนาดการพิมพ์ขั้นสุดท้าย
  • color mode
  • transparent background
  • clean edges
  • readable text
  • correct layer setup
  • white ink area if needed
  • no low-quality screenshots
  • no compressed images
  • no stretched graphics

For logos, QR codes, small text, labels, and packaging graphics, vector files are usually better than raster images. Vector artwork helps maintain clean edges and sharper color boundaries.

For product graphics, prepare artwork at the final print size. If a small image is enlarged too much, it may become blurry, pixelated, or dull.

Step 2: Understand RGB, CMYK, and Printer Color Range

Many customers create artwork in RGB because RGB is used by screens. But most printers reproduce color with ink, which means the final result must be converted into a printable color range.

Some bright screen colors cannot be printed exactly with physical ink. Vivid neon colors, strong blues, bright greens, and glowing screen effects may shift during printing.

For DTF, UV, and UV DTF printing, final color depends on:

  • CMYK ink range
  • white ink underbase
  • material color
  • surface reflection
  • curing result
  • ผลการกด
  • transfer film behavior
  • RIP conversion settings

If the artwork uses colors outside the printer’s printable range, the software will convert them to the closest printable color. This can cause a visible difference between screen and print.

The practical solution is to test, adjust, and document settings instead of expecting every RGB screen color to print exactly the same.

Step 3: Use the Right RIP Settings

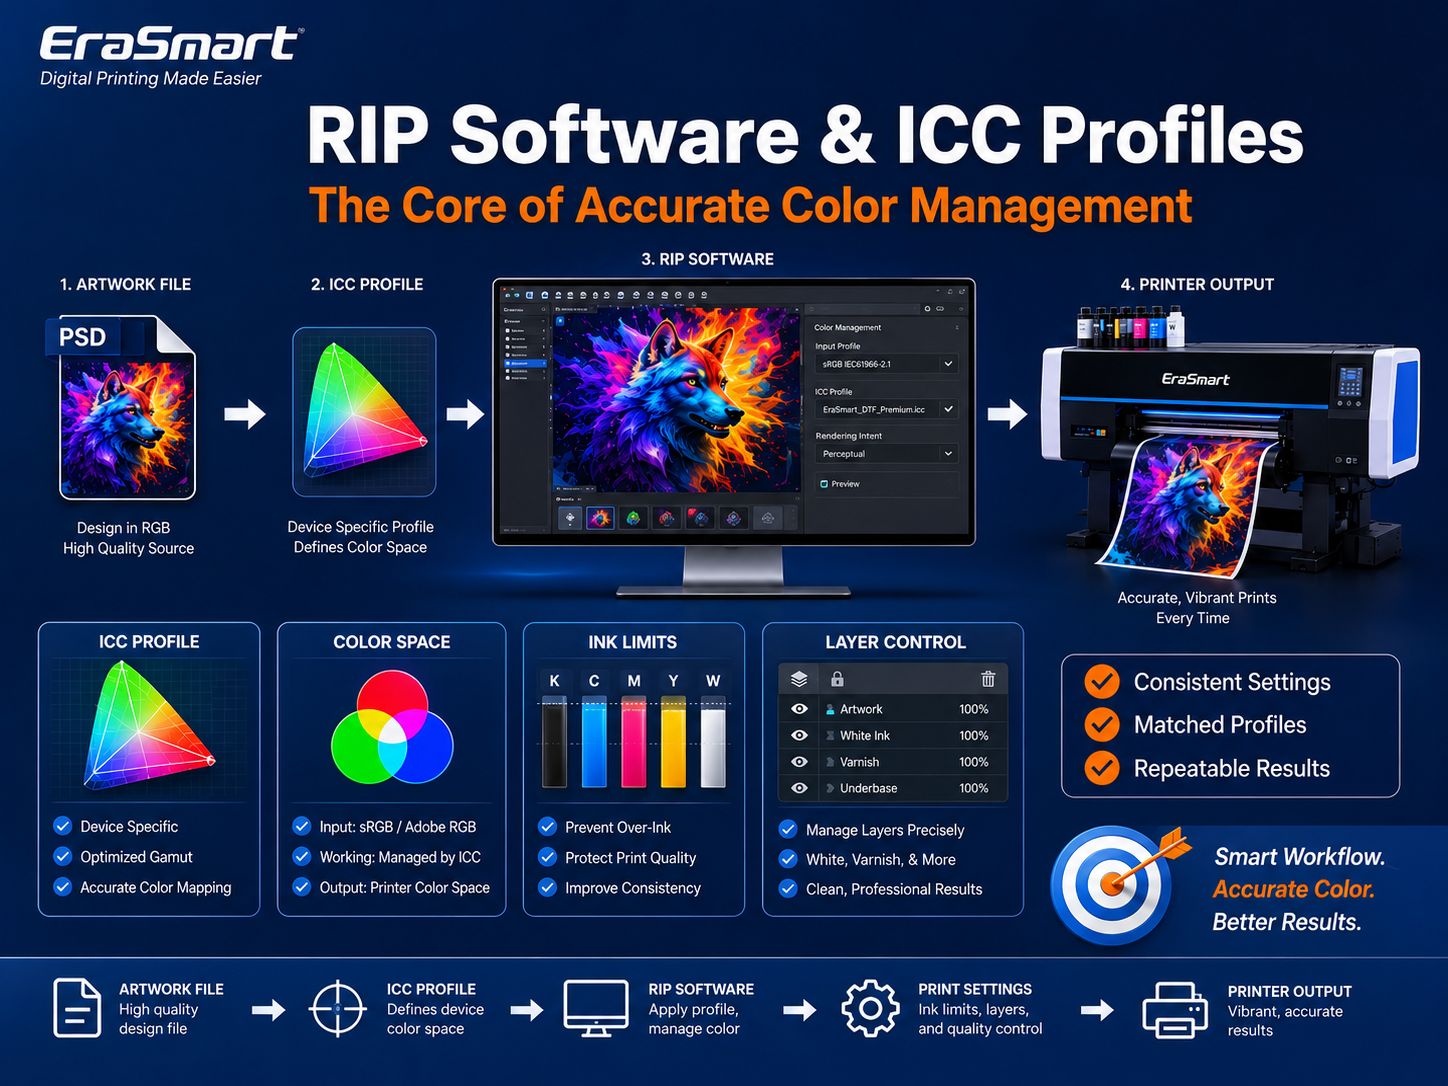
RIP software is one of the most important tools for color control. It converts artwork into printer-ready data and controls color output, ink limits, resolution, white ink, varnish, layer order, print passes, and production settings.

Wrong RIP settings can cause:

  • dull colors
  • oversaturated colors
  • weak white ink
  • incorrect white underbase
  • poor gradients
  • color shift
  • แถบ
  • excessive ink usage
  • weak adhesion
  • inconsistent repeat prints

In DTF printing, RIP settings affect CMYK ink, white ink underbase, and final garment color. In UV printing, RIP settings affect CMYK, white ink, varnish, print height, layer order, and surface finish. In UV DTF printing, RIP settings affect the printed decal layer, white ink opacity, varnish effect, and final transfer appearance.

For apparel production, EraSmart’s ขั้นตอนการผลิต DTF explains how artwork preparation, RIP setup, printing, powdering, curing, pressing, and quality control work together. For UV users, EraSmart’s UV Ink Guide: CMYK, White Ink, and Varnish helps explain how ink layers affect final color and product value.

Step 4: Use ICC Profiles and Print Curves Correctly

An ICC profile or print curve helps the printer reproduce color more consistently under specific conditions. It connects the artwork, software, printer, ink, material, and output method.

Different materials may require different profiles or settings. A glossy acrylic sheet, matte film, cotton shirt, black hoodie, transparent glass panel, metal plate, or UV DTF film can all produce different color results.

For practical production:

  • use supplier-recommended profiles or curves
  • do not randomly change color settings
  • keep settings consistent for repeat jobs
  • test before changing ink or material
  • document settings for each product type
  • create physical color samples when needed

If color suddenly changes, check whether the RIP profile, curve, color mode, ink setting, print mode, material, or environment changed.

Step 5: Use Matched Ink and Consumables

Ink is not only a color liquid. It must work with the printhead, film, material, curing method, adhesive powder, white ink system, varnish layer, and transfer process.

Using unmatched or low-quality consumables may cause:

  • color deviation
  • การอุดตันของหัวฉีด
  • weak saturation
  • unstable gradients
  • poor adhesion
  • poor curing
  • poor wash durability
  • ink sedimentation
  • film compatibility problems
  • inconsistent repeat production

For DTF printing, the ink must work with PET film, hot-melt powder, curing temperature, and heat press settings. For UV printing, the ink must work with the material surface and UV curing system. For UV DTF printing, the ink must work with A/B film, white ink, varnish, lamination, and transfer application.

อีราสมาร์ท คู่มือวัสดุสิ้นเปลือง DTF is useful for understanding why DTF ink, transfer film, adhesive powder, and maintenance materials should be matched. For UV and UV DTF users, the UV Ink Guide: CMYK, White Ink, and Varnish explains why CMYK, white ink, and varnish are part of the final color and finish system.

Step 6: Maintain the Printhead and Ink System

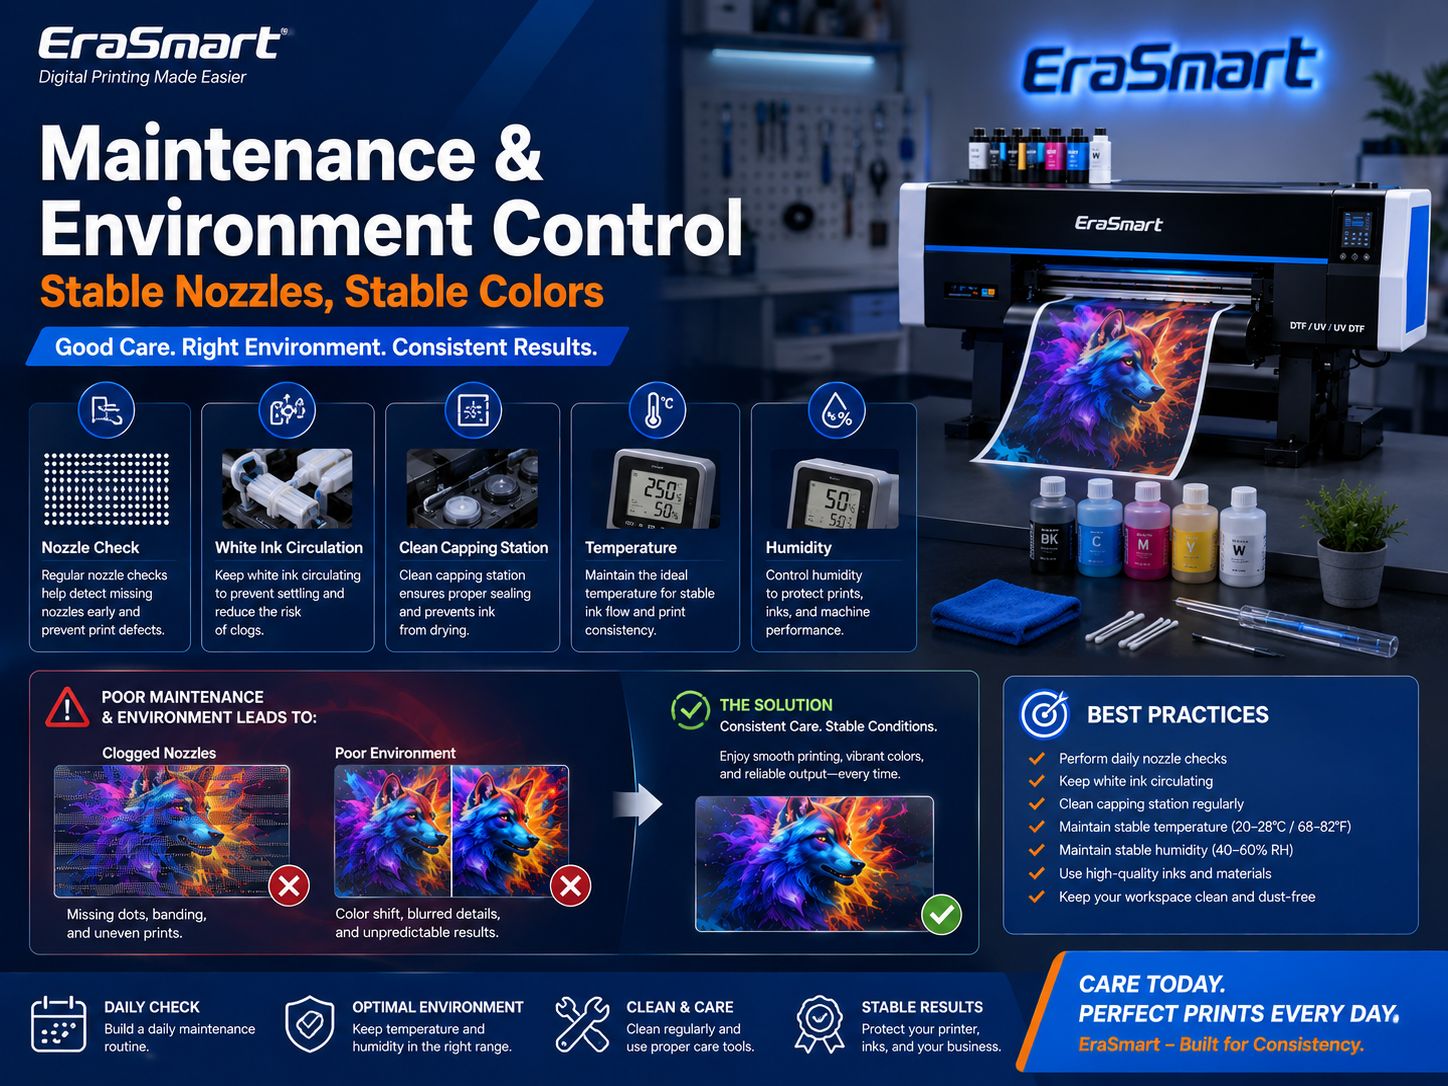
Printhead condition directly affects color accuracy. If nozzles are clogged or partially blocked, the printer cannot place ink correctly. This can cause missing colors, banding, uneven gradients, weak saturation, or visible color shift.

Common printhead-related color problems include:

  • red looks weak
  • black looks gray
  • gradients show lines
  • skin tones look unnatural
  • white ink is uneven
  • dark garment prints look dull
  • UV prints lose detail
  • decals have inconsistent opacity

To reduce these problems:

  • perform regular nozzle checks
  • clean the printhead when needed
  • keep the capping station clean
  • maintain the wiper system
  • avoid long idle time
  • use proper shutdown procedures
  • keep ink bottles sealed
  • avoid expired or contaminated ink
  • control dust around the printer

White ink needs special attention because it contains heavier pigment particles. If white ink circulation is poor, the white layer may become weak or uneven, and the final print may look dull.

อีราสมาร์ท คู่มือการบำรุงรักษาเครื่องพิมพ์ DTF is a useful resource for reducing clogging and maintaining stable daily output in DTF production.

Step 7: Control White Ink

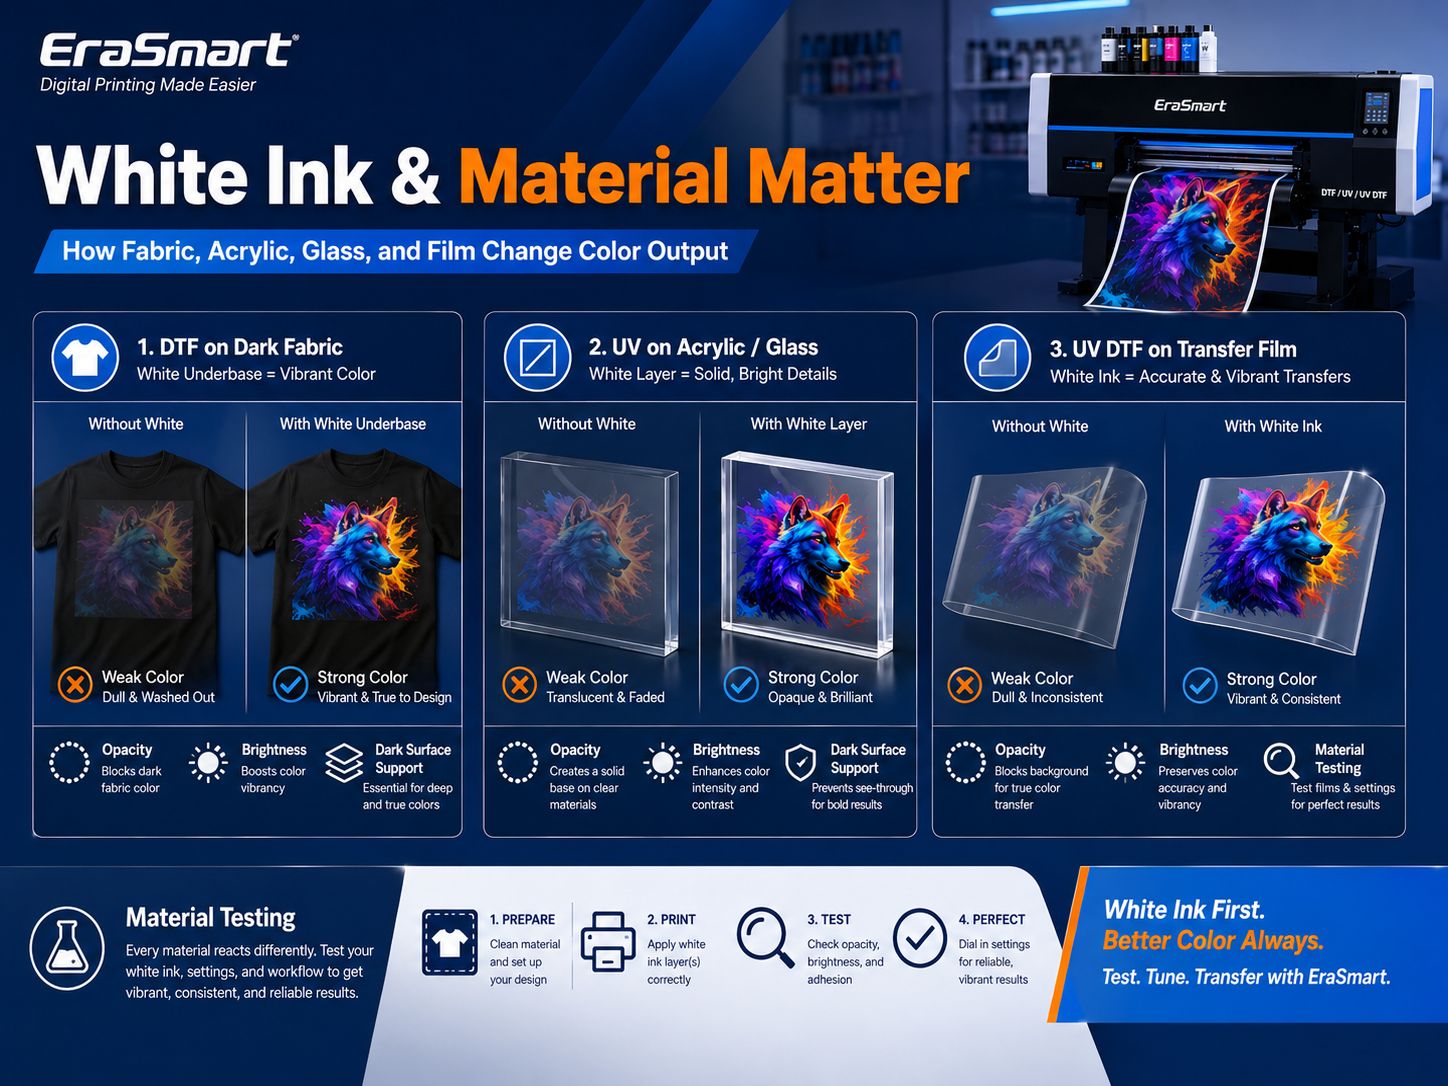
White ink has a major influence on final color in DTF, UV, and UV DTF printing.

In DTF printing, white ink creates the underbase for dark garments. If the white layer is too thin, colors may look dull. If it is too thick, the print may feel heavier or less breathable.

In UV printing, white ink supports color on dark, transparent, and colored materials. Without proper white backing, colors on acrylic, glass, metal, black plastic, or colored packaging may look weak.

In UV DTF printing, white ink helps decals look more opaque and visible on different product surfaces.

White ink affects:

  • color brightness
  • opacity
  • edge clarity
  • dark-surface performance
  • transparent-surface performance
  • print thickness
  • hand feel in DTF
  • premium appearance in UV and UV DTF

Do not treat white ink as a simple background. It is part of the color system.

Step 8: Match the Material to the Print Method

The same design can look different on different materials.

For DTF printing, color can vary based on:

  • cotton vs polyester
  • white shirt vs black shirt
  • fabric texture
  • fabric color
  • อุณหภูมิกดความร้อน
  • pressing pressure
  • powder bonding
  • curing quality

For UV printing, color can vary based on:

  • acrylic transparency
  • glass reflection
  • metal surface color
  • wood texture
  • plastic coating
  • ceramic gloss
  • leather texture
  • primer or coating

For UV DTF printing, color can vary based on:

  • A/B film quality
  • lamination pressure
  • decal thickness
  • application surface
  • transfer pressure
  • peel technique
  • final product surface color

This is why test printing is necessary. EraSmart’s คู่มือวัสดุเครื่องพิมพ์ UV can help you understand how different hard materials affect UV printing results.

Step 9: Control Temperature and Humidity

The printing environment affects color and stability. Temperature and humidity influence ink flow, drying, curing, static, media handling, film behavior, and ink absorption.

If the environment is too dry, static may increase. If humidity is too high, film and powder may behave differently. If temperature is unstable, ink viscosity and curing behavior may change.

Possible environment-related problems include:

  • ความไม่สอดคล้องกันของสี
  • ink flow instability
  • film feeding problems
  • powder clumping
  • weak adhesion
  • slow drying or curing
  • การอุดตันของหัวฉีด
  • media deformation

Keep the printing room clean and stable. For repeat business, try to keep production conditions consistent.

Step 10: Make Test Prints Before Production

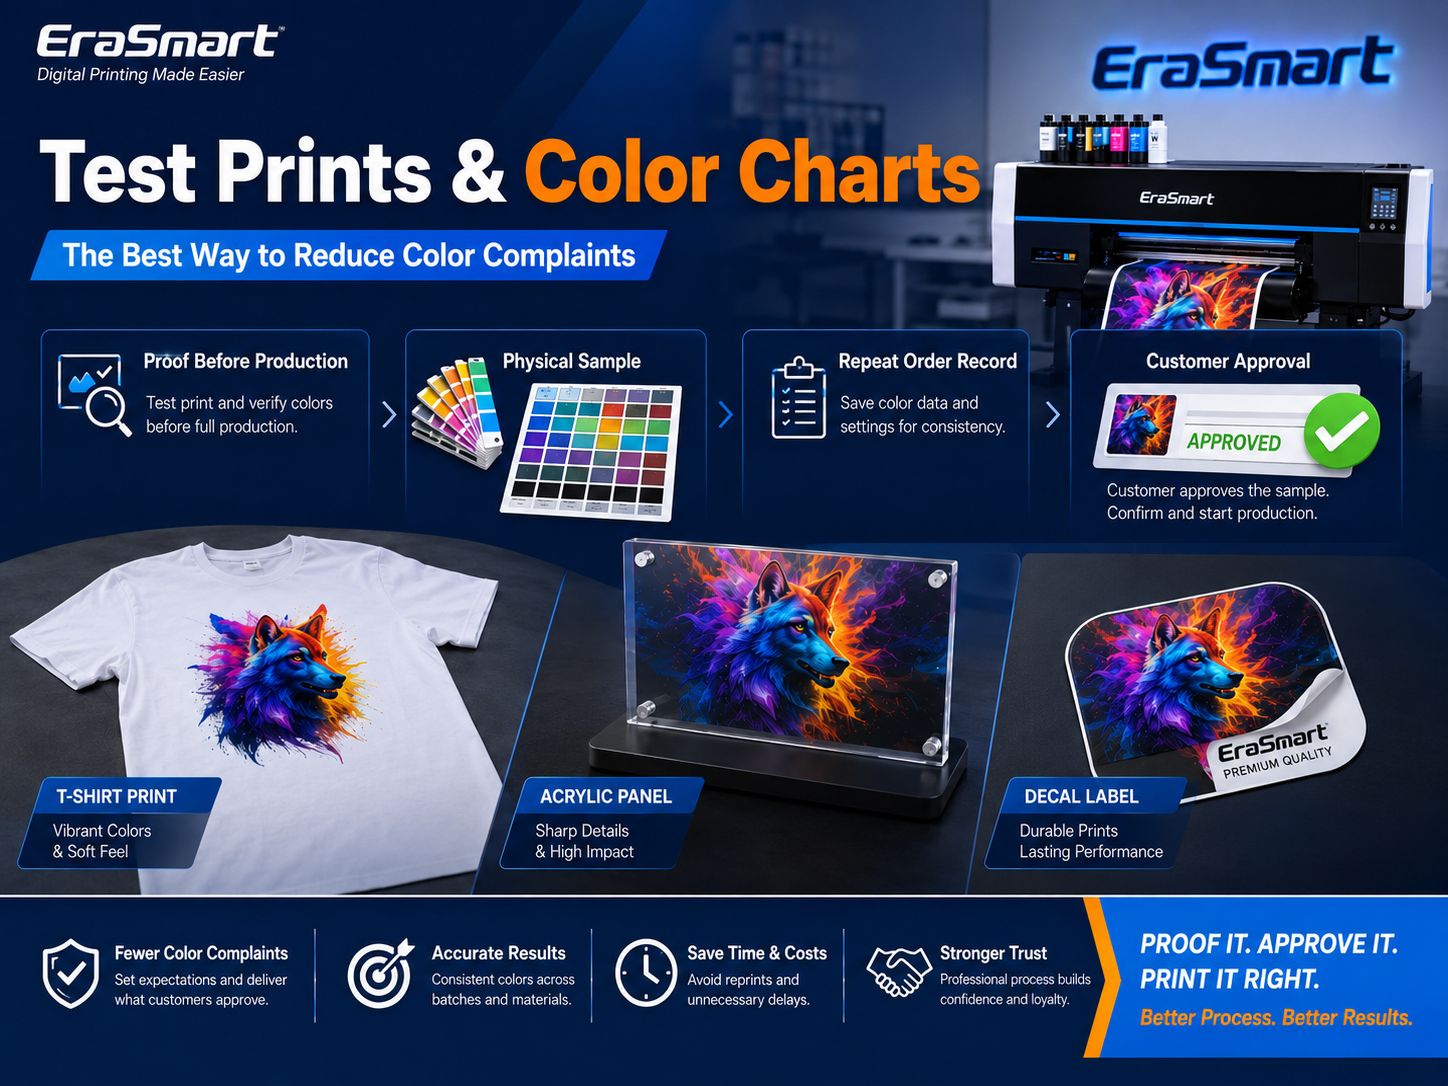
A test print is one of the most practical ways to avoid color complaints.

Before producing a full order, print a small sample using the same:

  • artwork file
  • printer
  • หมึก
  • film or material
  • RIP setting
  • print mode
  • curing setting
  • heat press setting
  • application surface

For customer orders, especially logos, brand colors, packaging labels, and repeat jobs, ask the customer to approve a physical sample when possible.

A screen preview is not enough for serious color work. A physical sample under real lighting is more reliable.

Step 11: Use a Color Chart for Repeat Jobs

A color chart helps customers choose printable colors instead of screen-only colors.

For DTF shops, create a T-shirt color chart on your common blank garments.

For UV shops, print color charts on common materials such as acrylic, glass, metal, wood, plastic, and ceramic.

For UV DTF shops, create decal color charts on common application surfaces such as glass cups, bottles, acrylic, plastic, and packaging.

A practical color chart may include:

  • CMYK color blocks
  • skin tone samples
  • gray scale
  • gradient bars
  • brand color references
  • white ink tests
  • varnish samples
  • small text examples
  • QR code examples
  • dark-surface samples

Color charts are especially useful for repeat B2B customers.

Step 12: Manage Customer Expectations

Many color complaints happen because customers expect the printed result to match their phone screen exactly.

Before production, explain:

  • screens and prints are different
  • RGB colors may shift during printing
  • dark garments need white ink underbase
  • material surface affects color
  • lighting affects appearance
  • exact 100% screen-to-print match is not always possible
  • physical sample approval is recommended for strict color orders

For brand logos, ask for:

  • vector logo file
  • color reference
  • previous printed sample if available
  • target material
  • sample approval before mass production

This makes your business look more professional and reduces disputes.

How to Print Better Colors with a DTF Printer

DTF printing color accuracy depends on the full textile transfer workflow.

To improve DTF colors:

  1. Use high-resolution artwork.
  2. Use correct RIP settings.
  3. Keep the white ink channel stable.
  4. Use matched DTF ink, film, and powder.
  5. Cure powder properly.
  6. Use consistent heat press temperature, time, and pressure.
  7. Test on the actual garment.
  8. Maintain the printhead regularly.
  9. Avoid mixing unknown consumables.
  10. Keep color settings consistent for repeat orders.

DTF printing is especially sensitive to white ink because it supports color on dark garments. If white ink is weak, colors may look dull after pressing.

For apparel businesses, start with EraSmart’s เครื่องพิมพ์ DTF- ขั้นตอนการผลิต DTF, และ คู่มือวัสดุสิ้นเปลือง DTF to build a more controlled production process.

How to Print Better Colors with a UV Printer

UV printing color accuracy depends on ink layer setup, material surface, curing, and surface preparation.

To improve UV colors:

  1. Clean the material surface.
  2. Test adhesion before production.
  3. Use the correct material profile.
  4. Add white ink when printing on dark or transparent materials.
  5. Use varnish only where it improves product value.
  6. Keep the print height correct.
  7. Maintain nozzle condition.
  8. Control UV curing strength.
  9. Use test prints for new materials.
  10. Keep the same settings for repeat jobs.

UV printing is strongly affected by material. The same artwork may look different on acrylic, glass, metal, wood, plastic, or ceramic.

If your business focuses on hard-surface product customization, compare EraSmart’s เครื่องพิมพ์ UV- คู่มือวัสดุเครื่องพิมพ์ UV, และ คู่มือหมึก UV-

How to Print Better Colors with a UV DTF Printer

UV DTF color accuracy depends on printed layers, film, lamination, and final application surface.

To improve UV DTF colors:

  1. Use clean artwork with sharp edges.
  2. Set CMYK, white ink, and varnish correctly.
  3. Use matched A/B film.
  4. Keep lamination stable.
  5. Avoid dust and bubbles.
  6. Apply decals to clean, smooth surfaces.
  7. Test on glass, acrylic, plastic, metal, or packaging before selling.
  8. Peel slowly and consistently.
  9. Compare finished product under real lighting.
  10. Keep the same RIP and film settings for repeat jobs.

For UV DTF, Film A, Film B, UV ink, white ink, varnish, and lamination all affect the final appearance. EraSmart’s A/B Film for UV DTF Printing explains how the film system works, while the เครื่องพิมพ์ UV DTF page is the right starting point for sticker, label, cup wrap, and decal production.

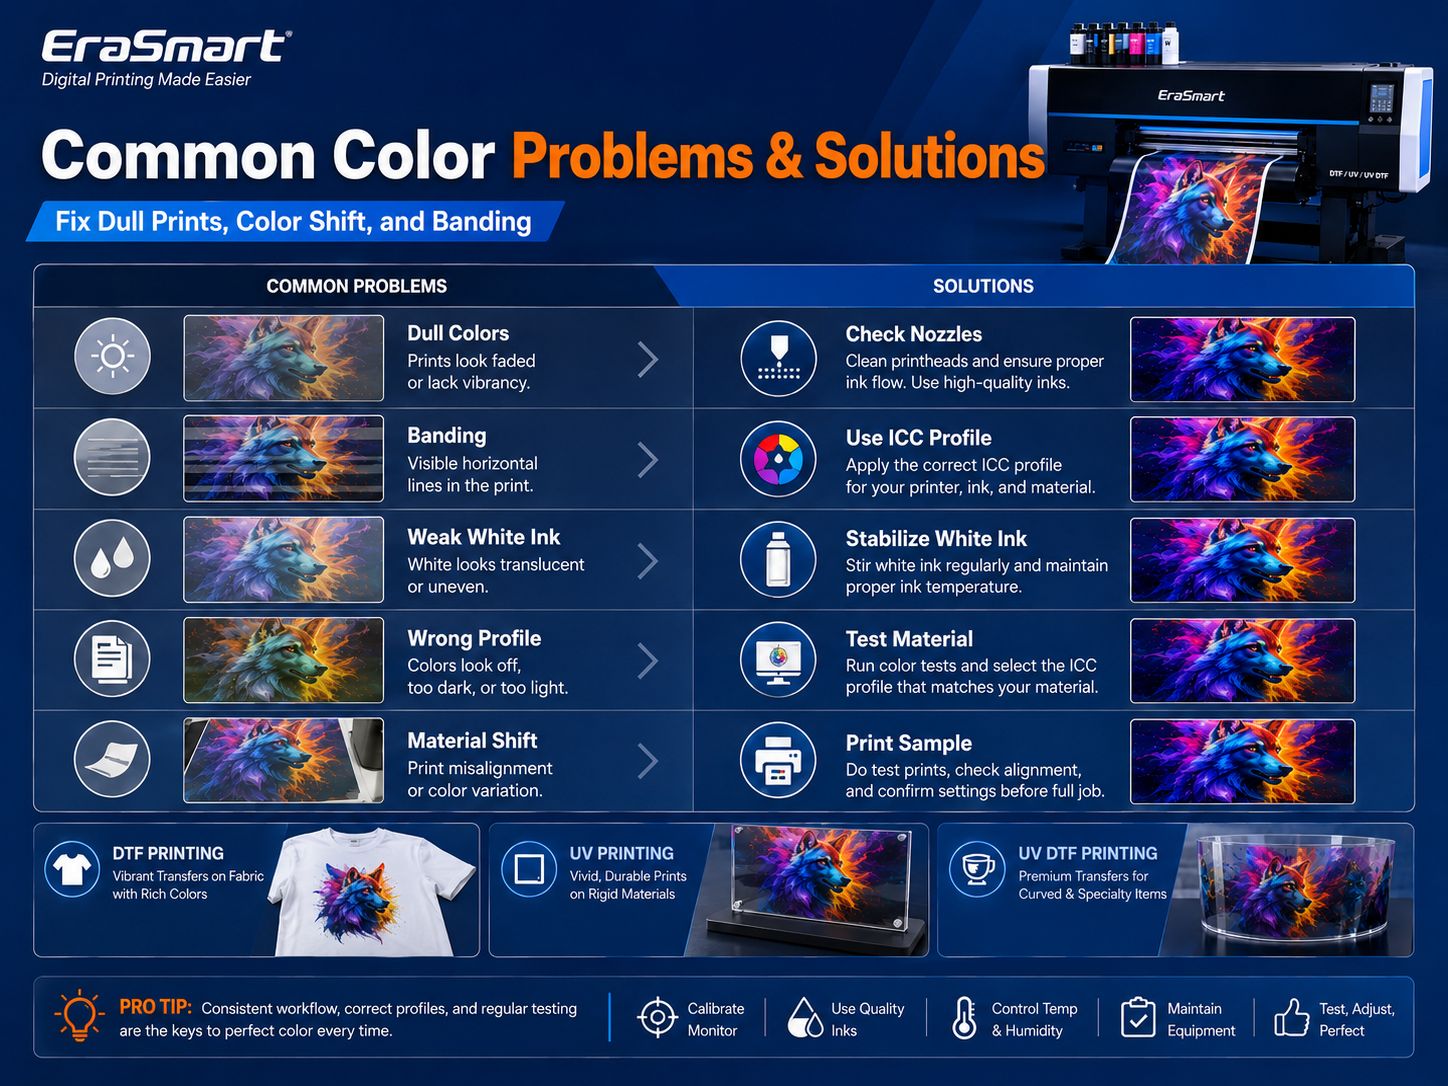
Common Color Problems and Solutions

ปัญหาสาเหตุที่เป็นไปได้สารละลาย
Print looks darker than screenMonitor brightness, RGB-to-CMYK conversion, material effectTest print, adjust RIP, manage expectations
Colors look dull on dark shirtsWeak white ink underbaseCheck white ink, nozzle status, and underbase setting
Logo color is not close enoughPoor file, wrong profile, no physical referenceUse vector file and sample approval
Gradients show bandingNozzle clogging or wrong pass settingNozzle check, clean printhead, adjust print mode
UV print looks weak on acrylicNo white ink backingAdd proper white ink layer
UV DTF decal changes after applicationSurface color or lamination issueTest on actual product surface
Repeat order color changedSettings, ink, material, or environment changedDocument successful settings
Color shifts after changing inkConsumable compatibility issueUse matched ink and materials
Small text loses clarityLow-resolution artwork or too much inkUse vector file and correct RIP setting
Customer says color is wrongScreen expectation mismatchUse physical sample approval

Professional Color Control Checklist

Before production, check:

  • ความละเอียดของงานศิลปะ
  • ขนาดการพิมพ์ขั้นสุดท้าย
  • color mode
  • RIP setting
  • ICC profile or curve
  • printer model setting
  • ink type
  • film or material type
  • white ink condition
  • printhead nozzle status
  • curing or pressing settings
  • room environment
  • customer-approved sample
  • lighting condition
  • repeat order record

After production, check:

  • color appearance
  • gradient smoothness
  • white ink opacity
  • sharpness
  • การยึดเกาะ
  • curing or pressing result
  • final surface look
  • repeat consistency

This checklist helps reduce mistakes and improves customer confidence.

Should You Promise Exact Color Matching?

For most small custom printing businesses, you should not promise exact 100% color matching from screen to print. That is not realistic.

Instead, promise:

  • professional color control
  • sample approval when needed
  • consistent settings
  • matched consumables
  • repeatable production
  • practical color guidance
  • best effort within printer and material limits

For strict brand color jobs, offer a paid sample or proof before full production.

This is more professional and safer for your business.

EraSmart Recommendation

เลือกอัน EraSmart DTF Printer if your business needs vibrant apparel prints on T-shirts, hoodies, sportswear, uniforms, and tote bags.

เลือกอัน เครื่องพิมพ์ UV EraSmart if your business needs stable colors on hard products such as acrylic, glass, metal, wood, plastic, phone cases, signs, and packaging samples.

เลือกอัน เครื่องพิมพ์ EraSmart UV DTF if your business needs premium stickers, labels, cup wraps, bottle decals, packaging decals, and hard-surface transfers.

No matter which workflow you choose, the best color results come from a complete system: artwork, RIP, profiles, ink, material, maintenance, environment, test prints, and operator training.

Final Answer: How Do You Print the Correct Colors?

To print the correct colors, do not rely on one setting or one adjustment. Build a controlled workflow.

Use good artwork. Use the right color space. Use proper RIP settings and profiles. Use matched ink and consumables. Maintain the printhead. Control white ink. Test on the actual material. Keep temperature and humidity stable. Print physical samples. Record successful settings.

In real production, the goal is not a perfect match to every phone or monitor. The goal is stable, repeatable, professional color that meets customer expectations and supports profitable production.

For DTF, UV, and UV DTF businesses, color accuracy is part of product quality, brand trust, and customer satisfaction.

Need help improving color consistency in your DTF, UV, or UV DTF workflow? Share your target products, printer type, material, artwork file, current color problem, and expected result with EraSmart.

Our team can help you choose the right เครื่องพิมพ์ DTF- เครื่องพิมพ์ยูวี, หรือ เครื่องพิมพ์ UV DTF and guide you on workflow settings, consumables, maintenance, and color testing for more stable production.


อาจเป็นเช่นเดียวกับคุณด้วย

  • เครื่องพิมพ์ Erasmart

    เครื่องพิมพ์ UV
    เครื่องพิมพ์ DTF
    เครื่องพิมพ์ DTG
    เครื่องกดความร้อน
    เครื่องพิมพ์โฆษณา

  • เครื่องมือเครื่องพิมพ์

    เตาอบ DTF
    กดร้อน
    เครื่องแกะสลัก
    การถ่ายเทความร้อนของแก้ว
    เครื่องเคลือบ

  • สิ้นเปลือง

    หมึกพิมพ์
    เคสโทรศัพท์มือถือ
    ผลิตภัณฑ์แก้ว
    ทำความสะอาดของเหลว
    ผ้าฝ้าย

  • ติดต่อเรา

    whatsapp: +8618566233796
    WeChat: +8618566233796
    มือถือ: +8618566233796
    เว็บ:www.erasmart.com
    ร้านค้า:www.erasmartmall.com

  • ต้องการราคาเครื่องพิมพ์ใช่ไหม?

    บอกความต้องการการพิมพ์ของคุณให้เราทราบ ทีมงานของเราจะตอบกลับภายใน 24 ชั่วโมง

    ขอใบเสนอราคา

    เพียงแค่ให้รายละเอียดเล็กน้อยและเราจะช่วยให้คุณได้รับใบเสนอราคาด่วน!