Small Size Flatbed Inkjet Printer Manufacturer

86-18566233796 [email protected]

Blog How to Print DTF on Black Shirts: Step-by-Step Guide
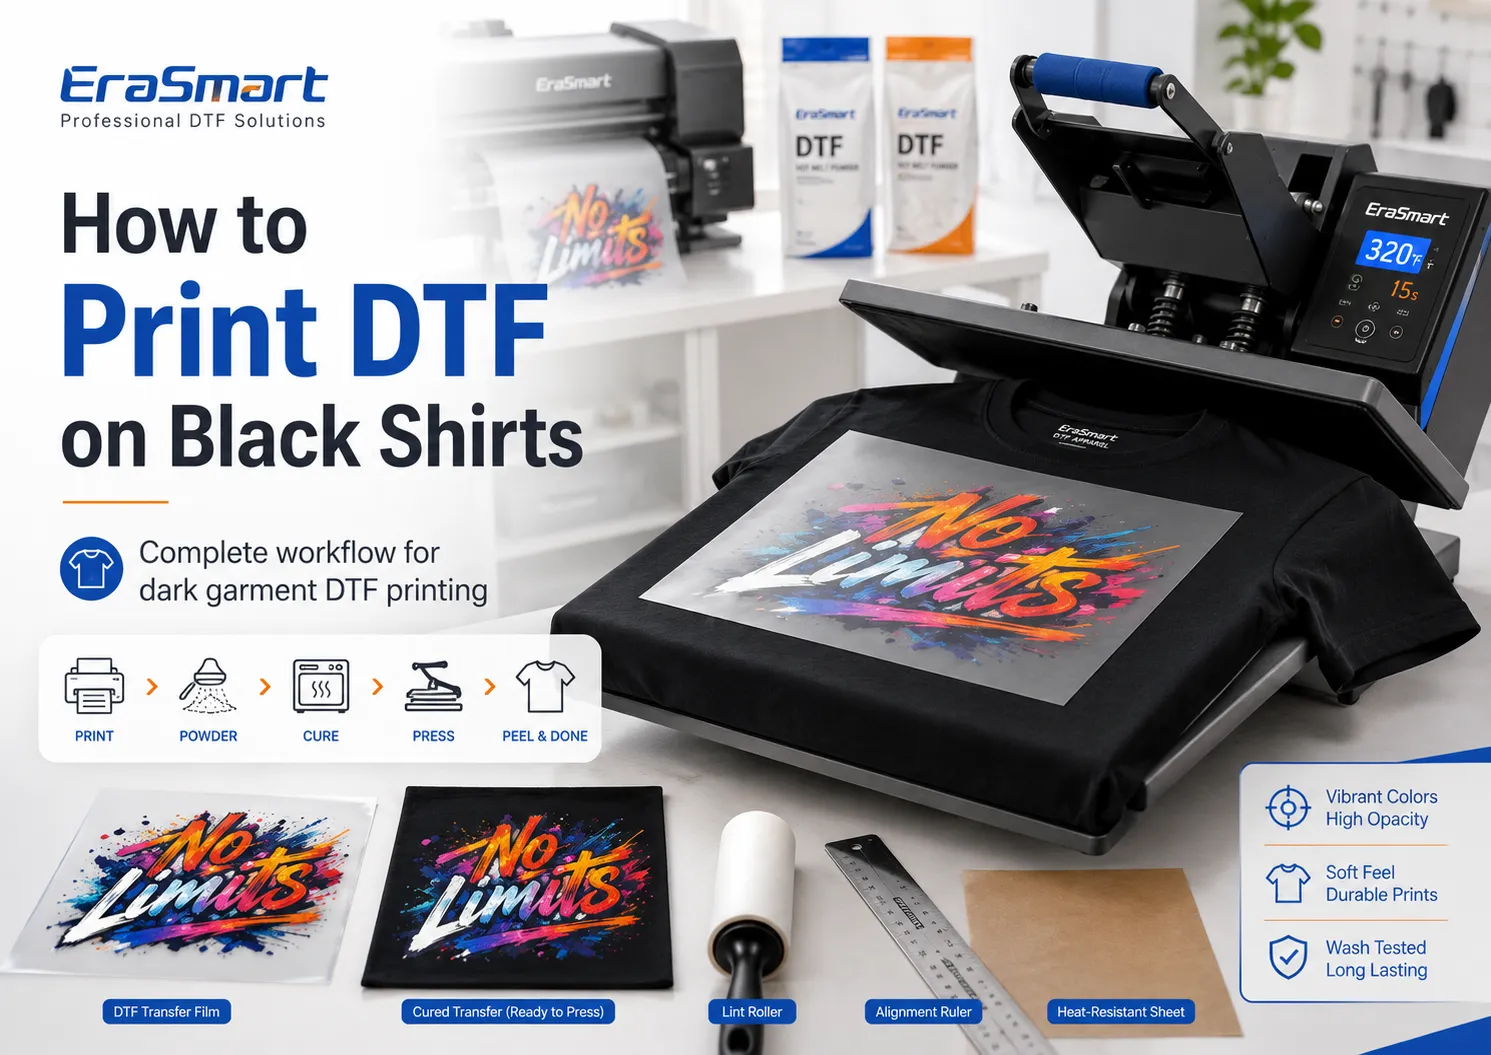
How to Print DTF on Black Shirts: Step-by-Step Guide

July 29, 2026     Blog

DTF printing is one of the most practical methods for producing bright, detailed graphics on black T-shirts and other dark garments.

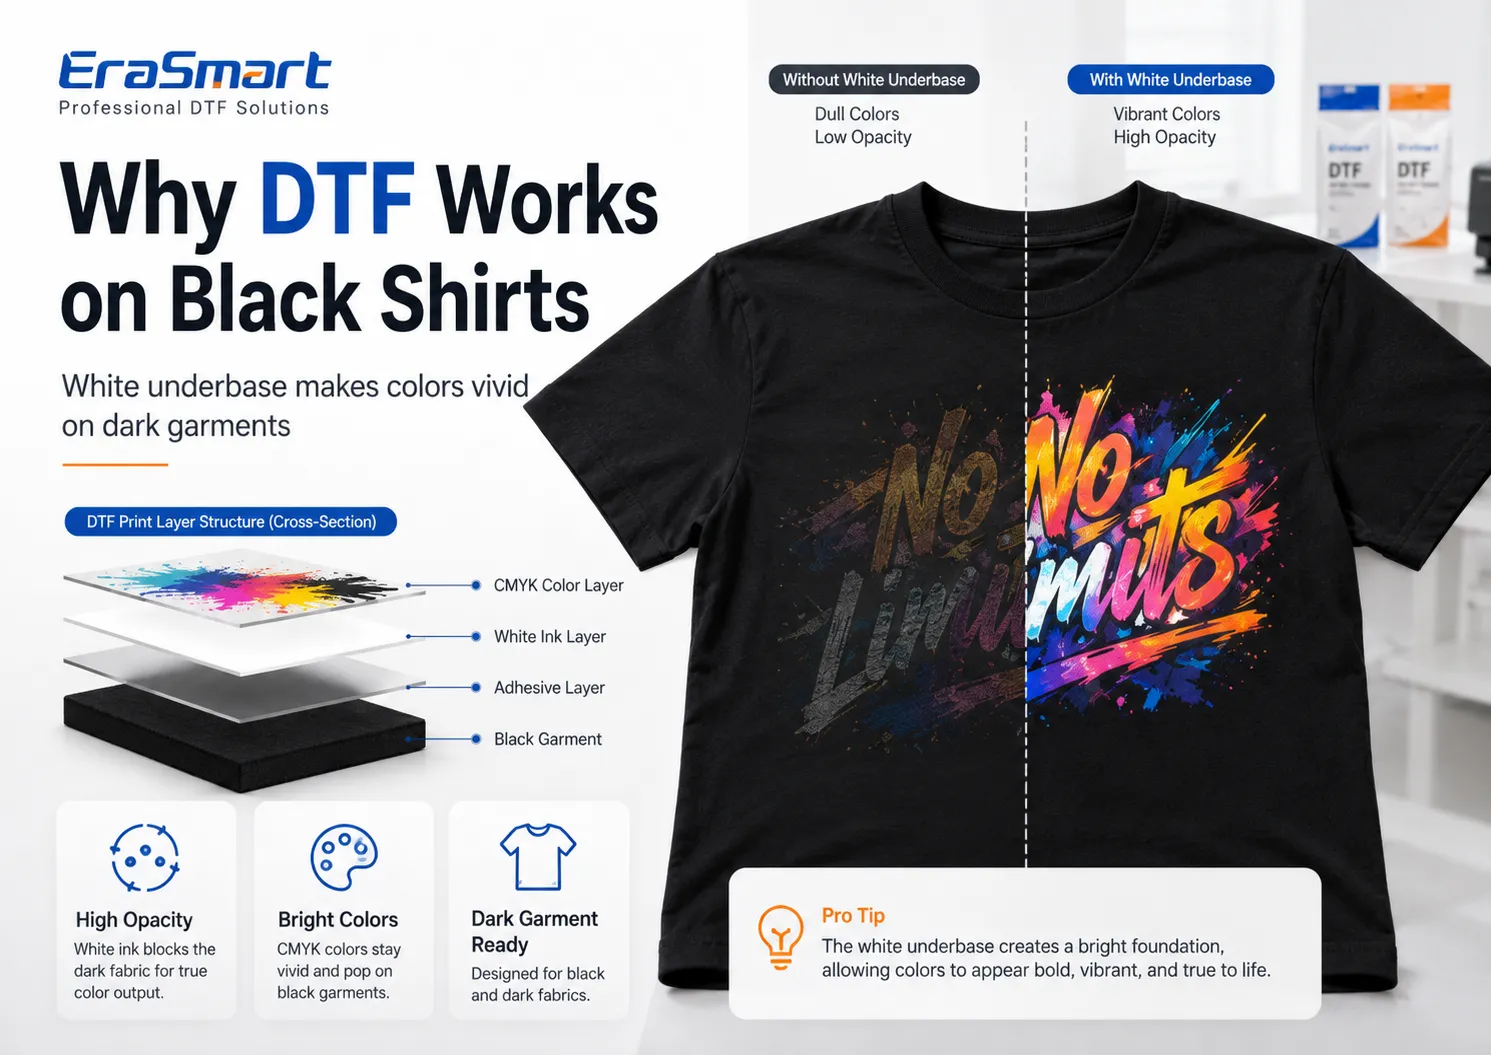
Unlike sublimation, DTF printing uses white ink beneath the color image. This white underbase prevents the dark fabric from showing through the artwork and helps CMYK colors remain visible on black, navy, charcoal and other dark-colored materials.

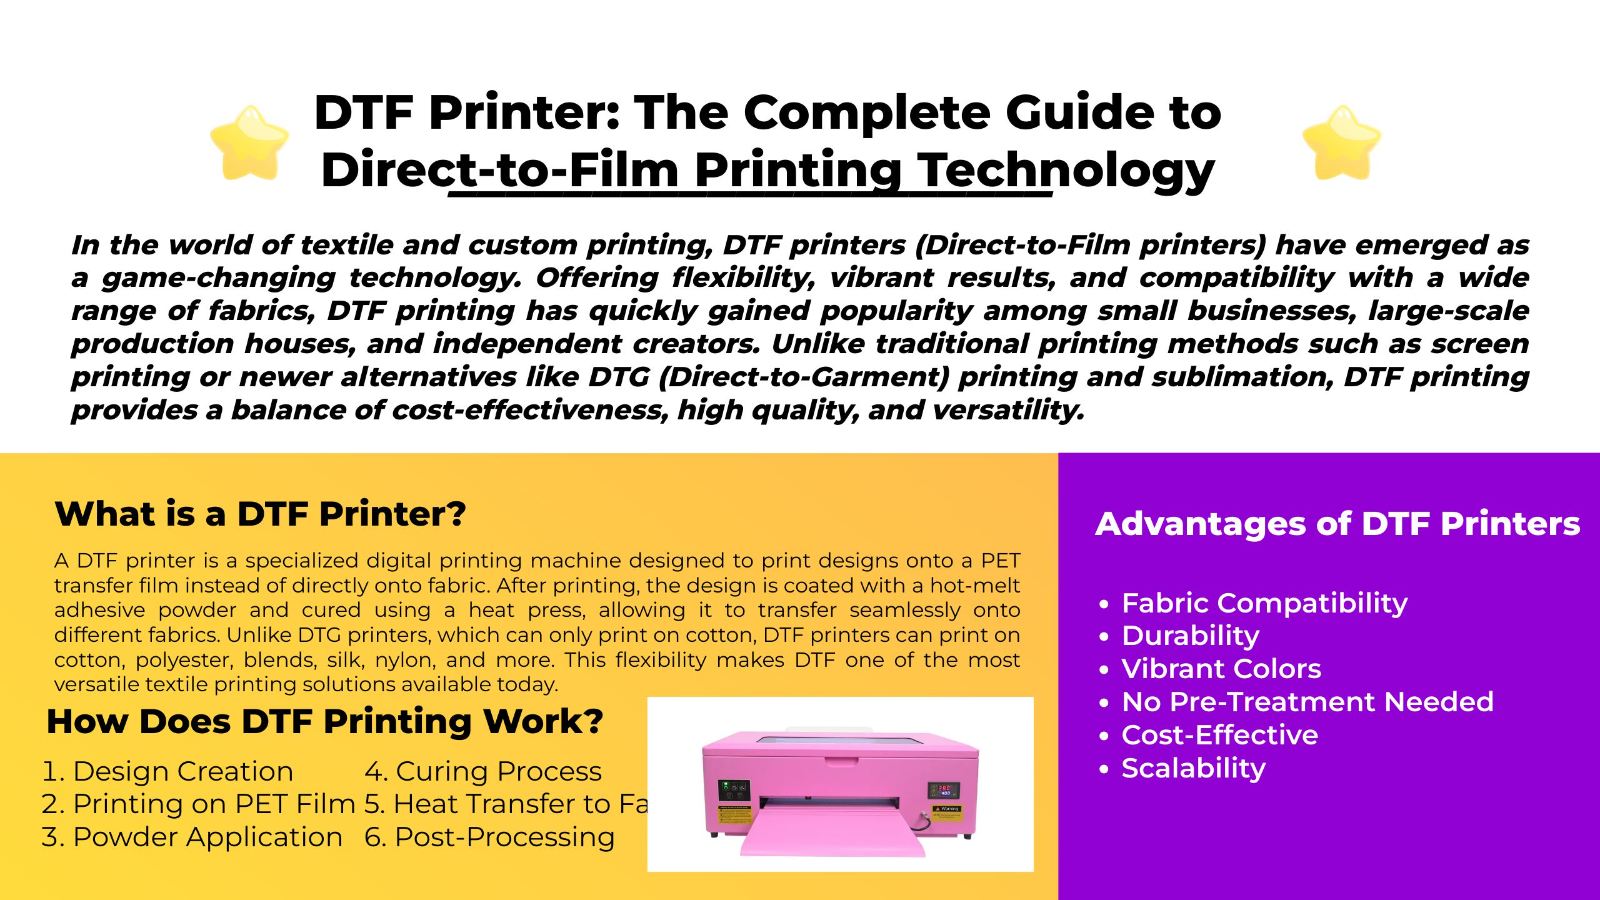
A standard DTF workflow involves:

  1. Preparing the artwork

  2. Printing CMYK and white ink onto PET film

  3. Applying hot-melt adhesive powder

  4. Curing the powdered transfer

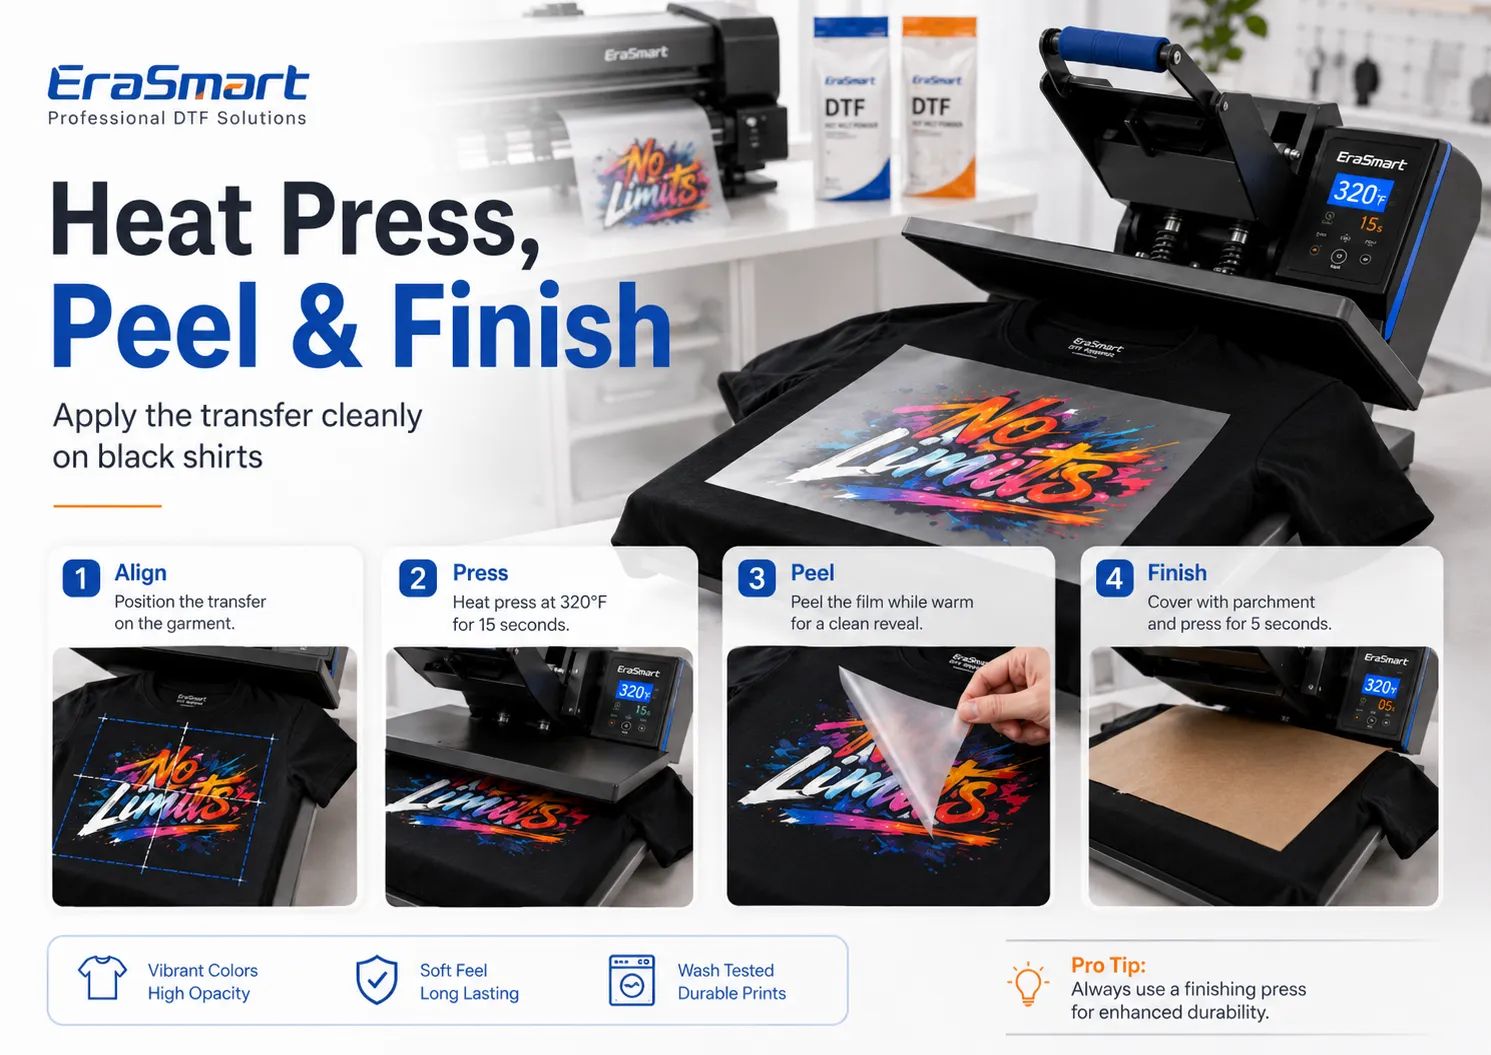
  5. Heat pressing it onto the shirt

  6. Peeling the carrier film

  7. Completing a finishing press

Professional DTF systems print a mirrored color image onto specialty film, add a white layer, apply adhesive powder and cure the transfer before it is pressed onto fabric.

Although the overall process is straightforward, black shirts reveal problems that may be less noticeable on white garments. Weak white ink, poor registration, excessive powder, incorrect pressure or dye migration can all reduce the quality of the finished print.

This guide explains the complete workflow and the adjustments required for reliable DTF printing on black shirts.

Why Does DTF Work on Black Shirts?

CMYK inks are not fully opaque.

If CMYK were printed without a white underbase, the black fabric would absorb or visually overpower much of the color. Yellow, light blue, skin tones and pastel colors would look especially weak.

DTF solves this problem by printing an opaque white ink layer behind the CMYK image.

The layer order on the film is normally:

  1. CMYK image

  2. White underbase

  3. Hot-melt adhesive powder

When the transfer is placed face down on the garment, the final visible order becomes:

  1. Garment

  2. Adhesive

  3. White ink

  4. CMYK image

This structure allows the white layer to isolate the color image from the dark fabric.

White ink is therefore not simply an optional design color. It is a functional part of the transfer system used to create opacity on dark garments. Modern DTF systems use CMYK plus white ink and often include circulation technology because white pigment requires stable handling.

What Equipment and Supplies Do You Need?
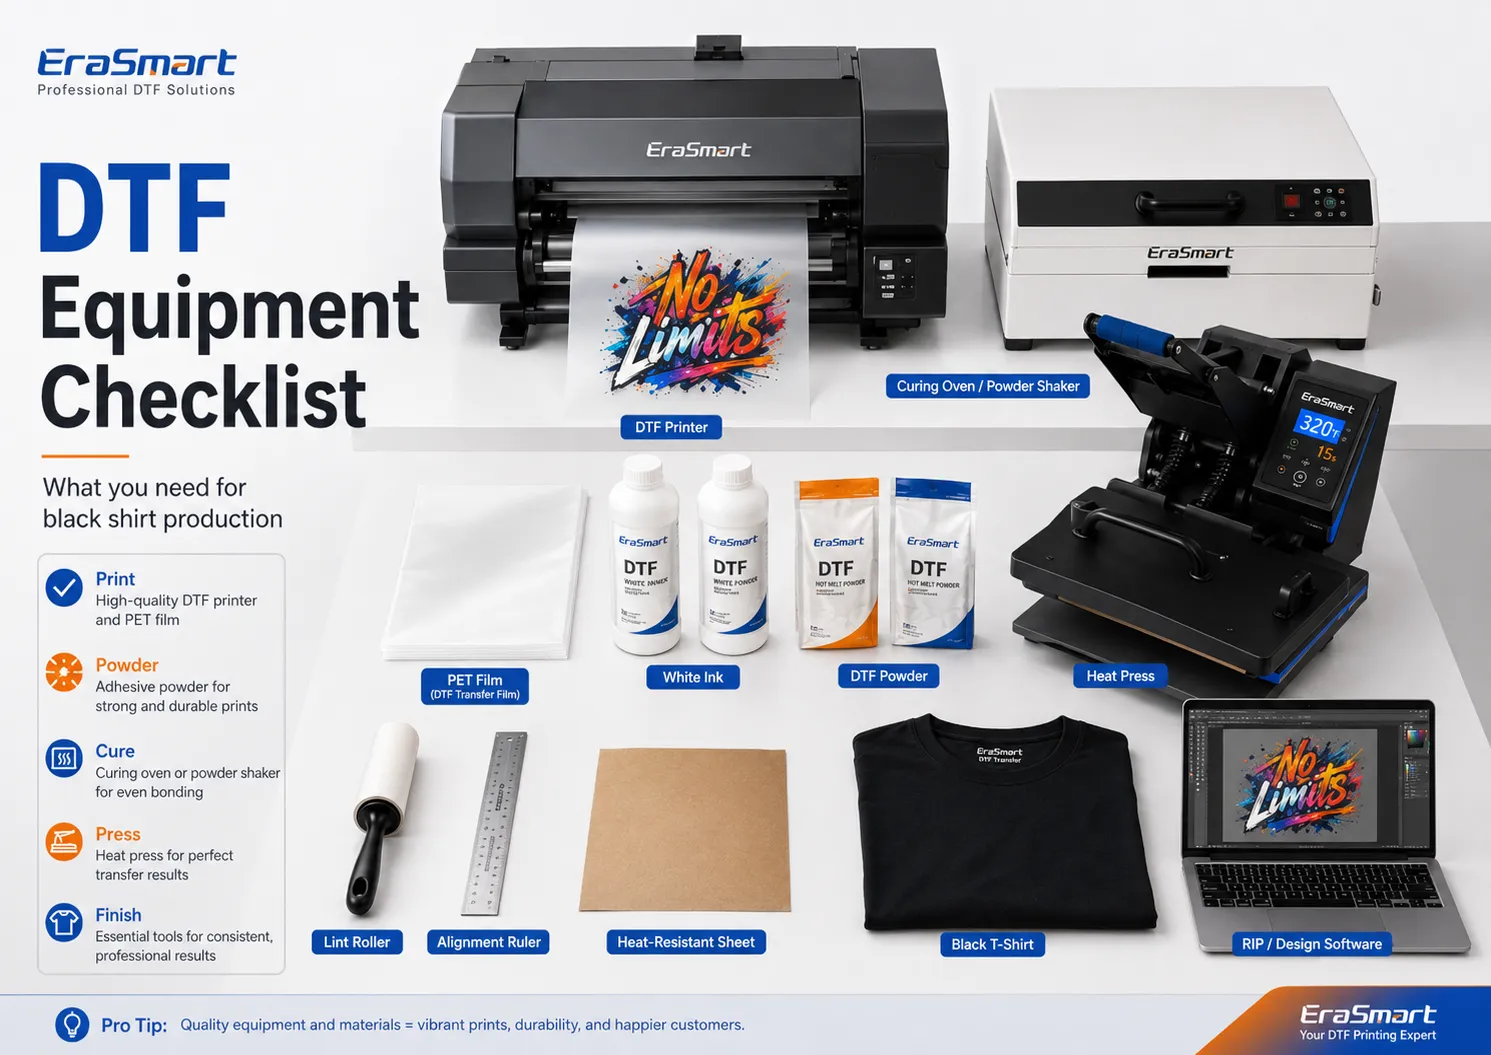
Prepare the following equipment and materials.

Essential DTF equipment

  • DTF printer

  • RIP software

  • Heat press

  • DTF curing oven or suitable curing system

  • Powder tray or automatic powder shaker

  • Computer with design software

DTF consumables

  • CMYK DTF ink

  • White DTF ink

  • Coated PET transfer film

  • Hot-melt adhesive powder

  • Cleaning solution

  • Maintenance swabs and lint-free cloths

Garment preparation tools

  • Black T-shirt

  • Lint roller

  • Garment alignment ruler

  • Heat-resistant tape

  • Parchment paper or finishing sheet

  • Heat press pillow when required

  • Heat-resistant gloves

A complete DTF workflow depends on the compatibility of the printer, ink, film, powder, curing equipment and heat press. Changing one component can change the required settings and final performance.

The EraSmart DTF consumables guide explains how ink, PET film and adhesive powder work together.

Choose the Right Black Shirt

Not every black garment reacts to heat in the same way.

Before production, check the fabric label and identify whether the shirt is:

  • 100% cotton

  • Cotton-polyester blend

  • 100% polyester

  • Sublimated polyester

  • Performance fabric

  • Heat-sensitive synthetic material

Black cotton shirts

Cotton is usually straightforward for DTF transfer application.

A tightly woven, smooth shirt generally provides a more even pressing surface than a rough or heavily textured garment.

Check for:

  • Loose fibers

  • Moisture

  • Heavy seams

  • Surface treatments

  • Fabric shrinkage

  • Heat marks

Black cotton-polyester blends

Blends can provide good DTF results, but the polyester content may make the garment more sensitive to heat.

Always test the specific shirt because two products labeled “50/50 blend” may still behave differently.

Black polyester shirts

DTF can be applied to polyester, but heat-sensitive garments require additional testing.

Dark or sublimated polyester may also experience dye migration. This happens when garment dye is reactivated by heat and moves into a light-colored transfer layer, causing white areas to become gray, blue, red or muddy.

The risk is generally higher with:

  • Sublimated sports jerseys

  • Dark polyester uniforms

  • Low-quality dyed garments

  • High heat

  • Long pressing cycles

  • Excessive pressure

Lower-temperature compatible transfer systems and material testing can help reduce the risk, but no workflow should be assumed safe without testing the actual garment.

Step 1: Prepare the Artwork

Create or import the design using software such as:

  • Adobe Photoshop

  • Adobe Illustrator

  • CorelDRAW

  • Affinity Designer

  • Other compatible design software

The artwork should be prepared at the intended print size.

Remove the background

Use a transparent background unless the background is intentionally part of the design.

An unwanted rectangular background may be printed with white ink underneath, creating a visible block on the shirt.

Check the artwork resolution

Use a source file with enough detail for the intended physical size.

Do not enlarge:

  • Screenshots

  • Social media thumbnails

  • Small web images

  • Heavily compressed JPEGs

EraSmart’s guide to the best DPI for printing explains how file resolution and print dimensions affect sharpness.

Use the black garment as part of the design

When printing on a black shirt, some black areas in the artwork may be removed so the shirt itself provides the black color.

This technique can:

  • Reduce ink consumption

  • Reduce the printed area

  • Improve flexibility

  • Create a softer hand feel

  • Reduce large solid blocks

However, do not automatically remove every black element. Fine black details surrounded by light colors may still need to remain in the printed artwork.

Check small details

Very thin lines, tiny text and isolated pixels can be difficult to reproduce consistently.

Inspect:

  • Fine outlines

  • Small punctuation

  • Hair details

  • Transparent shadows

  • Glow effects

  • Semi-transparent edges

Simplify artwork that contains elements too small to survive printing, powdering, peeling and washing.

Step 2: Configure the White Underbase

The white underbase is one of the most important settings for black-shirt printing.

Your RIP software may allow you to control:

  • White ink density

  • Underbase generation

  • White choke

  • Edge reduction

  • Highlight white

  • White layer order

  • Ink limits

Use enough white for opacity

An insufficient white layer can cause:

  • Muted colors

  • Gray-looking highlights

  • Weak yellows

  • Poor skin tones

  • Black fabric showing through

Do not automatically use maximum white

Excessive white ink can cause:

  • Longer curing

  • Heavy surface feel

  • Reduced flexibility

  • Increased ink cost

  • Powder buildup

  • Incomplete curing

  • Cracking

The correct white density is the lowest level that produces sufficient opacity and stable transfer performance.

Apply underbase choke

A small white choke slightly reduces the edge of the white layer beneath the CMYK image.

This helps prevent a visible white border when color and white registration are not perfectly aligned.

Too much choke may remove white beneath fine details, while too little may create white halos. Test the RIP setting using small text, fine lines and curved edges.

Maintain accurate CMYK and white registration

White ink must align correctly behind the color image.

If the layers are misaligned, you may see:

  • White borders

  • Colored shadows

  • Blurred edges

  • Double-image effects

Printer manufacturers recommend selecting the appropriate dark-media or film alignment mode when configuring white and CMYK registration for DTF production.

Step 3: Check the Printer Before Production

Before printing the customer design:

  1. Perform a nozzle check.

  2. Confirm that all CMYK channels are printing.

  3. Confirm that the white channels are complete.

  4. Check white ink circulation.

  5. Inspect the capping station and wiper.

  6. Confirm film alignment.

  7. Check that the film is loaded on the printable side.

White ink quality can deteriorate if pigment settles or nozzles become restricted. Daily agitation, circulation and nozzle checks help maintain consistent opacity.

Do not continue printing if the white nozzle pattern is incomplete. A transfer may appear acceptable on the film but produce weak or uneven color after application to a black shirt.

Step 4: Print the Design on DTF Film

Load the PET film according to the printer and film instructions.

The general printing order is:

  1. Print the mirrored CMYK image.

  2. Print the white underbase over the color.

  3. Keep the printed film flat and protected.

The image must be mirrored because the printed side will face the garment during heat pressing.

Professional DTF workflows print CMYK first and white afterward so that the color layer becomes the visible outer surface after transfer.

Inspect the printed film

Before applying powder, check:

  • Color completeness

  • White coverage

  • Registration

  • Fine details

  • Banding

  • Ink pooling

  • Scratches

  • Film feeding marks

Do not powder a visibly defective print. Correcting the print first is less expensive than wasting powder, curing time and a garment.

Step 5: Apply Hot-Melt Powder

Apply powder while the printed ink is still wet.

The powder should contact the white ink evenly.

Manual powdering process

  1. Place the printed film in a powder tray.

  2. Cover the printed area with powder.

  3. Gently move or lift the film so powder reaches the full design.

  4. Shake off the excess.

  5. Inspect the edges.

  6. Remove loose powder outside the printed area.

Avoid excessive powder

Too much powder can cause:

  • Rough edges

  • Adhesive halos

  • Stiff hand feel

  • Visible residue

  • Contaminated film

  • Reduced fine-detail quality

Too little powder can cause:

  • Missing adhesive

  • Edge lifting

  • Weak wash durability

  • Small details failing to transfer

Epson warns that DTF powder should be handled away from the printer because powder contamination inside the machine can cause malfunctions.

Step 6: Cure the Powder

The powder must be heated until it forms a stable adhesive layer.

Possible curing equipment includes:

  • DTF curing oven

  • Drawer oven

  • Conveyor dryer

  • Powder shaker with integrated dryer

  • Non-contact heat press method supported by the consumable supplier

Do not use one universal curing temperature or time for every DTF system.

Correct curing depends on:

  • Powder formulation

  • Ink volume

  • Film coating

  • White ink density

  • Oven airflow

  • Ambient temperature

  • Production speed

Use the settings specified for the ink, film and powder combination.

Signs of undercuring

  • Loose powder remains

  • Adhesive looks dry or grainy

  • Transfer surface is inconsistent

  • Print lifts after pressing

  • Wash durability is poor

Signs of overcuring

  • Film warping

  • Burnt or discolored adhesive

  • Brittle transfer

  • Excessive gloss

  • Reduced adhesion

  • Hard surface feel

A properly cured transfer should have an even adhesive layer without loose powder or burnt areas.

Step 7: Prepare the Black Shirt

Place the shirt on the heat press platen.

Remove lint

Use a lint roller to remove:

  • Dust

  • Hair

  • Loose cotton fibers

  • Packaging particles

Lint beneath the transfer can create bumps, incomplete adhesion or visible imperfections.

Check seams and raised areas

Seams, collars, pockets, buttons and zippers can prevent even pressure.

Use:

  • Heat press pillow

  • Silicone pad

  • Appropriate platen

  • Repositioned garment loading

The transfer area should be the highest and flattest part of the pressing surface.

Pre-press the garment

A short pre-press may help:

  • Remove moisture

  • Flatten wrinkles

  • Smooth fabric fibers

  • Stabilize the garment

Do not pre-press longer than necessary, especially on heat-sensitive polyester.

Step 8: Position the Transfer

Place the cured film design-side down on the shirt.

Use a garment ruler to check:

  • Horizontal center

  • Distance below the collar

  • Left-chest position

  • Sleeve placement

  • Back-print position

Secure small transfers with heat-resistant tape if movement is likely.

For batch orders, document the placement measurements so every garment remains consistent.

Step 9: Heat Press the Transfer

Use the time, temperature and pressure specified by the film, powder or complete consumable system supplier.

Pressing conditions should not be copied blindly from another printer or transfer brand because optimum settings vary with the transfer system and heat press.

Before production, verify:

  • Actual platen temperature

  • Even pressure

  • Correct timer

  • Garment heat tolerance

  • Film peel type

  • Whether a protective sheet is required

Pressure matters

Insufficient pressure can cause:

  • Edge lifting

  • Missing fine details

  • Poor adhesion

  • Uneven transfer

Excessive pressure can cause:

  • Press marks

  • Flattened garment texture

  • Adhesive spreading

  • Reduced surface quality

  • Heat-sensitive fabric damage

Pressure should be firm enough for even adhesion without damaging the garment.

Step 10: Peel the Film Correctly

DTF film may be designed for:

  • Hot peel

  • Warm peel

  • Cold peel

Follow the film manufacturer’s instructions.

Hot peel

The carrier is removed shortly after the press opens.

Warm peel

The transfer rests briefly before peeling.

Cold peel

The transfer must cool more fully before the carrier is removed.

Peeling at the wrong temperature can cause:

  • Image lifting

  • Rough surface

  • Missing details

  • Adhesive separation

  • Carrier marks

Read the EraSmart hot peel vs cold peel film guide for a more detailed comparison.

Peel smoothly at a controlled angle rather than pulling the film abruptly upward.

If part of the image lifts, stop peeling. Place the carrier back down and review the press settings instead of forcing the peel.

Step 11: Complete the Finishing Press

A short finishing press is commonly used after peeling.

Place a suitable finishing sheet over the design and press according to the transfer-system instructions.

Possible finishing materials include:

  • Parchment paper

  • Matte finishing sheet

  • Gloss finishing sheet

  • Silicone-coated release paper

A finishing press may help:

  • Improve adhesion

  • Stabilize fine details

  • Adjust surface texture

  • Reduce excessive gloss

  • Improve wash durability

Do not overpress. Additional heat can make some transfers harder and may increase dye migration on polyester.

Recommended Test Process Before Full Production

Before printing a large order, produce a controlled sample.

Record:

Test itemWhat to check
Shirt compositionCotton, blend or polyester
White densityOpacity without excessive buildup
Powder coverageEven adhesion without halos
Cure resultNo loose or burnt powder
Press settingsTime, temperature and pressure
Peel timingHot, warm or cold
Surface feelFlexible and even
Edge adhesionNo lifting
ColorBright and accurate
Wash resultNo separation or cracking
Delayed inspectionNo polyester dye migration

For black polyester and sublimated garments, inspect the product again after it has cooled and rested. Dye migration may develop after the initial press rather than appearing immediately.

Common Problems When Printing DTF on Black Shirts
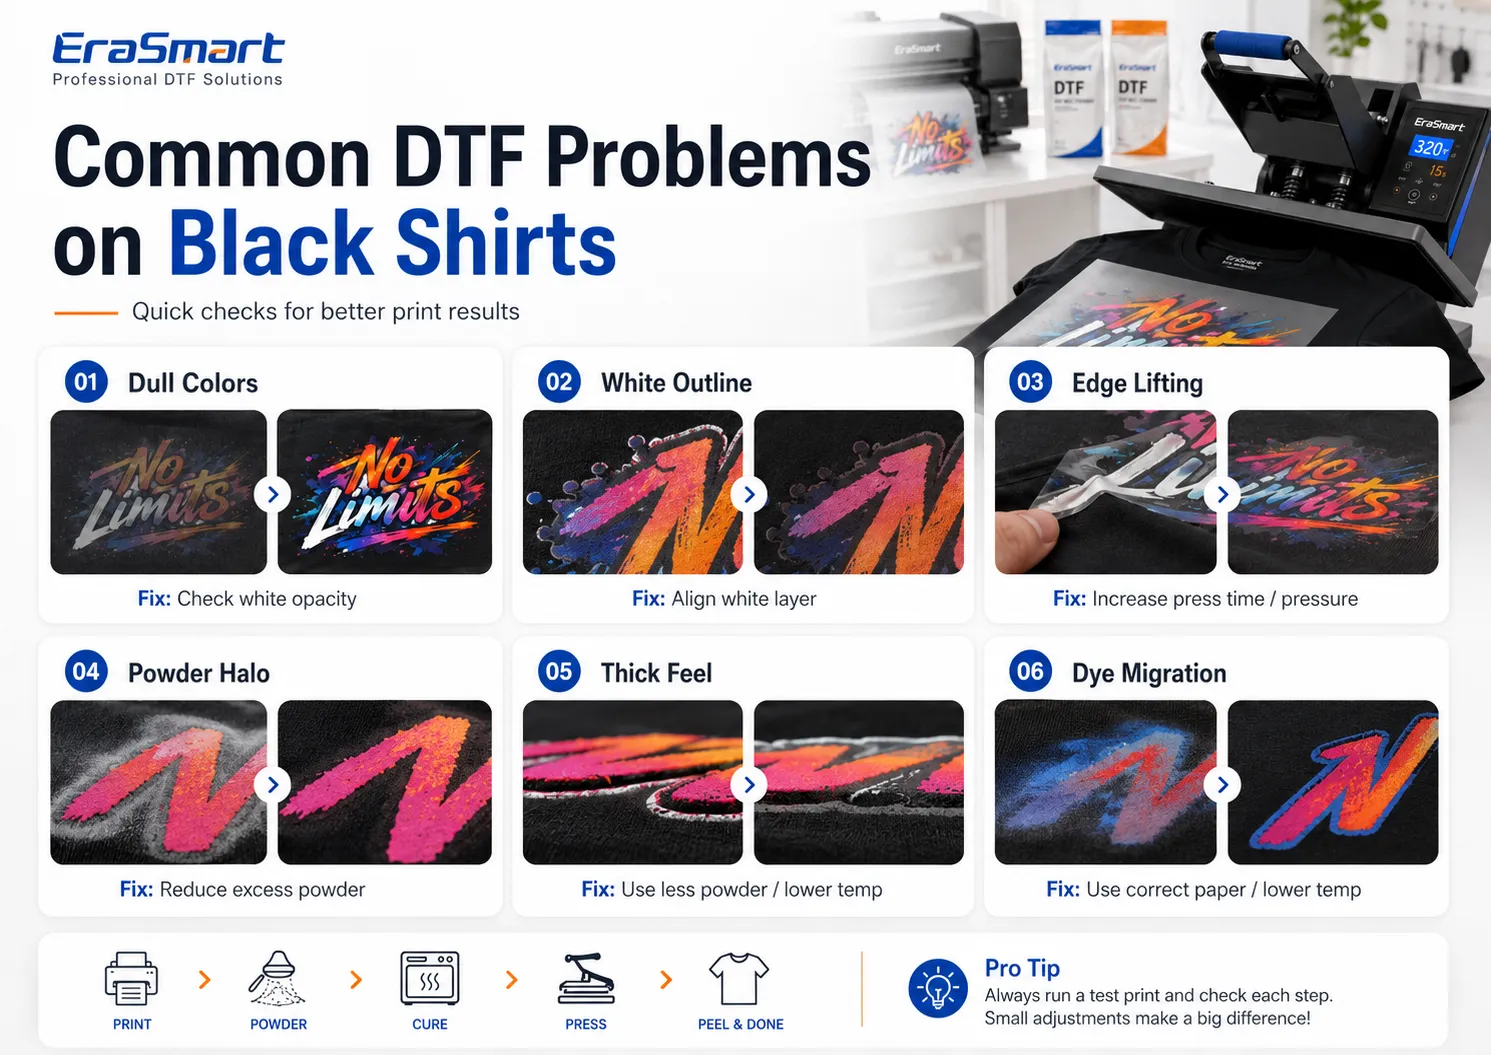
ProblemPossible causeRecommended action
Colors look dullWeak or uneven white underbaseCheck white nozzles and adjust density
Black fabric shows throughInsufficient white opacityIncrease white carefully and retest
White border around designWhite and CMYK misalignmentAlign the printer and adjust choke
Transfer does not stickInsufficient pressure, undercured powder or incompatible settingsTest the full transfer system again
Edges liftUneven platen or insufficient adhesiveCheck seams, pressure and powder coverage
Film will not peel cleanlyIncorrect peel timing or press settingsConfirm whether the film is hot, warm or cold peel
Powder halo appearsExcess powder outside the imageRemove loose powder before curing
Print feels too thickExcessive white, powder or ink coverageReduce buildup and simplify solid areas
Design cracksIncorrect curing, pressing or transfer systemReview cure and press conditions
White areas become tintedPolyester dye migrationUse a suitable lower-temperature system and test the garment
Press marks appearExcess heat or pressureReduce exposure and use a pressing pillow
Fine details disappearArtwork too small or insufficient adhesiveIncrease detail size and inspect powder coverage

EraSmart’s common DTF printing problems guide provides additional troubleshooting steps.

Design Tips for Better Black-Shirt Prints

Use contrast intentionally

Black shirts work well with:

  • White

  • Yellow

  • Orange

  • Cyan

  • Bright red

  • Pastels supported by a strong white base

  • Metallic-look artwork simulated through color

Dark artwork may disappear unless surrounded by lighter elements.

Avoid unnecessary solid backgrounds

A large rectangular printed background can create:

  • Heavy hand feel

  • High ink consumption

  • Reduced breathability

  • Greater curing demand

Use transparency and allow the black shirt to become part of the composition.

Use negative space

Negative space reduces the transferred area and can make large designs more flexible.

Check transparency effects

Semi-transparent shadows and glows may interact unpredictably with the automatically generated white underbase.

Preview the color and white layers separately in RIP software.

Create separate artwork versions

A design prepared for a white shirt may not be suitable for a black shirt.

Create a dark-garment version with:

  • Adjusted outlines

  • Improved highlights

  • Controlled transparency

  • Correct white elements

  • Suitable black knockout areas

How to Improve Wash Durability

Wash durability depends on the complete production process.

Important factors include:

  • Compatible ink, film and powder

  • Correct powder curing

  • Correct press settings

  • Even pressure

  • Finishing press

  • Suitable garment

  • Customer care

Provide care instructions such as:

  • Wait before the first wash according to the transfer supplier’s guidance.

  • Turn the shirt inside out.

  • Wash in cold or moderate-temperature water.

  • Avoid chlorine bleach.

  • Avoid ironing directly on the print.

  • Use low-temperature drying when possible.

Does a Black Shirt Need Pretreatment for DTF?

No garment pretreatment is normally required when using the DTF film-transfer process.

The design is printed onto film, combined with adhesive powder and transferred onto the fabric. This differs from direct-to-garment printing, where dark garments commonly require pretreatment before white ink is printed directly onto the fabric.

Do not apply DTG pretreatment to a shirt unless the specific DTF workflow requires it.

Can DTF Print on Black Polyester?

Yes, DTF can be used on black polyester and polyester blends, but test printing is essential.

Pay particular attention to:

  • Heat sensitivity

  • Dye migration

  • Scorching

  • Press marks

  • Fabric texture

  • Adhesion

  • Delayed color change

For additional guidance, see why DTF works on dark polyester.

Is More White Ink Always Better on a Black Shirt?

No.

Increasing white density can improve opacity when the existing layer is too weak, but maximum white ink does not automatically produce the best transfer.

Too much white may increase:

  • Ink cost

  • Curing time

  • Transfer thickness

  • Stiffness

  • Powder usage

  • Risk of incomplete curing

Start with the profile designed for your ink and film, then adjust using printed tests.

The goal is stable opacity, not the thickest possible white layer.

Final Thoughts

DTF printing is well suited to black shirts because its white ink underbase separates the CMYK image from the dark fabric.

For reliable results:

  • Choose a suitable garment.

  • Prepare high-quality transparent artwork.

  • Configure the white underbase carefully.

  • Check white and CMYK nozzles before printing.

  • Print onto the correct side of the PET film.

  • Apply powder evenly while the ink is wet.

  • Cure according to the consumable system.

  • Prepare and align the shirt.

  • Use the specified pressing and peeling method.

  • Complete a controlled finishing press.

  • Test wash durability and polyester dye migration.

Avoid relying on a universal temperature or automatically adding maximum white ink. The correct settings depend on the entire production system.

EraSmart offers compact and production-level DTF printer solutions for custom T-shirts, hoodies, tote bags, workwear and other dark-garment applications.

Beginners can also review the EraSmart DTF production workflow before setting up their first complete print-and-transfer process.

Frequently Asked Questions

Can DTF print bright colors on a black shirt?

Yes. The white ink underbase provides an opaque foundation that helps CMYK colors remain visible on black fabric.

Do I need to print white ink on a black shirt?

Yes, a white underbase is normally required beneath the color image. White may also be used as a visible design color.

Should a DTF design be mirrored?

Yes. The image is normally printed in reverse because the printed side of the film faces the garment during transfer.

What temperature should I use for DTF on a black shirt?

Use the settings specified for your film, powder, ink and garment. There is no single temperature suitable for every DTF system.

Can DTF be applied to black cotton?

Yes. Black cotton T-shirts are a common DTF application.

Can DTF be applied to black polyester?

Yes, but polyester should be tested for heat sensitivity and dye migration.

Why does my DTF print look dull on black fabric?

Common causes include weak white ink, missing white nozzles, incorrect white density, poor registration or black fabric showing through the transfer.

Why is there a white outline around my design?

The white and CMYK layers may be misaligned, or the white underbase may need a small choke adjustment.

Why is my DTF transfer peeling from the shirt?

Possible causes include undercured powder, insufficient pressure, incorrect pressing settings, uneven garment surfaces or incompatible consumables.

Should I peel DTF film hot or cold?

Follow the film specification. DTF films may require hot, warm or cold peeling.

Does DTF require shirt pretreatment?

DTF film transfers generally do not require garment pretreatment.

How can I prevent dye migration on black polyester?

Test the exact garment, use a compatible lower-temperature transfer system where available, minimize unnecessary heat exposure and inspect the sample again after it has rested.


MAY BE YOU LIKE ALSO

  • EraSmart Printer

    uv printer
    DTF printer
    DTG printer
    Heat press machine
    Advertising printer

  • Printer tools

    DTF oven
    Hot Press
    Carving machine
    Mug heat transfer
    Laminating machine

  • Consumables

    Printing INK
    Cellphone case
    Glass product
    Cleaning fluid
    Cotton swab

  • Contact Us

    WhatsApp:+8618566233796
    WeChat: +8618566233796
    Mobile: +8618566233796
    Web:www.erasmart.com
    Shop:www.erasmartmall.com

  • Need Printer Price?

    Tell us your printing needs. Our team will reply within 24 hours.

    Request A Quote

    Just provide a few details and we will help you get quick quotes!