Small Size Flatbed Inkjet Printer Manufacturer

How White Ink Layers Create 3D Raised Effects in UV DTF Printing
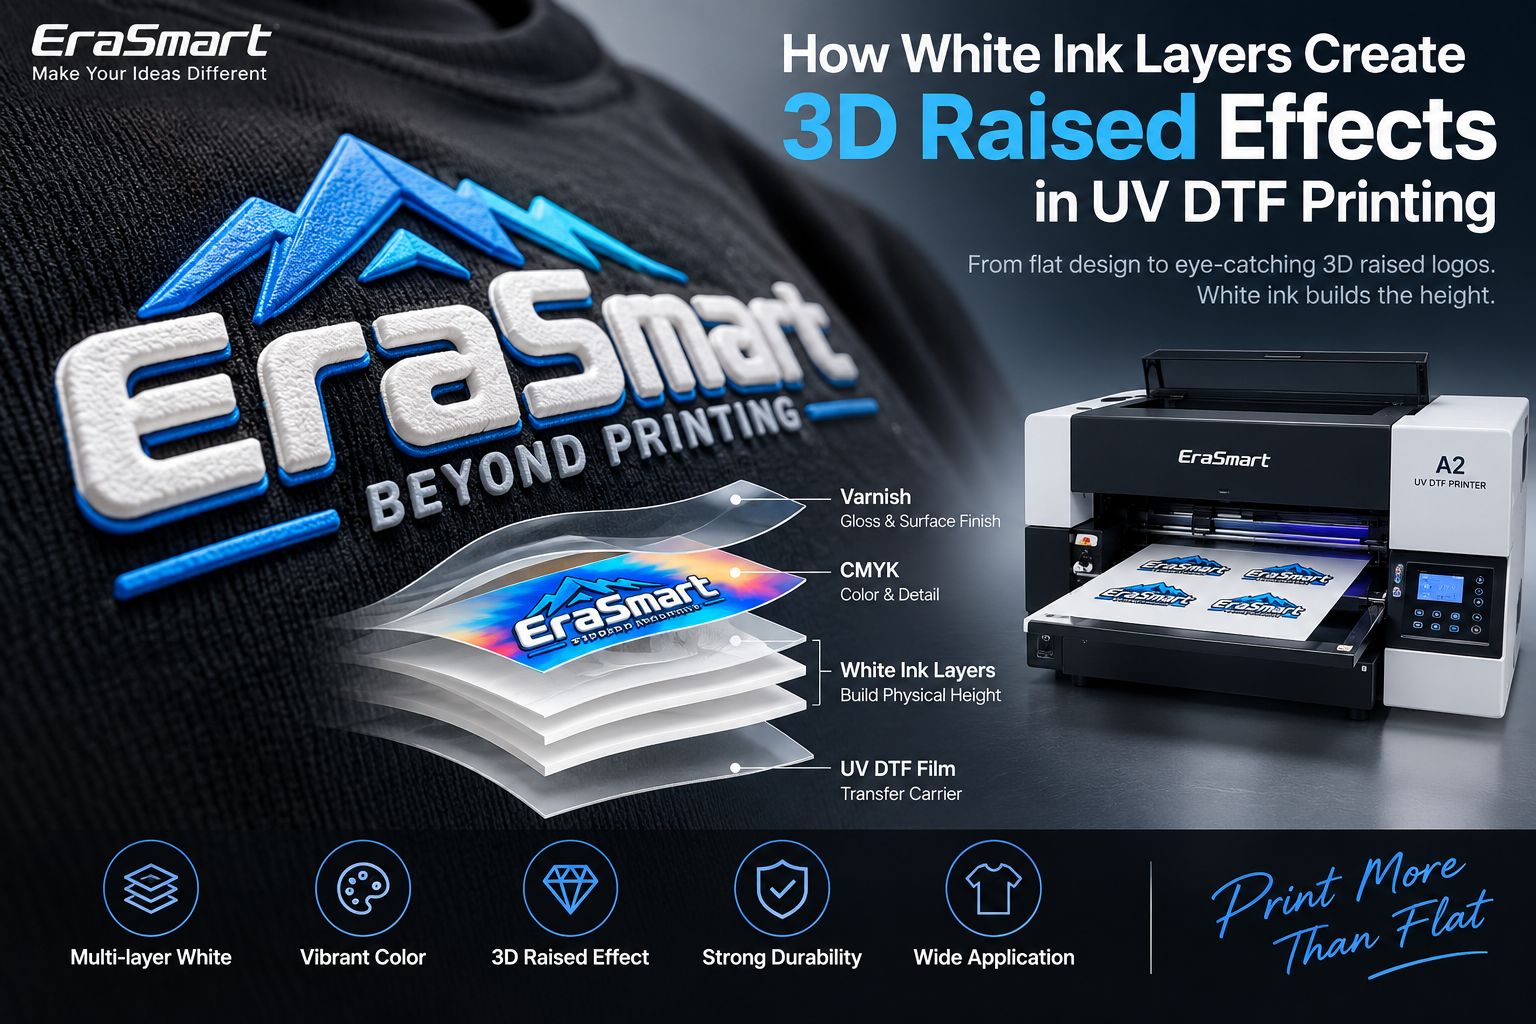
In a standard UV printing workflow, white ink is usually treated as an underbase. Its main job is to block the color of the substrate and provide a clean foundation for CMYK.
In a 3D raised UV DTF logo, white ink can do much more.
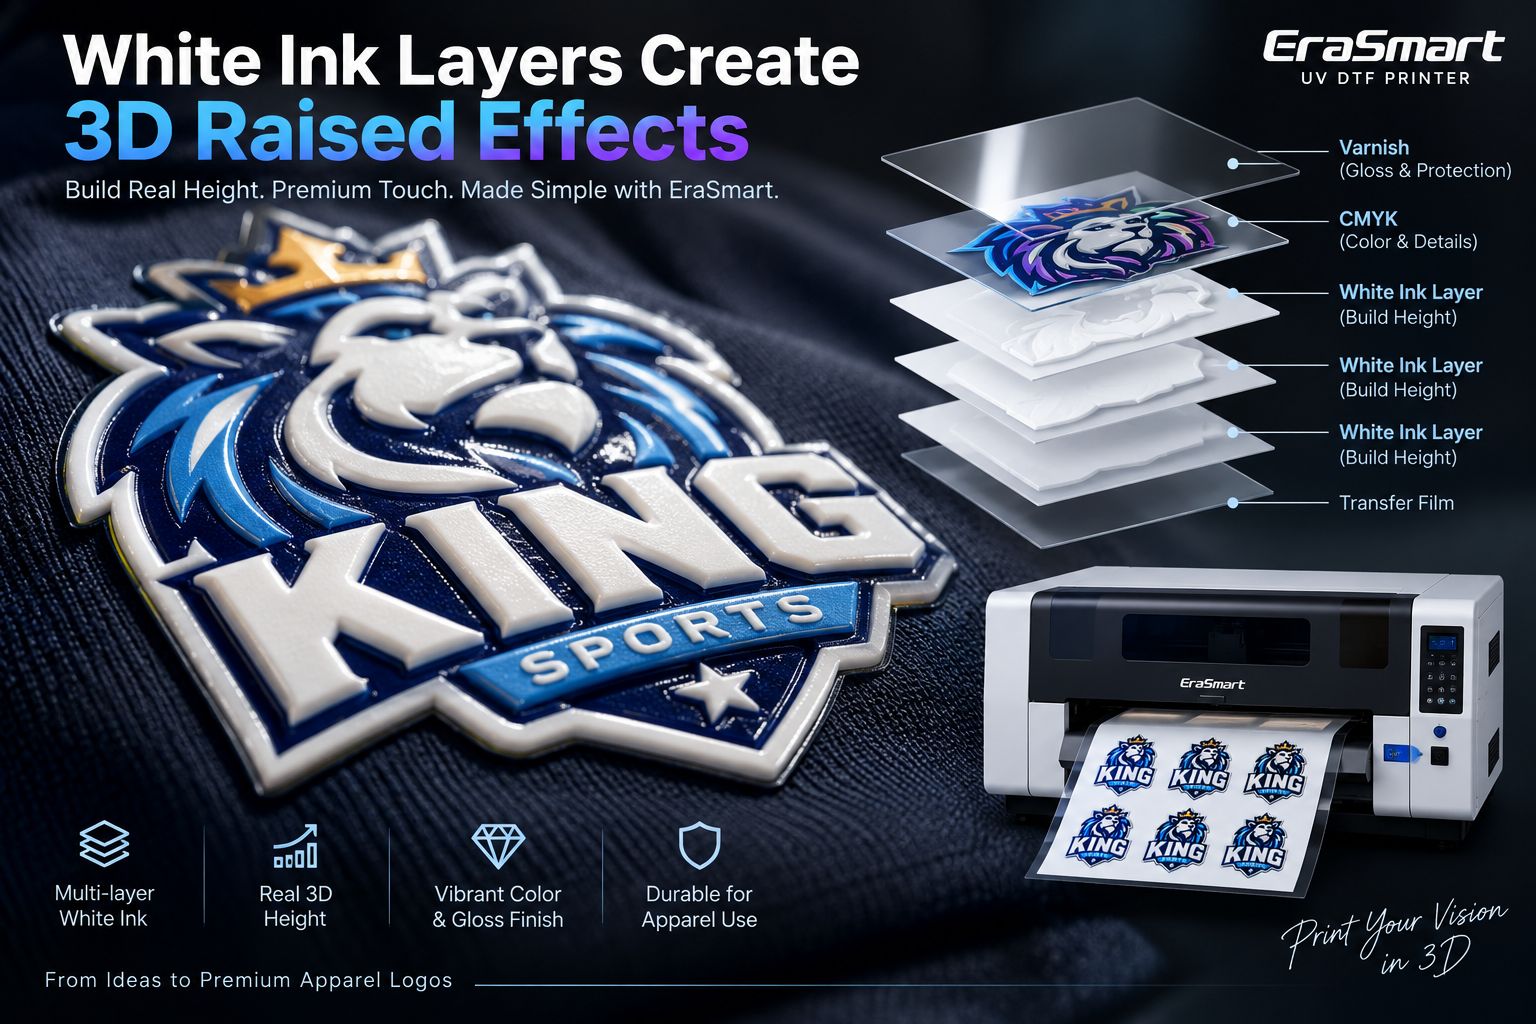
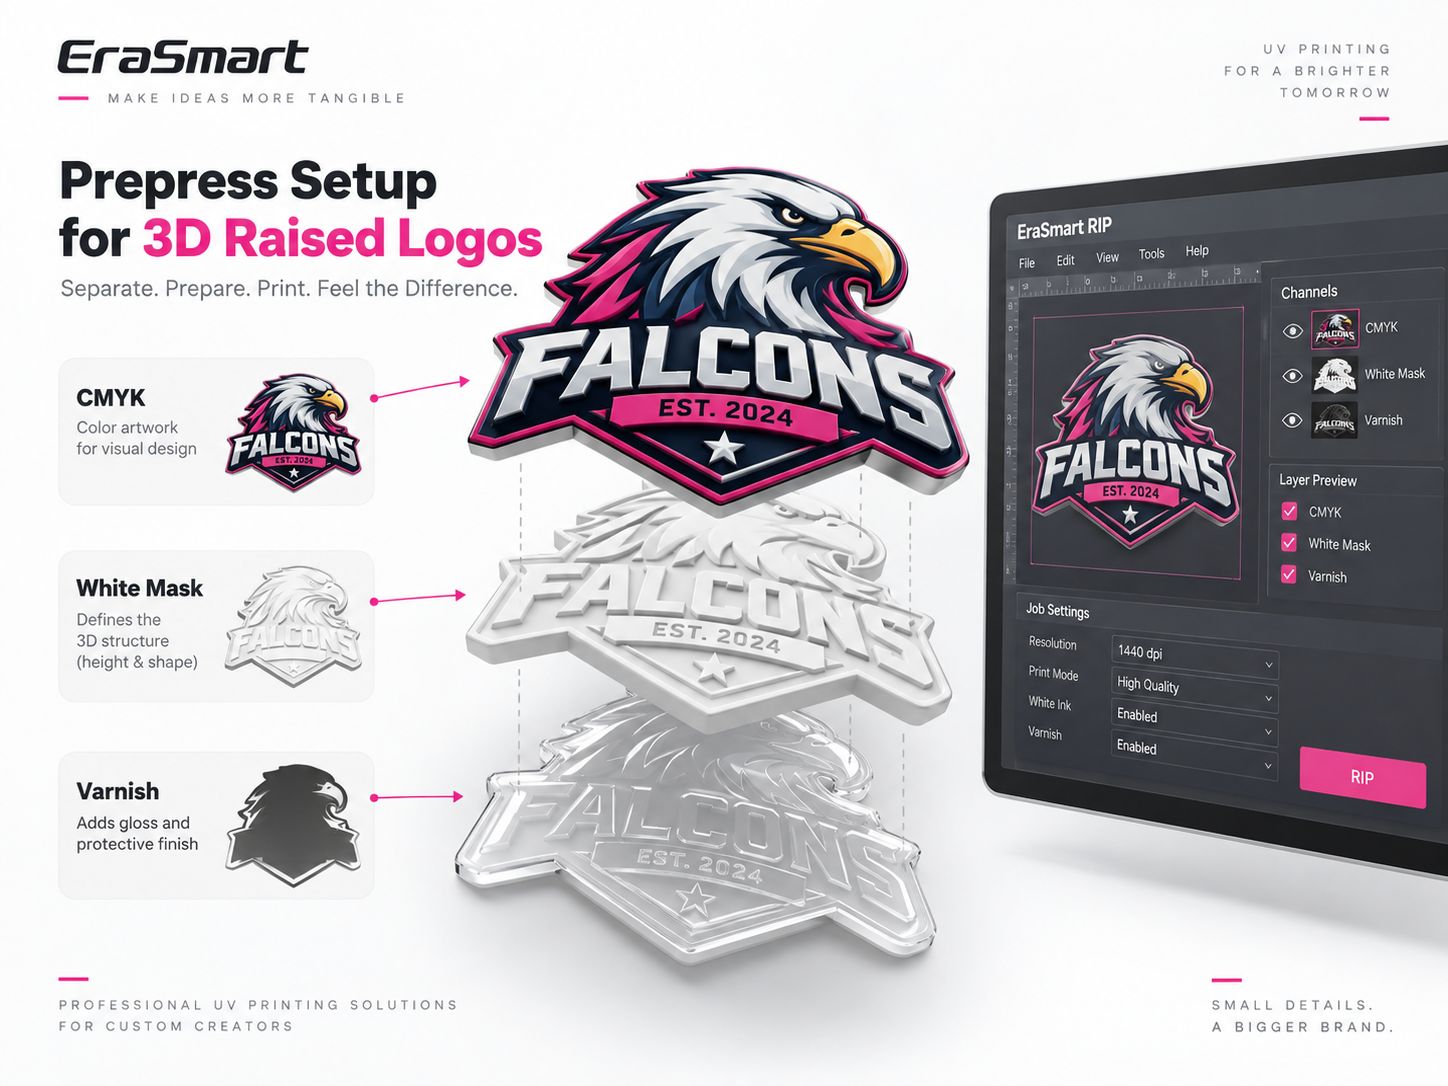
By printing and curing white ink repeatedly in the same defined areas, the white layer becomes a structural build layer. Each additional layer adds physical thickness. CMYK is then printed over the raised foundation to create the visible design, while varnish adds gloss, surface definition and the final premium finish.
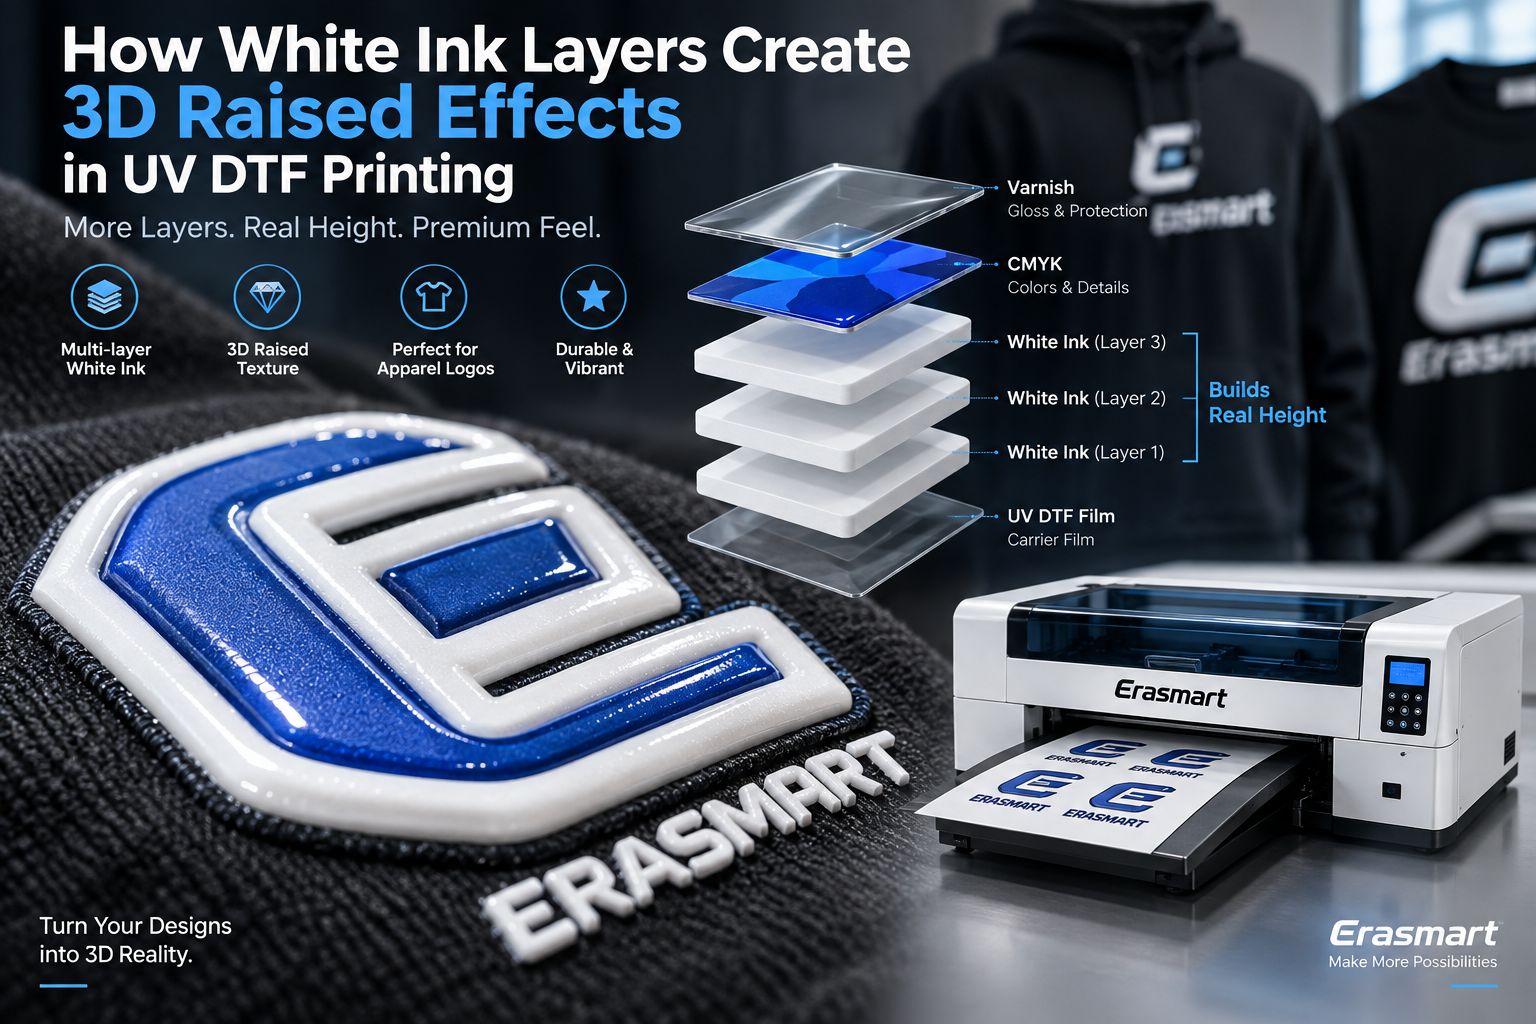
The simplified layer logic is:
Special Transfer Film → Multiple White Ink Layers → CMYK → Varnish
The important point is simple:
White ink builds the height. CMYK creates the color. Varnish finishes the surface.
That is the core principle behind the EraSmart 3D raised-logo workflow.
If you want to see how this white-layer process fits into the complete production sequence of printing, contour cutting and heat transfer, read our How to Make 3D Raised Logos with a UV DTF Printer: Complete Workflow.
White Ink Is Not Just an Underbase
White ink has several possible roles in UV printing.
In a conventional job, it is commonly used to:
- improve opacity
- isolate the printed image from a dark or transparent substrate
- provide a white base beneath CMYK
- improve color consistency
In these applications, the white layer is normally kept relatively thin.
The goal is coverage, not height.
A 3D raised logo changes that logic.
Instead of printing one normal white base, the printer repeatedly places white ink into the same selected areas.
Each cured layer becomes part of the physical body of the badge.
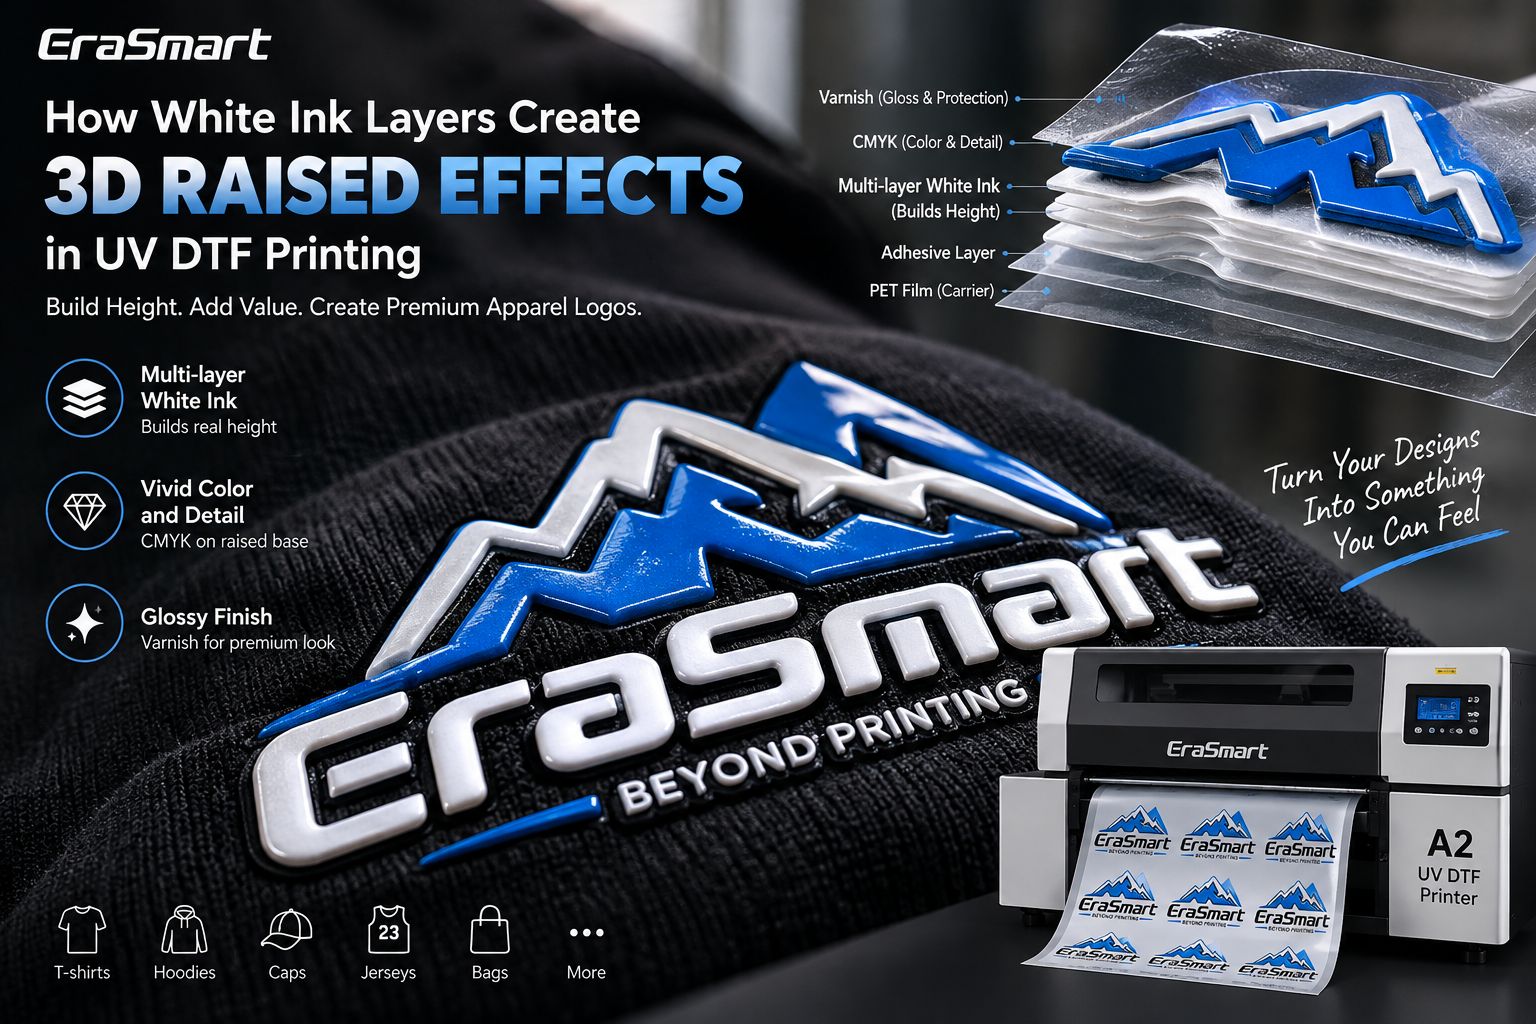
The difference can be summarized like this:
| White Ink Function | Standard White Underbase | 3D Structural White |
|---|---|---|
| Main purpose | Opacity | Physical height |
| Thickness | Relatively thin | Multi-layer |
| Surface shape | Flat | Raised |
| Number of passes | Normal print requirement | Repeated according to target height |
| Final feel | Conventional print | Tactile and dimensional |
| Typical use | Standard UV printing | 3D apparel logos and badges |
This distinction is important because simply increasing white ink density is not the same as designing a controlled multi-layer raised structure.
A good 3D logo requires the height, color, curing, registration and flexibility to work as one system.
How Multiple White Ink Layers Build Real Physical Height
UV ink behaves differently from inks that soak deeply into fabric.
When UV ink is exposed to the printer’s UV curing system, the deposited ink polymerizes and forms a solid layer.
Once that layer is stable, another layer can be printed on top of it.
The process can therefore be repeated:
White Ink → Cure → White Ink → Cure → White Ink → Cure
Each cycle adds material to the structure.
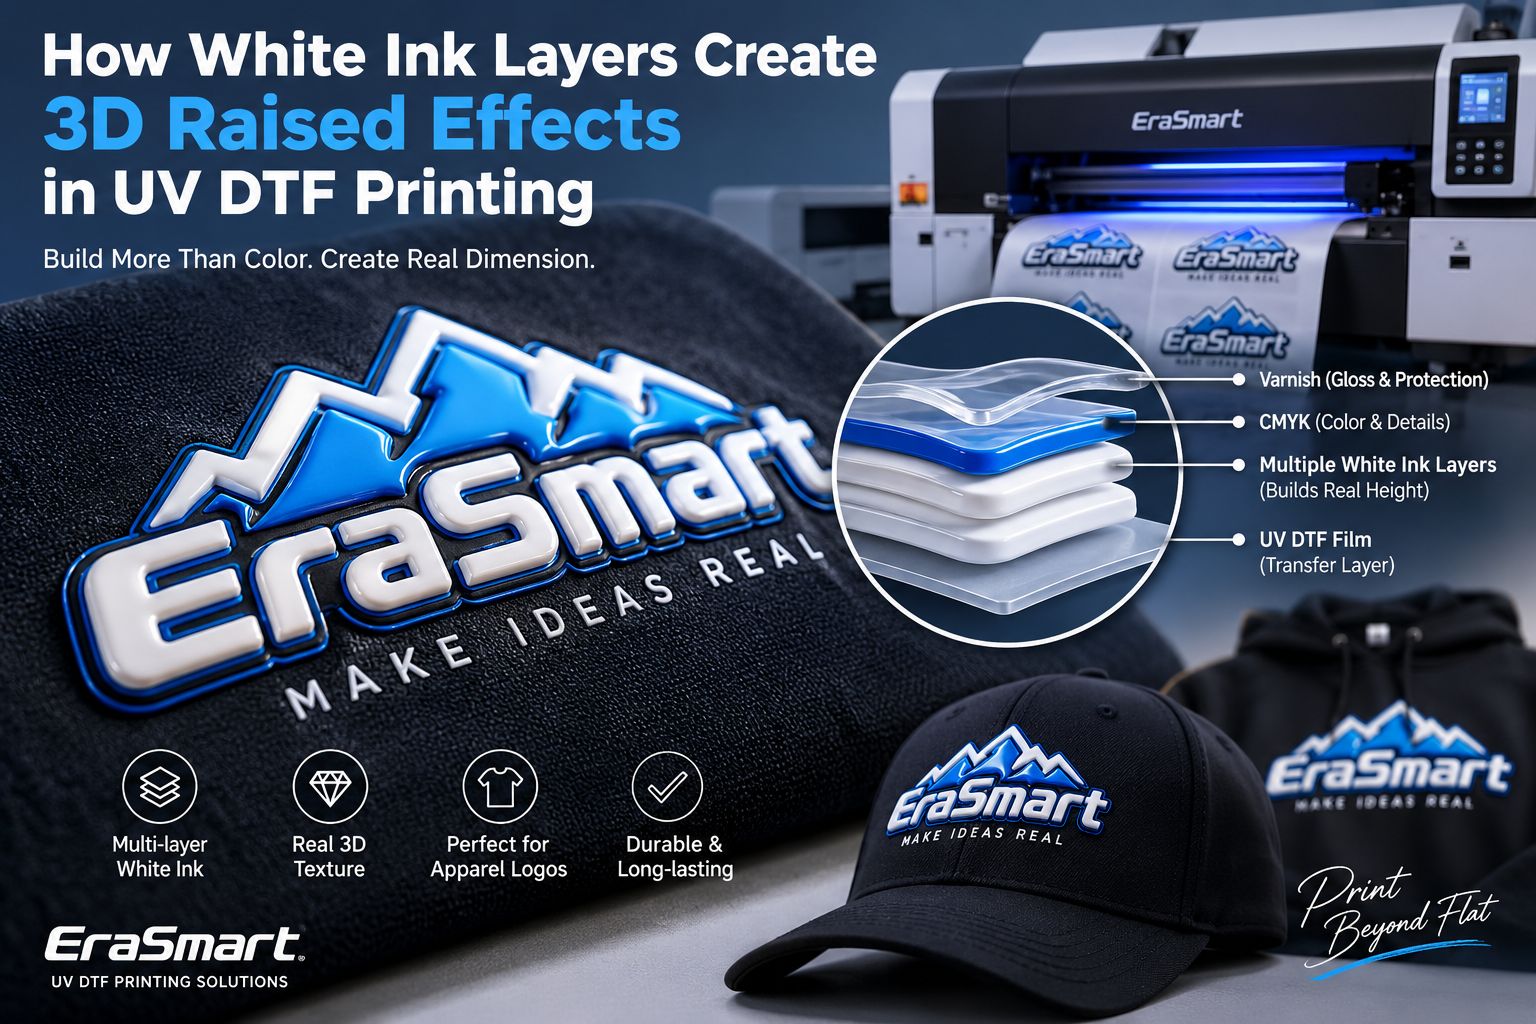
A simplified 3D raised-logo structure looks like this:
- Special heat-transfer film
- First white structural layer
- Additional white structural layers
- CMYK color layer
- Varnish finishing layer
As the white structure grows, the logo begins to develop a noticeable sidewall and tactile surface.
This is real physical height rather than a printed shadow or simulated 3D visual effect.
When transferred to a garment, the raised areas can be clearly seen from the side and felt by touch.
Why Not Print One Extremely Thick White Layer?
Because 3D height is not just about depositing as much ink as possible.
A single uncontrolled heavy layer may create several problems:
- uneven curing
- poor surface consistency
- excessive spreading
- unstable edges
- reduced registration accuracy
- inconsistent structural height
A controlled multi-pass process makes it easier to build the structure progressively.
Each layer becomes the foundation for the next.
This is similar to building a physical object in stages rather than attempting to create the entire thickness in one pass.
The correct production goal is therefore not:
Use as much white ink as possible.
It is:
Build only enough stable white structure to achieve the required height, appearance and flexibility.
White-Built Height vs Varnish-Built Height
One of the most confusing points in UV printing is that more than one material can create a raised effect.
Some applications build height mainly with white ink.
Others build height mainly with clear varnish.
These are not necessarily contradictory methods. They are different approaches for different finished products.
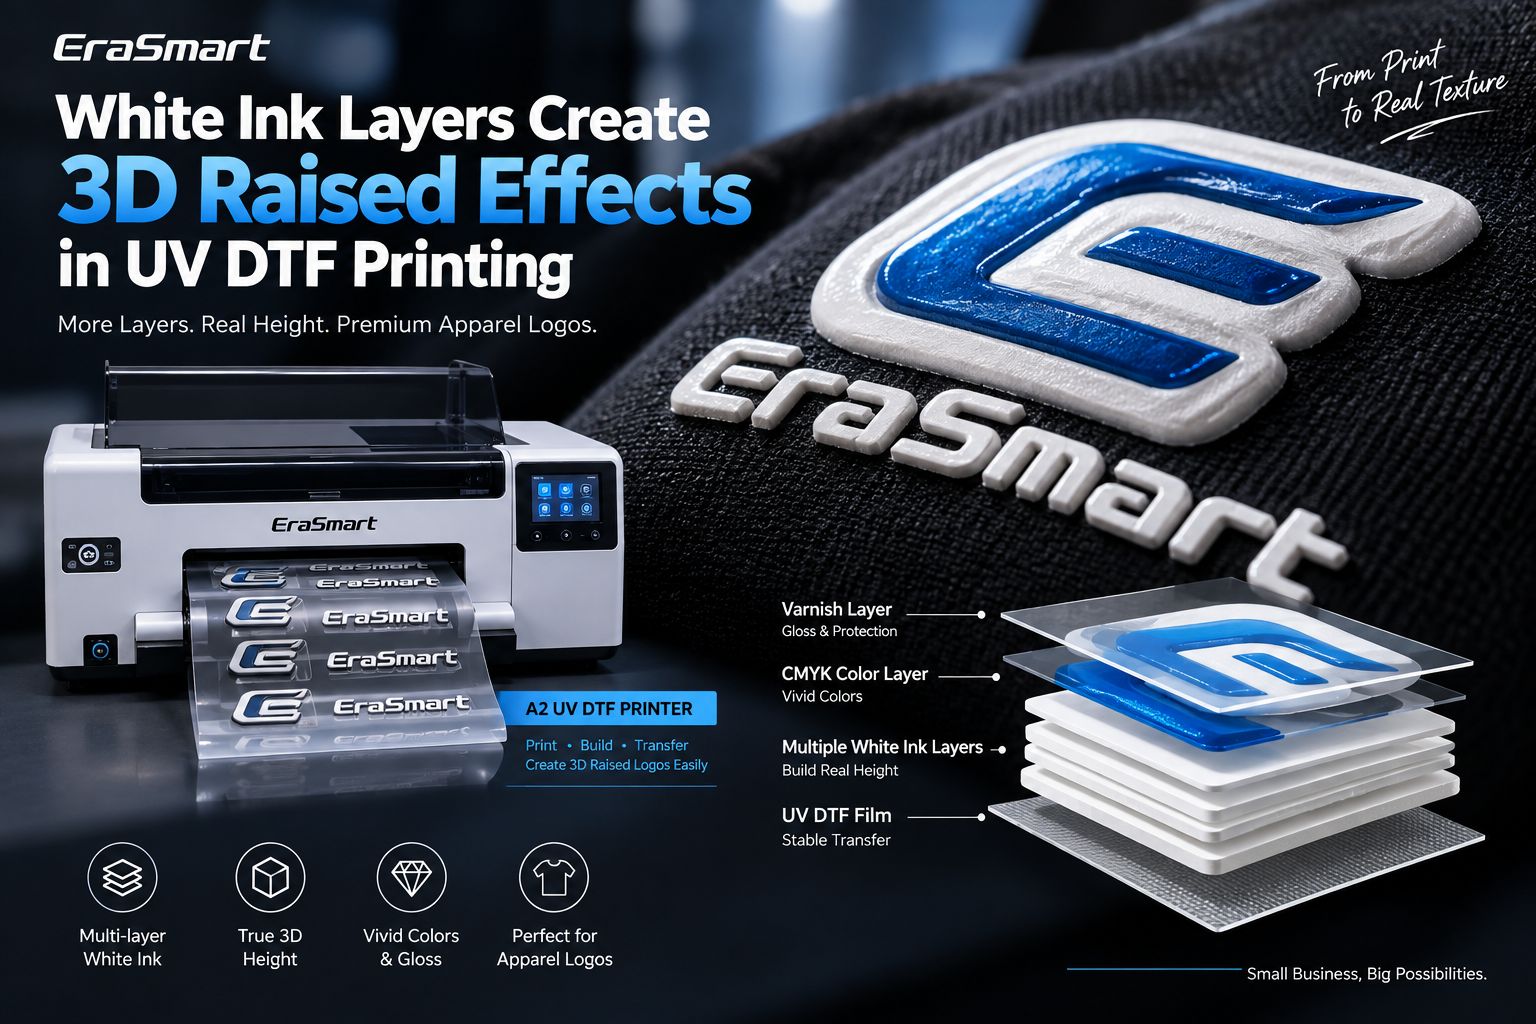
White-Built Raised Apparel Logo
In the EraSmart apparel workflow discussed here, repeated white layers create most of the structural height.
The structure is then finished with:
Multi-Layer White → CMYK → Varnish
This approach is useful when the final product needs:
- obvious raised height
- tactile lettering
- badge-like structure
- garment transfer
- flexibility for apparel use
Varnish-Built Crystal or Dome Effect
Other UV applications can use repeated varnish passes to create a transparent dome or raised glossy area.
This is especially useful when the visual goal is:
- crystal appearance
- transparent depth
- glossy doming
- jelly-like finish
- raised highlights on hard-surface products
In those applications, varnish itself may become the main height-building material.
The two techniques therefore solve different design problems.
For more information about the general functions of white ink and varnish in UV printing, see the EraSmart UV Ink Guide: CMYK, White Ink and Varnish.
What Does CMYK Do After the White Structure Is Built?
Once the structural white foundation is complete, the next function is color.
CMYK creates the visible design that the customer actually sees.
This can include:
- brand colors
- sports team graphics
- numbers
- typography
- gradients
- logos
- illustrations
- fine decorative details
The white structure underneath determines the physical shape.
The CMYK layer follows that shape and gives the badge its visual identity.
For example, a sports badge may use white ink to create the raised outer border and lettering, while CMYK provides the blue, red, orange or yellow team colors on top.
This separation makes it possible to control structure and color independently.
What Does Varnish Do?
After the CMYK artwork is printed, varnish can be used to finish the visible surface.
Its main functions in this 3D raised-logo workflow are:
- increasing gloss
- improving surface definition
- enhancing visual depth
- creating a premium finish
- protecting the printed appearance
Varnish can also influence how strongly the raised contours catch light.
A glossy raised logo usually appears more dimensional because reflections move across the curved or stepped surfaces as the garment moves.
However, this does not mean more varnish is always better.
Too much varnish may change:
- flexibility
- surface feel
- curing requirements
- overall thickness
The varnish layer should therefore be designed as part of the complete badge structure.
RIP Setup: White Mask, CMYK, Varnish and Cut Line
A 3D logo starts as artwork, but it becomes a manufacturable product only when each functional layer is defined correctly.
A practical file normally needs to distinguish between several different functions.
White Mask
The white mask defines where structural height is built.
If a certain letter, border or graphic element should be raised, the white mask controls that region.
CMYK Layer
The CMYK layer contains the visible artwork.
Its position must align precisely with the white structure underneath.
Varnish Layer
The varnish mask defines which parts of the design receive the glossy surface treatment.
This does not always need to cover every part of the badge.
Cut Line
The contour-cut line defines the final outside shape.
It should leave enough clearance around the raised structure to avoid cutting into critical areas.
Why White Choke Matters
If the white structure extends beyond the edge of the CMYK design, a visible white halo can appear.
This is especially obvious on:
- black outlines
- dark logos
- fine typography
- high-contrast graphics
White choking slightly reduces the white mask relative to the color layer.
This helps hide the white foundation beneath the visible design.
Depending on the artwork, spot-color expansion or contraction can also be used to control edge alignment.
EraSmart EraRIP supports spot-color generation, white ink choking and spot expansion/contraction, which are useful tools when preparing layered UV printing jobs.
For 3D raised logos, the exact white-layer repetition and height profile still needs to be matched to the actual printer, ink and film system.
Why Registration Becomes More Important with Every Additional Layer
Multi-pass printing introduces a simple technical challenge:
Every pass must return to essentially the same position.
If one single white layer is shifted slightly, the error may be difficult to notice.
If many layers are stacked, small positioning errors can accumulate into a visible stepped edge.
Possible symptoms include:
- white border visible on one side
- uneven sidewalls
- CMYK shifted from the white base
- varnish not centered over the color
- raised structure extending toward the cut line
This is why media stability, nozzle condition and RIP setup become especially important in 3D printing.
The higher the structure becomes, the more obvious alignment errors can appear.
Does More White Ink Always Create a Better 3D Logo?
No.
A higher structure can look more dramatic, but there is always a practical balance between height and performance.
Too Few White Layers
Possible result:
- weak 3D appearance
- almost flat surface
- limited tactile effect
- garment texture may remain visually dominant
Balanced White Structure
A good production profile aims for:
- visible raised height
- clean sidewalls
- good color registration
- controlled gloss
- sufficient flexibility
- reliable garment transfer
Excessive White Build
Too much total structure can potentially create:
- unnecessary rigidity
- longer printing time
- higher ink consumption
- increased curing demand
- more visible registration errors
- edge stress
- increased risk of cracking when sharply bent
For this reason, EraSmart does not recommend copying a fixed white-pass number from an unrelated machine, film or ink system.
The correct height should be established through testing with the real production materials.
What Determines the Correct Number of White Layers?
There is no single universal answer.
The required build depends on several variables.
Desired Height
A subtle premium logo needs less structure than a deeply embossed sports badge.
Logo Size
A large simple graphic can tolerate more build than extremely small lettering or narrow isolated lines.
Detail Density
Fine artwork may require a more conservative height to preserve clean edges.
Ink Characteristics
Different UV inks can have different viscosity, curing behavior and flexibility.
Film
The transfer film needs to support the total printed structure and the final heat-transfer process.
UV Curing
Each layer must cure sufficiently to remain stable while still maintaining the performance needed for later transfer and bending.
Final Garment
A soft T-shirt and a heavy sports jersey may not need exactly the same badge structure.
The correct setting is therefore a production profile, not a universal number.
Why UV Curing Between Layers Matters
The structure of a 3D badge depends on the stability of each deposited layer.
If the lower white layers are not sufficiently cured, later layers may not sit on a stable base.
Possible problems include:
- deformation
- poor edge definition
- unstable height
- surface inconsistency
But excessive total curing can also affect the finished structure.
If a very thick badge becomes too rigid, it may perform poorly when the fabric bends.
The goal is therefore controlled curing throughout the buildup process.
For a broader look at UV printing setup, artwork, white ink, varnish and curing, see our UV Printing Workflow Guide.
Why White Ink Stability Matters More in Multi-Layer Printing
White UV ink contains a high concentration of pigment.
That is necessary for strong opacity, but it also means white ink demands more attention than standard CMYK.
In a normal print, a minor white-ink inconsistency may affect one underbase layer.
In a 3D raised workflow, the same inconsistency can be repeated through multiple structural passes.
Possible effects include:
- uneven height
- missing sections
- rough sidewalls
- density variation
- visible banding
- incomplete structural areas
Regular white ink circulation and printer maintenance therefore become particularly important.
Before starting a long multi-layer job, check:
- white ink circulation
- nozzle condition
- test pattern quality
- media stability
- printhead cleanliness
A clean nozzle check is much easier to fix before printing than after several structural layers have already been built.
The Relationship Between Height and Flexibility
A successful apparel logo needs to look three-dimensional without behaving like a rigid plastic plate.
That balance is important.
A very thick structure can look impressive on the table but may not perform well on a flexible garment.
The badge should be evaluated after transfer on the actual fabric.
Useful tests include:
Bend Test
Flex the garment naturally.
Watch for:
- cracking
- whitening
- edge lifting
- layer separation
Edge Test
Inspect the transition between badge and fabric.
The perimeter should remain clean and properly bonded.
Touch Test
The logo should feel raised, but the target feel should match the product.
A fashion hoodie may tolerate a more substantial badge than a lightweight T-shirt.
Wash Test
Commercial products should be tested using realistic wash conditions before production approval.
Common White-Ink Problems in 3D Raised Logos
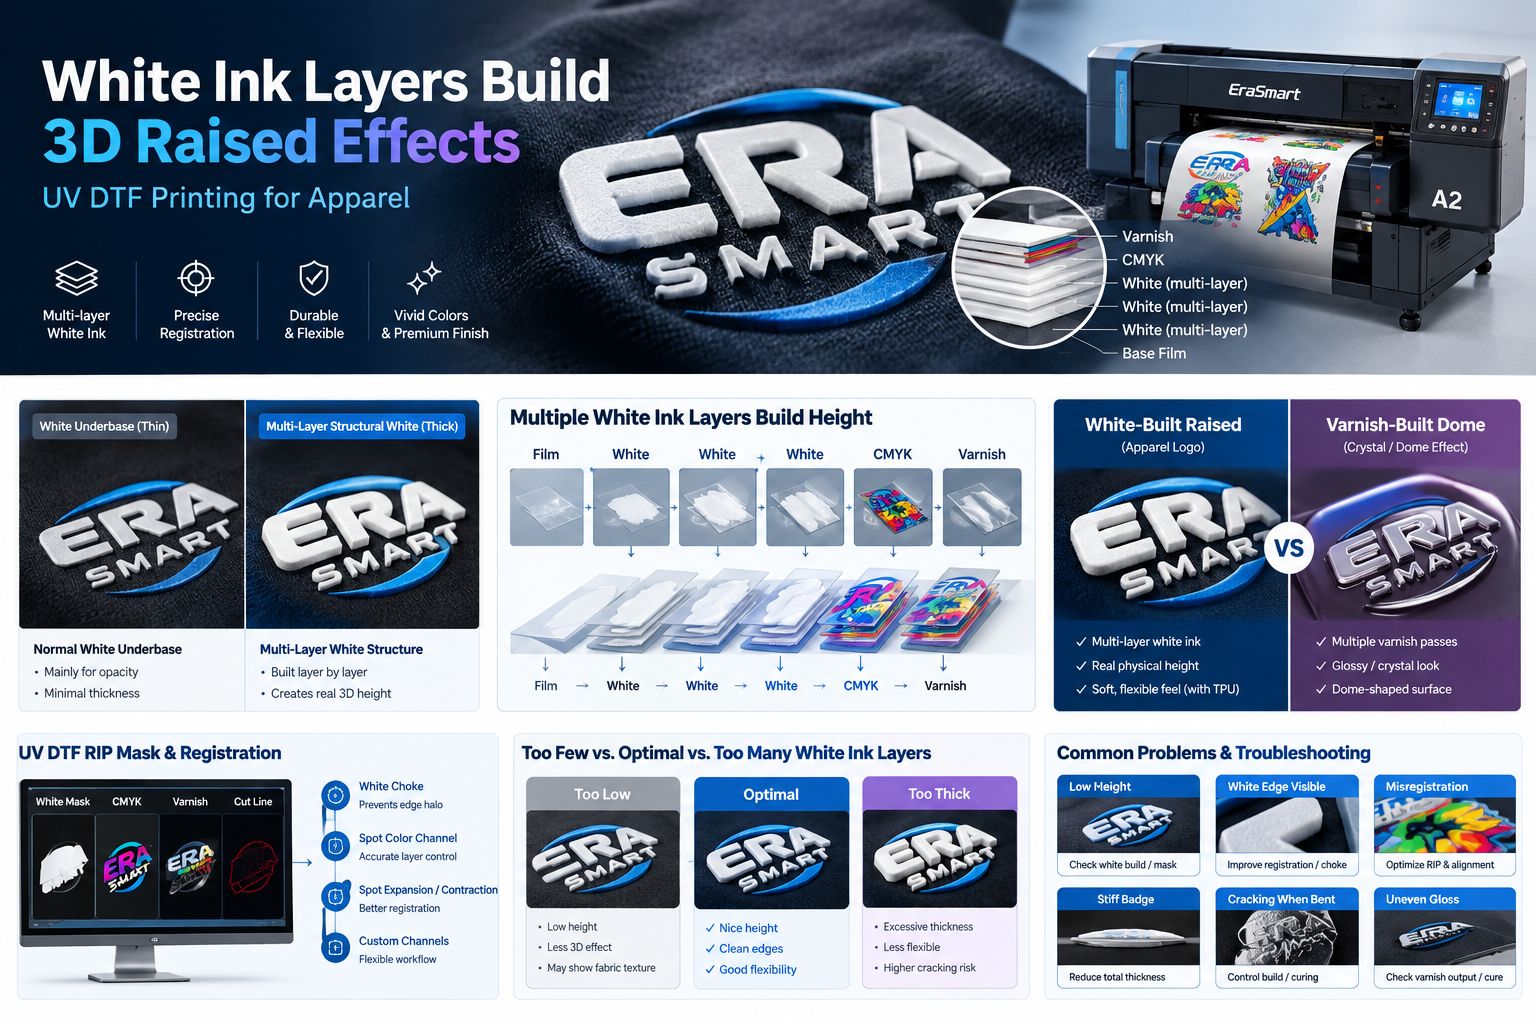
Problem 1: Raised Effect Is Too Low
Possible causes:
- insufficient structural white build
- incorrect white mask
- reduced white output
- incomplete structural areas
First confirm that the white mask actually covers the intended raised elements.
Then verify output and nozzle condition before increasing the total build.
Problem 2: White Edge Is Visible
Possible causes:
- white mask extends too far
- poor white choke
- registration shift
- media movement
Check the white-to-CMYK relationship in RIP before assuming that more ink is required.
Problem 3: CMYK Is Misaligned with the Raised Structure
Possible causes:
- multi-pass registration error
- unstable film feeding
- printhead alignment issue
- RIP positioning problem
This becomes increasingly visible as physical height increases.
Problem 4: Badge Feels Too Stiff
Possible causes:
- excessive total thickness
- too many structural layers
- incompatible ink and film
- excessive curing
Try to achieve the target visual height with the minimum stable structural build.
Problem 5: Logo Cracks When Bent
Check:
- total white thickness
- curing
- ink flexibility
- film compatibility
- garment application
Do not evaluate flexibility only before heat transfer.
The final badge must be tested on the finished garment.
Problem 6: Varnish Looks Uneven
Possible causes include:
- nozzle issues
- incorrect varnish mask
- poor curing
- contamination
- registration problems
Remember that a good white structure can still look low-quality if the finishing layer is inconsistent.
White Ink Height Building vs Standard UV DTF Crystal Stickers
It is useful to separate 3D apparel logos from standard UV DTF stickers.
Both may involve:
- CMYK
- white ink
- varnish
- UV curing
But their production goals are different.
| 3D Raised Apparel Logo | Standard UV DTF Crystal Sticker | |
|---|---|---|
| Primary substrate | Textile | Hard surface |
| White ink role | Opacity + structural height | Primarily opacity |
| Height strategy | Multi-layer structural build | Normally much flatter |
| Varnish role | Final gloss / definition | Gloss / visual texture |
| Film | Apparel-compatible transfer film | UV DTF A/B film |
| Finishing | Contour cutting | Film transfer workflow |
| Application | Heat press | Pressure / cold transfer |
| Typical product | Hoodie, cap, jersey | Bottle, acrylic, glass, metal |
If you want to understand the conventional crystal-label workflow, see How to Make UV DTF Stickers at Home.
The two applications can use a similar printer platform, but the film, ink profile, processing and final transfer method are not the same.
Which EraSmart Printer Platform Can Be Used?
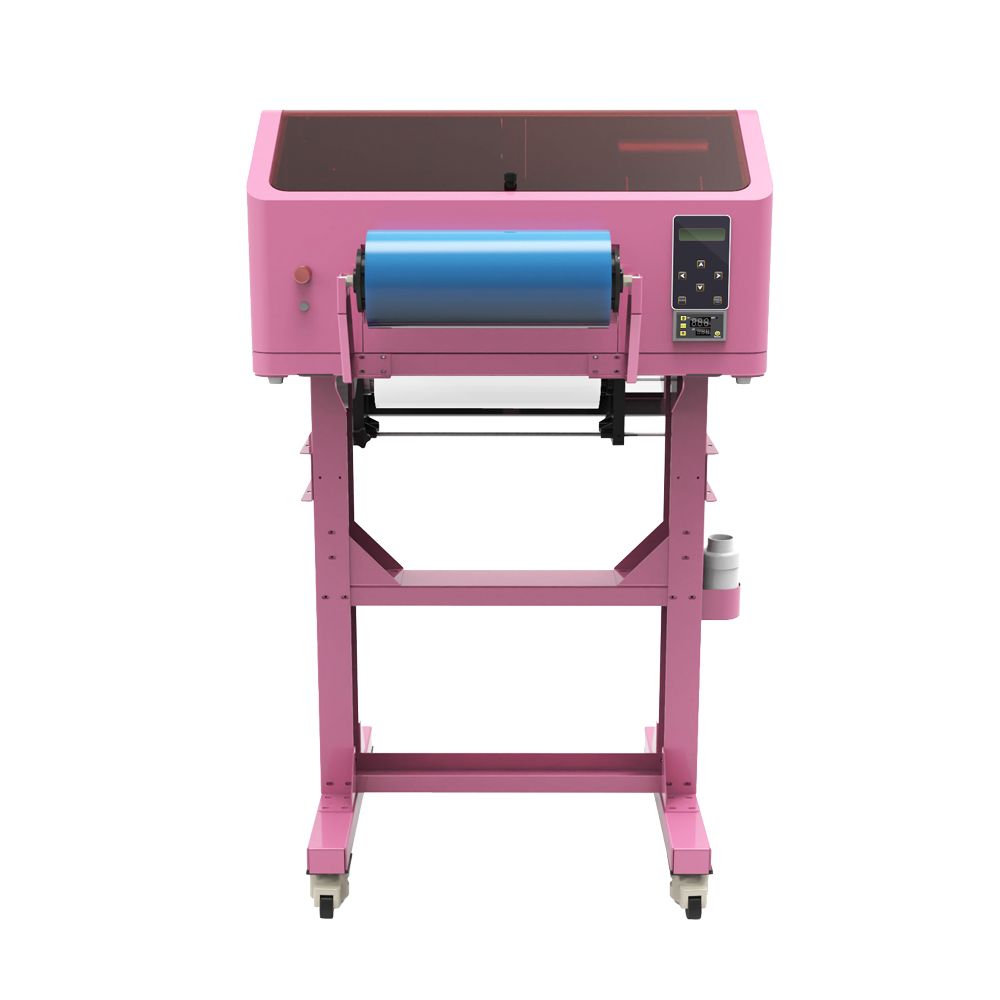
The EraSmart A2 UV DTF Printer provides the machine platform used for this type of application when paired with the appropriate ink, film and production settings.
The A2 platform is available with different printhead configurations for different production requirements.
The key requirement for a 3D raised workflow is not simply the printhead name.
The complete system must support:
- controlled white output
- repeated structural printing
- accurate CMYK registration
- varnish output
- appropriate curing
- compatible film
- contour cutting
- garment heat transfer
The final quality depends on how these components work together.
How to Develop a Stable White-Layer Profile
When setting up production, do not begin with the maximum possible height.
A better development process is:
1. Start with a moderate structural build
Confirm that the white structure prints cleanly and evenly.
2. Check sidewall definition
Look at the badge from an angle.
The edges should remain consistent rather than spreading unpredictably.
3. Add CMYK and varnish
Confirm that color and finishing layers stay aligned with the white foundation.
4. Contour cut the sample
Make sure the raised structure does not interfere with the cutting path.
5. Heat transfer to the actual garment
A sample on film is not the final product.
Evaluate the transferred badge.
6. Test bending and washing
Check real-world performance.
7. Increase or reduce height only after testing
Optimize for the final product instead of simply maximizing thickness.
This approach is slower during initial development but produces a much more repeatable production profile.
Final Takeaway
White ink is what transforms this application from a conventional printed graphic into a physically raised textile badge.
In the EraSmart 3D raised-logo workflow:
White ink builds the structure.
CMYK creates the visual design.
Varnish creates the surface finish.
The key is not simply printing more white ink.
Successful production requires controlled layer buildup, accurate registration, proper UV curing, compatible film and enough flexibility for the final garment.
The best 3D effect is therefore not necessarily the thickest one.
It is the structure that achieves the required height and tactile appearance while still transferring cleanly and performing reliably on apparel.
To see the complete production sequence from artwork through contour cutting and heat transfer, continue with How to Make 3D Raised Logos with a UV DTF Printer: Complete Workflow.
If you are evaluating equipment for this application, explore the EraSmart A2 UV DTF Printer and the complete 3D Raised Logo Printing Solution.
Frequently Asked Questions
What creates the height in an EraSmart 3D raised logo?
In the workflow described here, repeated white UV ink layers create most of the physical height. CMYK is printed over the structure for color, and varnish provides the final glossy surface.
Is white ink normally used to create height?
In conventional UV printing, white ink is usually used mainly for opacity or as an underbase. In this specific 3D raised-logo process, the white layer is repeated and used as a structural build material.
Is varnish responsible for the 3D effect?
It depends on the application. Some crystal or dome effects use repeated varnish layers for height. In the EraSmart raised apparel logo workflow discussed here, multi-layer white ink builds the main structure and varnish is primarily used for surface gloss and visual depth.
How many white layers should I print?
There is no universal number. The correct build depends on the ink, film, logo size, target height, curing conditions and required flexibility. Production testing should determine the final profile.
Does more white ink always create a better logo?
No. Excessive structural buildup can increase rigidity, printing time, ink consumption and the risk of registration or cracking problems.
Why can I see a white border around my design?
The white mask may extend beyond the CMYK artwork, or the layers may be misregistered. White choking and accurate layer alignment can help reduce visible white edges.
Why does my 3D badge crack when bent?
Possible causes include excessive total thickness, over-curing, unsuitable consumables or insufficient flexibility in the complete ink/film system.
Why is the height uneven?
Check white ink circulation, nozzle condition, RIP masks, media stability and curing. Multi-layer printing can amplify small inconsistencies that might be less obvious in a normal single-layer job.
Can the same UV DTF printer make both crystal labels and 3D apparel logos?
The same printer platform may support both applications, but the ink profile, film, processing and final transfer method are different. Standard UV DTF crystal labels normally use A/B film for hard surfaces, while raised apparel logos use a dedicated textile transfer workflow.
What should I test before mass production?
Check height, registration, gloss, edge quality, contour cutting, garment adhesion, flexibility and wash performance using the actual film, ink and garment intended for production.
MAY BE YOU LIKE ALSO
Copyright 2020 © EraSmart. | Sitemap