Small Size Flatbed Inkjet Printer Manufacturer

UV Printing on 3D-Printed Parts: Materials, Workflow and Product Ideas
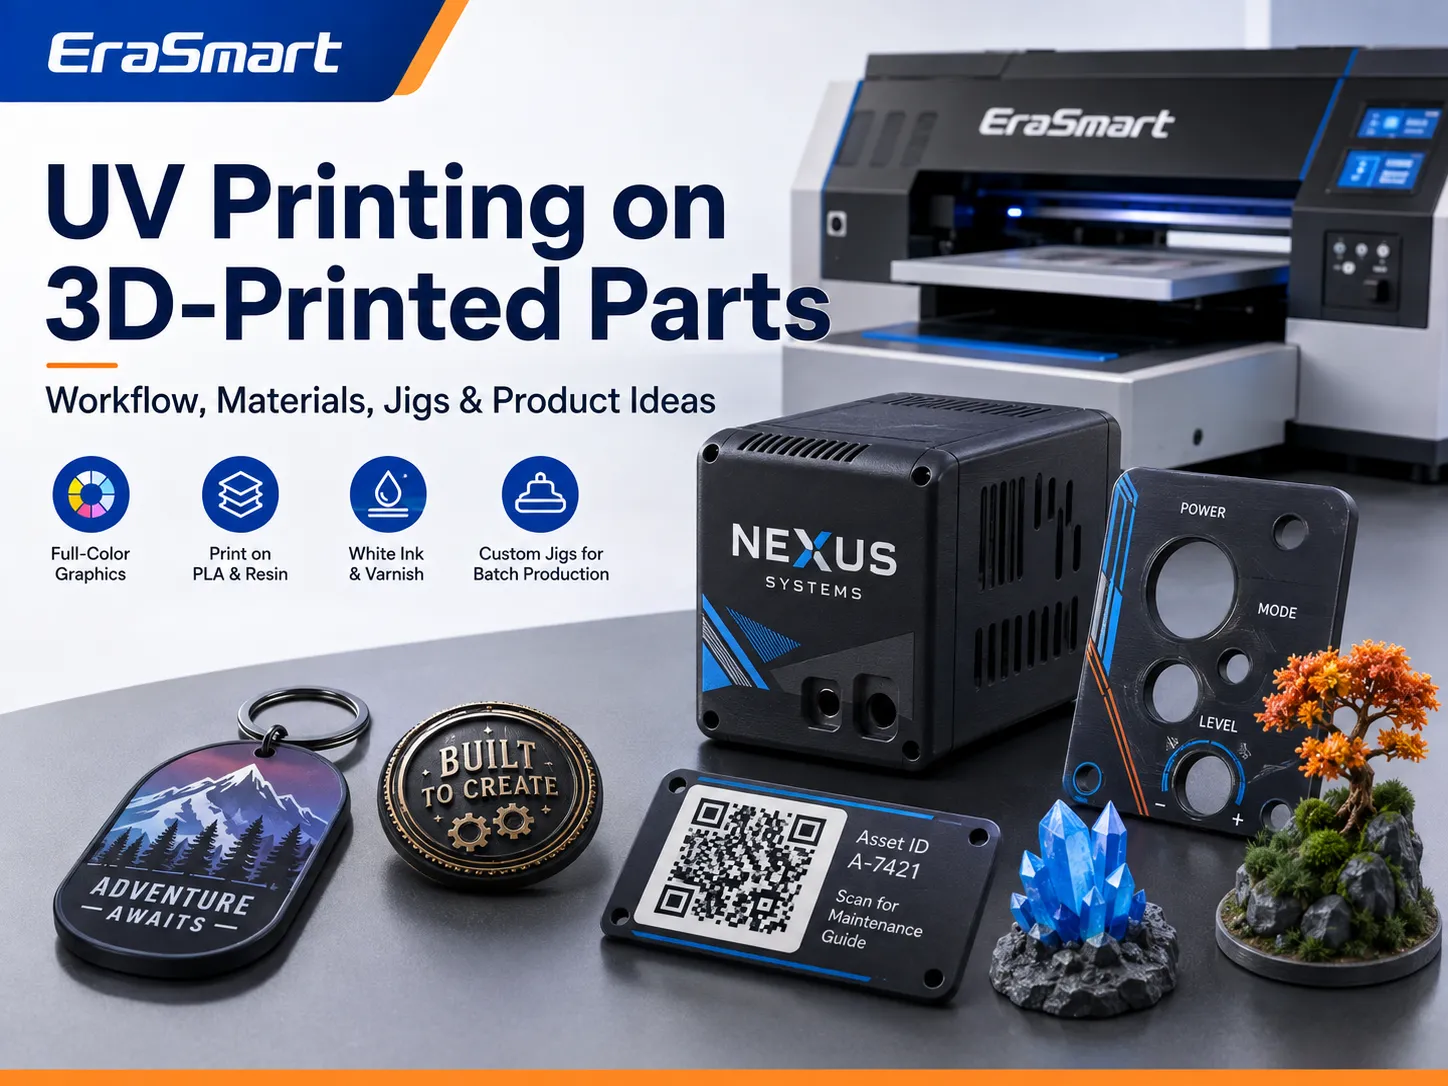
Which 3D-Printing Materials Can Be UV Printed?
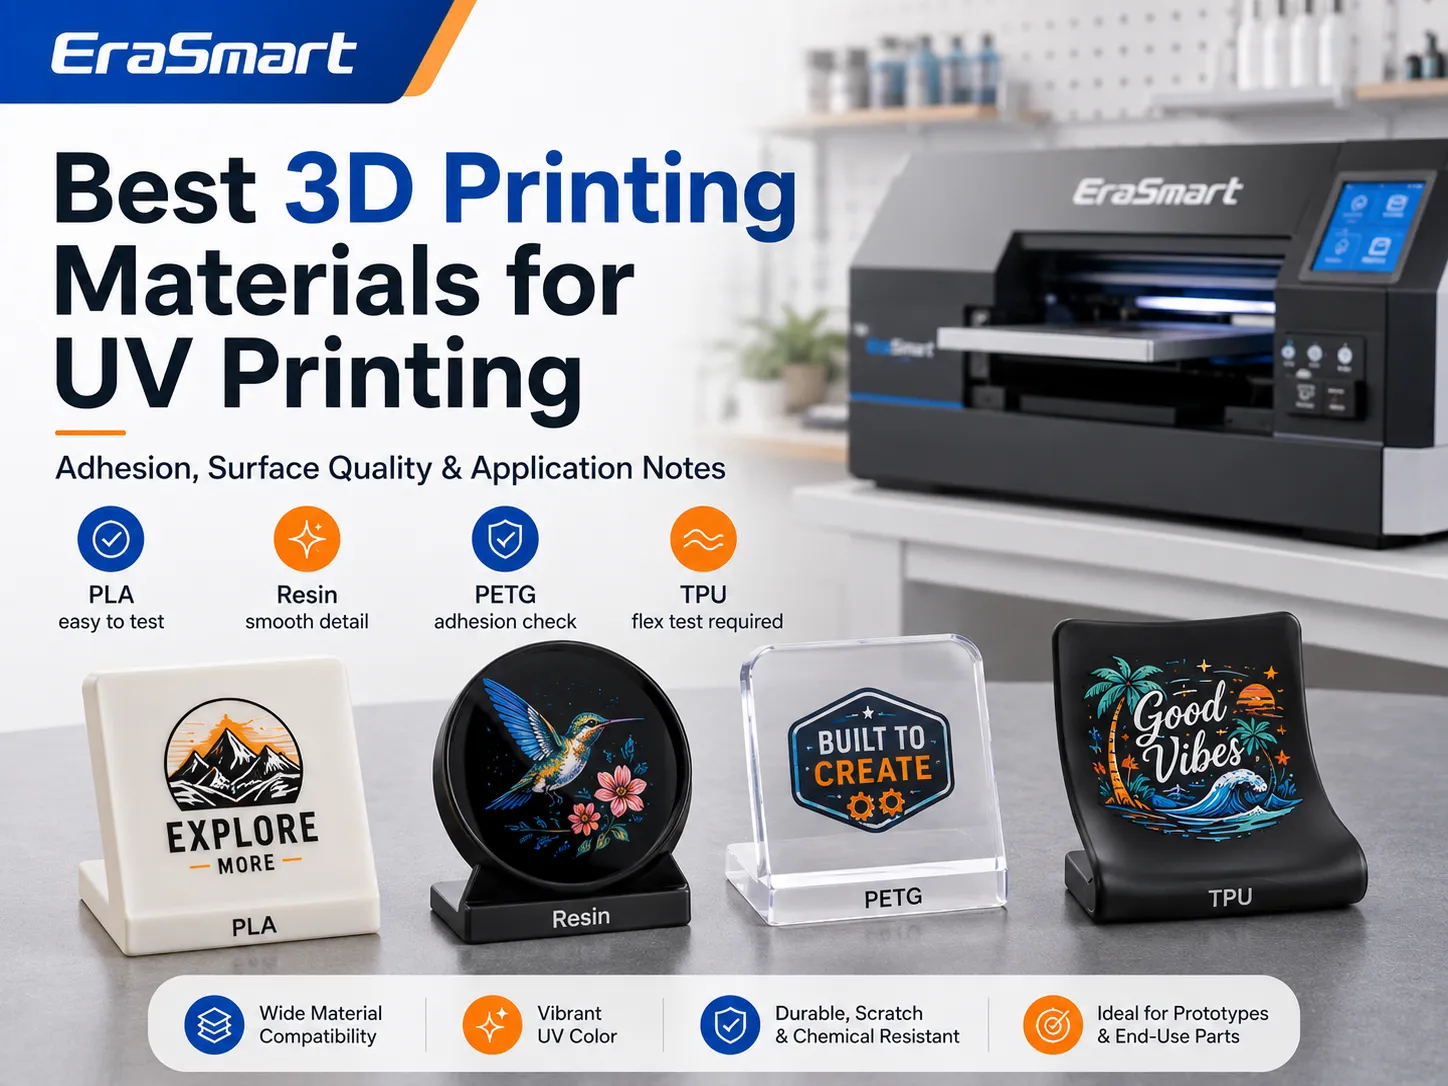
There is no universal material list that guarantees perfect adhesion.
Filament brands may contain different pigments, fillers, recycled content, surface modifiers and additives. Resin formulations also vary considerably.
Use the following table as a testing guide rather than a guarantee.
| 3D-printing material | UV-printing potential | Main risk | Recommended approach |
|---|---|---|---|
| PLA | Often suitable for testing | Layer lines, additives and variable adhesion | Smooth, clean and test |
| ABS | May be suitable | Surface chemistry and warping | Clean carefully and test primer |
| PETG | May be suitable | Smooth or low-adhesion surface | Perform scratch and tape tests |
| Standard resin | Suitable after correct post-processing | Uncured resin, residue and brittle surface | Wash, fully cure and clean |
| Tough or engineering resin | Material-dependent | Additives and surface variation | Test the exact resin |
| Nylon | More difficult | Moisture absorption and adhesion | Dry, prepare and consider primer |
| TPU | Higher risk | Flexible surface may crack rigid ink | Test bending and ink flexibility |
| Filled filament | Material-dependent | Carbon fiber, wood or metal filler affects surface | Test each formulation |
| Painted or primed part | Often more consistent | Coating compatibility | Use a compatible, fully cured coating |
PLA
PLA is widely used for prototypes, keychains, signs, models and decorative products.
It may provide a practical UV-printing surface, but performance depends on:
- Filament brand
- Surface texture
- Printing temperature
- Layer height
- Pigment
- Surface contamination
- Primer or coating
- Ink formulation
A smooth, flat PLA panel is usually easier to print than a rough model with visible layer lines and steep surface changes.
White PLA may reduce the need for a heavy white ink underbase in some designs. However, the surface color should not be treated as a substitute for testing color density and adhesion.
ABS
ABS is commonly used for enclosures, tools, prototypes and functional parts.
Before UV printing, inspect the surface for:
- Oil
- Fingerprints
- Dust
- Smoothing residue
- Surface coatings
- Warping
A solvent-smoothed ABS surface may look attractive but can behave differently from an untreated printed surface. Allow all surface treatments to stabilize fully before testing UV ink.
PETG
PETG is widely used for functional products and parts requiring greater impact resistance than standard PLA.
Its relatively smooth surface may require careful adhesion testing.
Test:
- Direct UV printing
- Approved primer
- Lower or higher ink density
- Different curing modes
- Scratch resistance after curing
Do not assume that settings developed for PLA will work on PETG.
Resin 3D Prints
Resin prints must be properly post-processed before UV printing.
They should be:
- Fully washed
- Free from uncured resin
- Properly post-cured
- Dry
- Free from support residue
- Stable under UV exposure
Support marks, layer artifacts and surface defects may remain visible after printing. Sanding and priming are standard approaches for preparing 3D-printed parts for a cleaner finish because coatings do not automatically hide underlying surface defects. (Formlabs)
TPU and Flexible Parts
Flexible parts are more challenging because a standard UV ink layer may be less flexible than the substrate.
When the product bends, the printed area may:
- Crack
- Separate
- Develop white stress marks
- Lose adhesion
- Change gloss
Use a compatible flexible ink system where available and test the product through the expected bending cycle.
For highly flexible or irregular objects, UV DTF may sometimes be more suitable than direct flatbed printing.
How to UV Print on 3D-Printed Parts
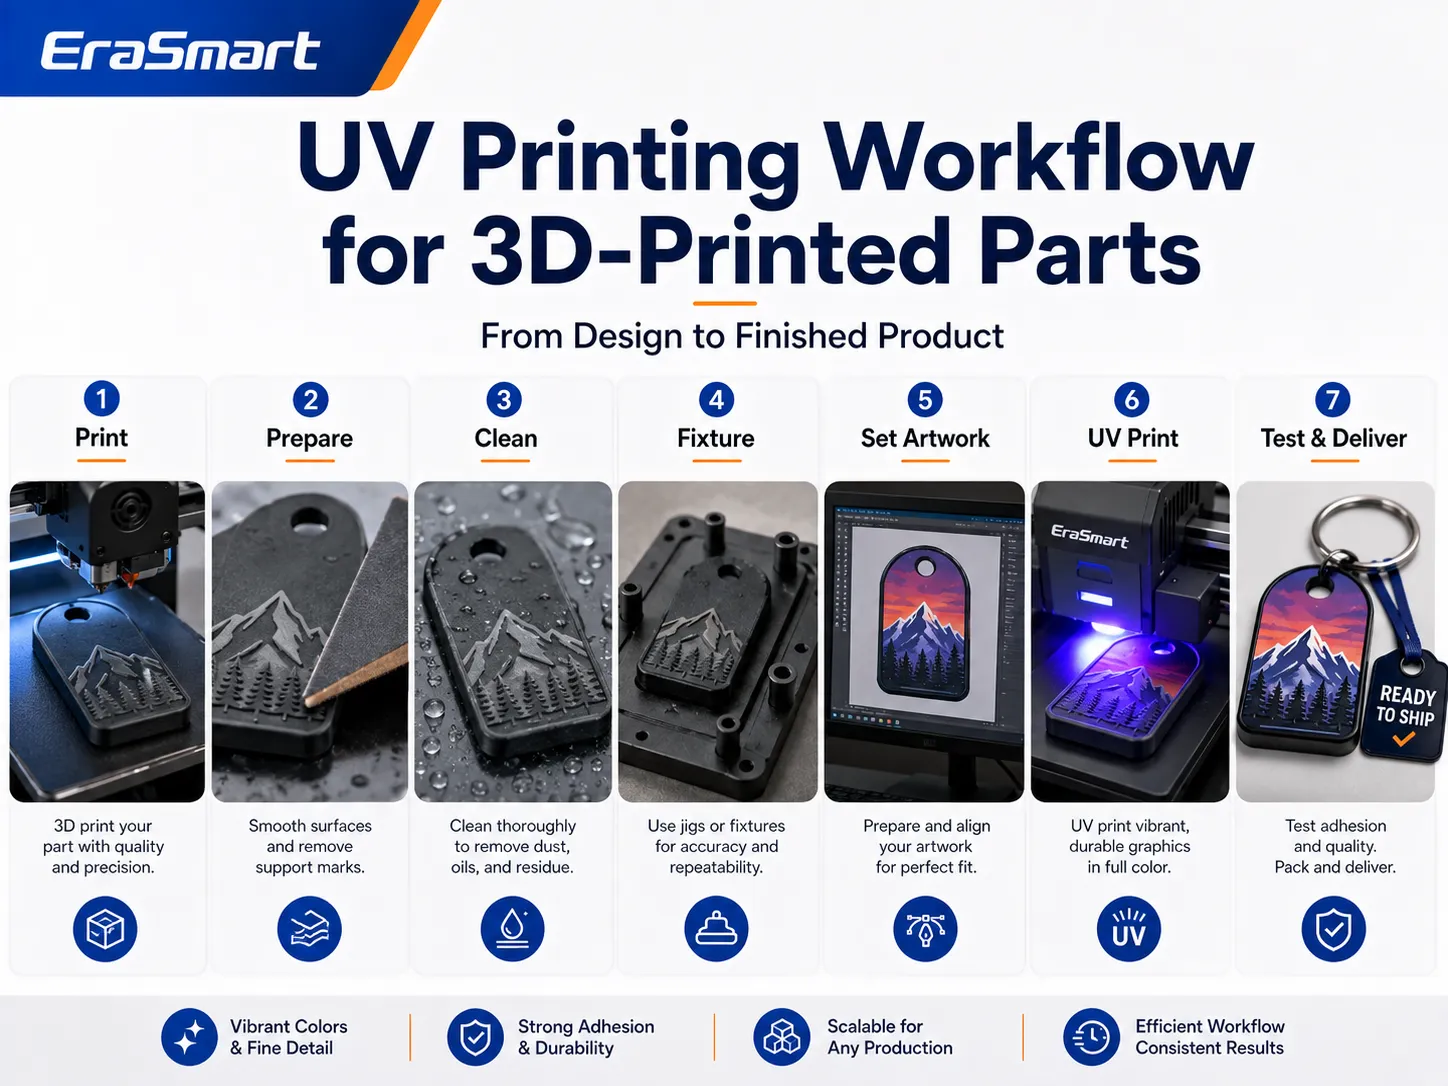
Step 1: Design the Part and Printable Area
Before 3D printing, confirm:
- Final product dimensions
- Printable surface size
- Required artwork position
- Product orientation
- Jig location
- Maximum printer height
- Required white or varnish layers
Designing for UV printing is more reliable than adapting the product after manufacturing.
Step 2: Produce the 3D-Printed Part
Print the part using settings that provide a stable, consistent surface.
Consider:
- Layer height
- Top-layer quality
- Surface flatness
- Warping
- Support placement
- Filament color
- Print orientation
Place support structures away from the final printing area whenever possible.
Step 3: Remove Supports and Surface Defects
Remove:
- Support structures
- Brims
- Rafts
- Stringing
- Sharp edges
- Loose material
- Raised seams
If the printable surface contains visible layer lines, sand it carefully.
A UV printer can reproduce fine graphics, but it cannot remove the underlying surface texture.
Step 4: Sand or Prime When Required
Surface preparation may include:
- Light sanding
- Filler primer
- Plastic-compatible primer
- Clear coating
- Surface smoothing
After sanding:
- Remove all dust.
- Clean the surface.
- Allow the part to dry.
- Apply a compatible primer if required.
- Allow the primer to cure fully.
- Test the surface before production.
Priming can create a more uniform surface, but a thick coating may hide fine 3D-printed details. Use only enough treatment to create the required finish. (Formlabs)
Step 5: Clean the Product
Remove:
- Dust
- Fingerprints
- Oil
- Sanding particles
- Cleaning residue
- Uncured resin
- Packaging contamination
Use a cleaning method compatible with the plastic or resin.
Do not assume that a strong solvent is safe for every printed material.
Handle the cleaned product with gloves to avoid adding new fingerprints.
Step 6: Create a Jig or Fixture
A jig holds the product in a repeatable position.
The jig should:
- Prevent movement
- Keep the product level
- Position the print area correctly
- Avoid obstructing the printhead
- Make loading simple
- Support batch production
One major advantage of combining 3D and UV printing is that the same 3D printer can produce customized jigs for different products.
EraSmart’s UV printing workflow recommends jigs and templates for repeated products because they improve positioning speed, consistency and operator training. (EraSmart)
Step 7: Prepare the Artwork
Prepare the artwork at the exact final print dimensions.
Possible artwork layers include:
- CMYK layer
- White ink layer
- Varnish layer
- Positioning reference
- Cut or product outline
Check:
- Resolution
- Color
- Text
- Orientation
- Bleed
- White underbase
- Varnish placement
- Product alignment
Step 8: Choose the Ink Layer Structure
Common configurations include:
CMYK Only
Suitable for:
- White parts
- Light-colored parts
- Designs not requiring opacity
White + CMYK
Suitable for:
- Black parts
- Dark parts
- Colored substrates
- Transparent resin parts
- Strong color reproduction
CMYK + Varnish
Suitable for:
- Spot gloss
- Highlighted details
- Decorative surface effects
White + CMYK + Varnish
Suitable for:
- Premium products
- Dark parts
- Raised logos
- High-value personalized products
The correct layer order depends on the product color, viewing direction and desired finish.
Step 9: Set the Product Height
Measure the product and fixture together.
Confirm:
- Maximum height
- Highest point
- Surface flatness
- Printhead clearance
- Jig position
Incorrect height can cause blurred output or printhead collision. EraSmart’s production workflow identifies height adjustment as one of the most important steps for protecting the printhead and maintaining image sharpness. (EraSmart)
Step 10: Run a Nozzle Test
Before printing the product, check:
- Cyan
- Magenta
- Yellow
- Black
- White
- Varnish
Do not print a finished 3D part when the nozzle pattern is incomplete.
A failed UV print may require discarding or refinishing a product that took several hours to 3D print.
Step 11: Print One Sample
Start with one test product.
Inspect:
- Position
- Image sharpness
- White opacity
- Color density
- Varnish effect
- Curing
- Adhesion
- Surface texture
Do not move directly from a digital mockup to full-batch production.
Step 12: Perform an Adhesion Test
After printing and allowing the product to stabilize according to the ink requirements, perform suitable tests such as:
- Light fingernail test
- Cross-hatch test where appropriate
- Tape test
- Dry cloth rub
- Controlled scratch test
- Flex test for flexible parts
Testing should reflect the product’s real use.
A decorative model does not need the same performance as a frequently handled tool enclosure.
Step 13: Save the Production Settings
Record:
- 3D material
- Filament or resin brand
- Surface treatment
- Primer
- Jig file
- Print height
- RIP mode
- White ink density
- Varnish mode
- Pass count
- Curing setting
- Adhesion result
Saved settings reduce repeated testing and make batch production more consistent.
When Is UV DTF Better Than Direct UV Printing?
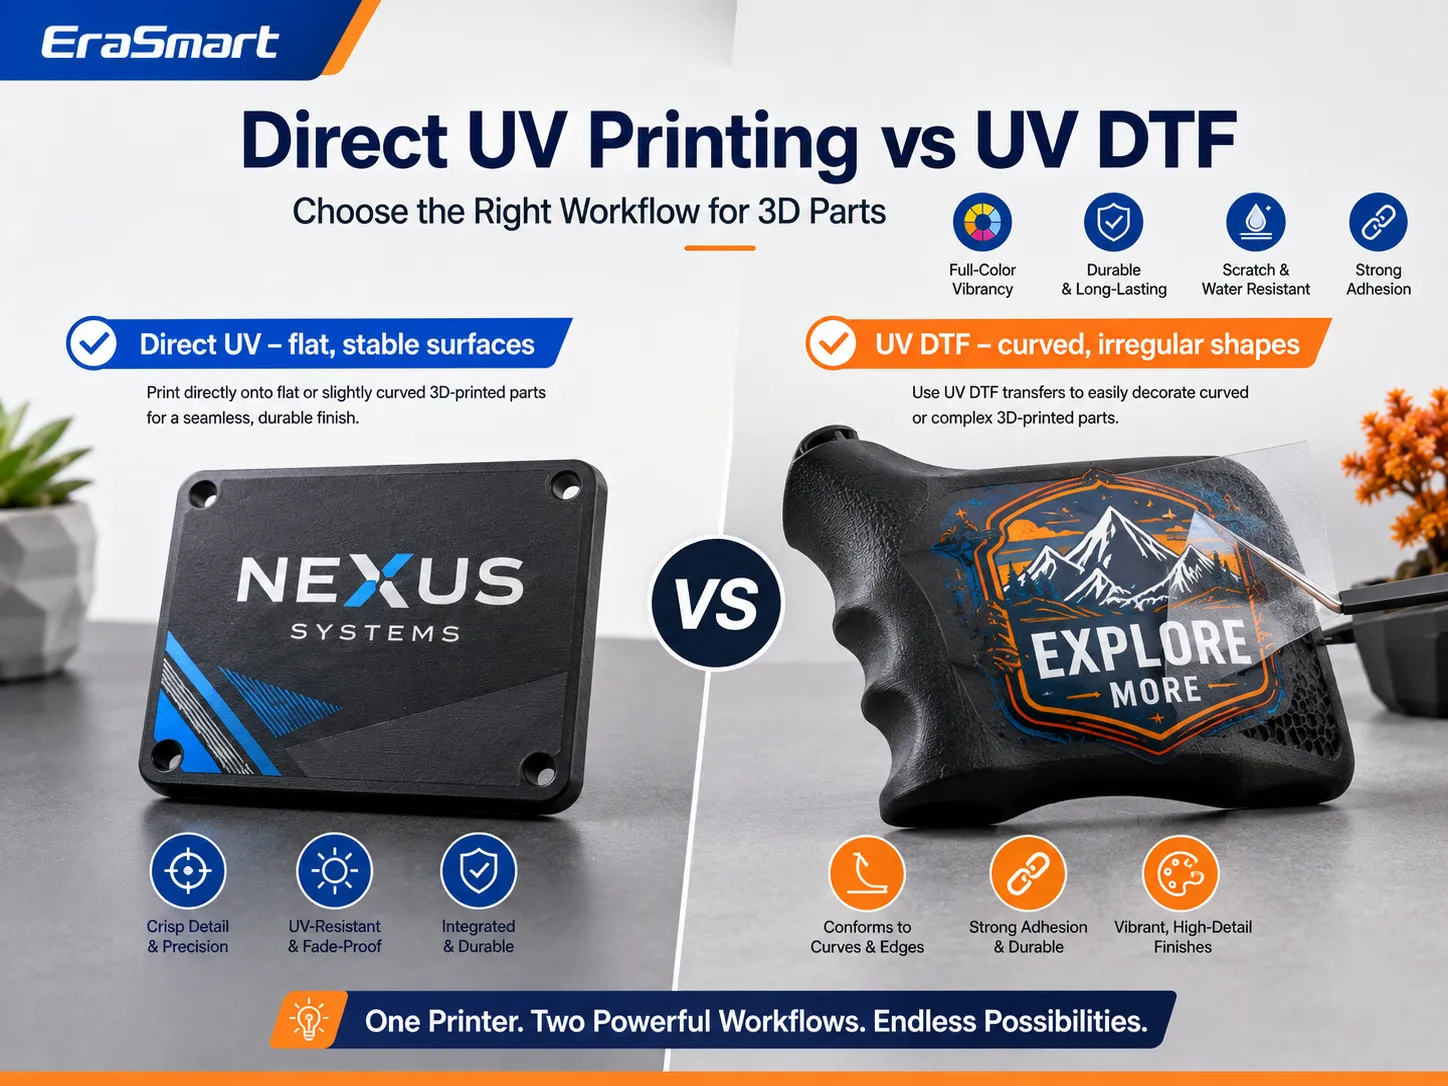
Direct UV flatbed printing is best when the product has a stable, accessible printing area.
UV DTF may be more practical when the product is:
- Curved
- Irregular
- Difficult to fixture
- Too tall for the flatbed
- Already assembled
- Difficult to position accurately
- Required to carry a wraparound graphic
| Product condition | Better starting workflow |
|---|---|
| Flat 3D-printed panel | Direct UV printing |
| Flat keychain face | Direct UV printing |
| Box lid | Direct UV printing |
| Curved bottle-style object | UV DTF |
| Deeply textured model | UV DTF or separate printed insert |
| Irregular cosplay prop | UV DTF or modular flat components |
| Repeated flat badge | Direct UV printing with jig |
| Full wrap around complex geometry | UV DTF or alternative finishing method |
Read UV DTF printer vs UV printer for a complete comparison between direct printing and film-transfer workflows.
Product Ideas for UV-Printed 3D Parts
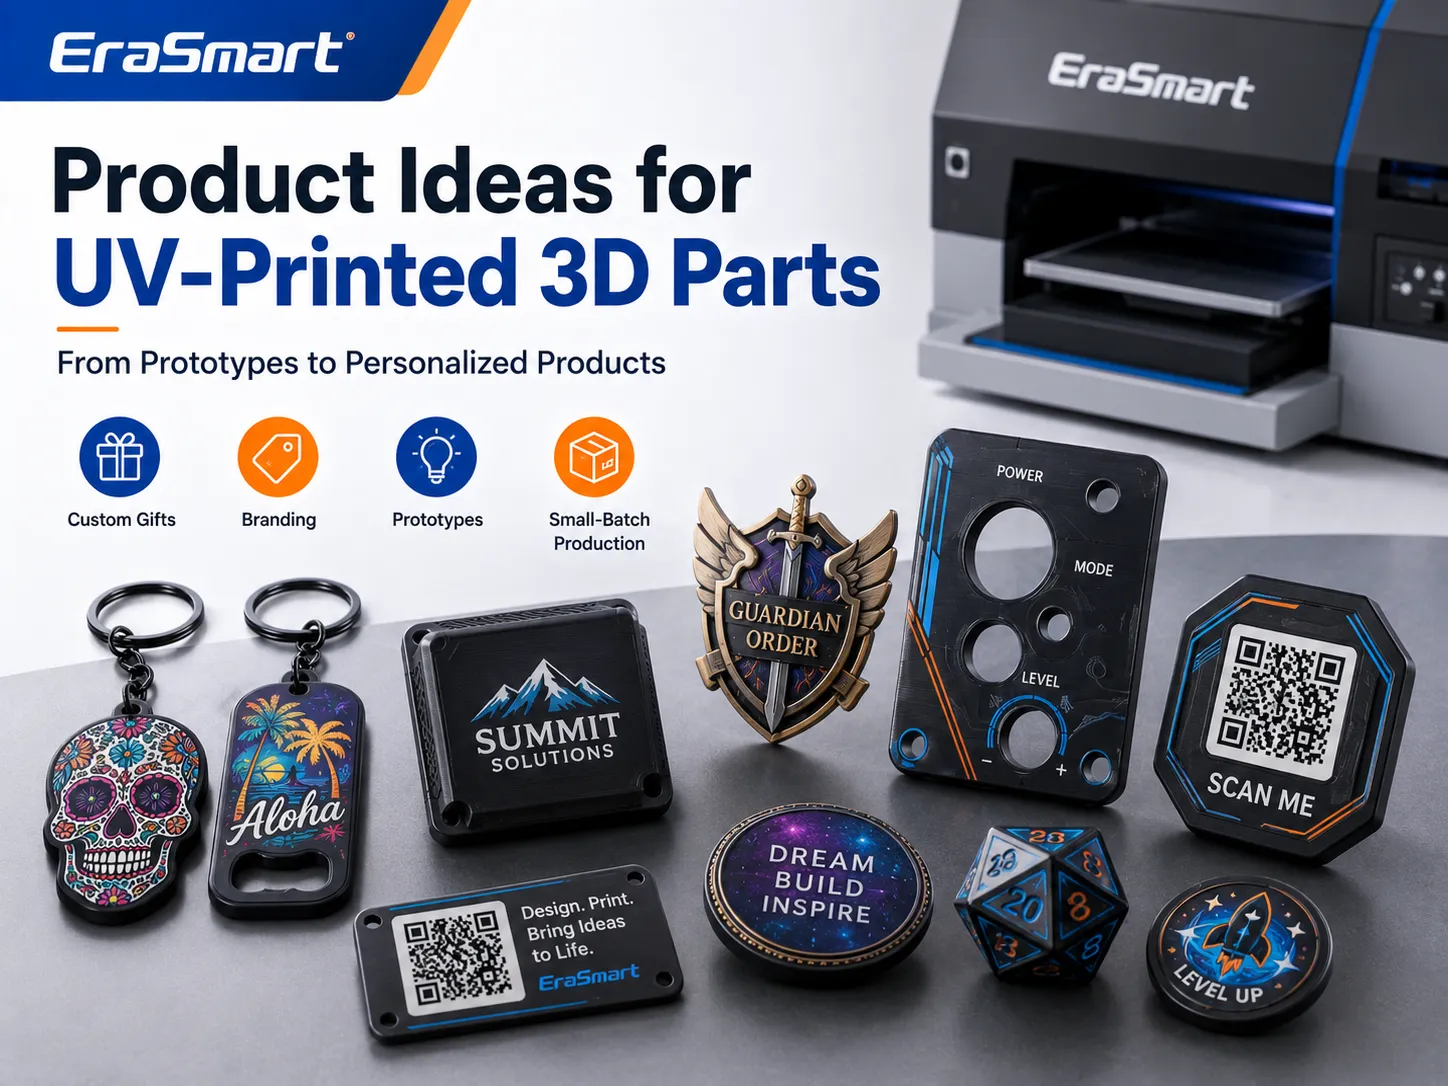
Full-Color Keychains
3D print the basic shape and use the UV printer for:
- Names
- Logos
- Photographs
- Character artwork
- Event information
- QR codes
Keychains are suitable for testing because they are small and easy to place in batch jigs.
QR Code Labels and Workshop Tags
3D-print:
- Storage-bin labels
- Filament tags
- Tool labels
- Shelf markers
- Material identification plates
Then add:
- QR codes
- Material type
- Color number
- Purchase date
- Inventory information
- Safety instructions
Always test whether the printed QR code scans reliably at the intended size.
Product Housings and Enclosures
Possible products include:
- Electronic project boxes
- Sensor enclosures
- Controller housings
- Prototype panels
- Small equipment covers
UV printing can add:
- Port labels
- Button icons
- Warning text
- Branding
- Serial numbers
- Control diagrams
Control Panels
A 3D-printed control panel can include physical openings and mounting features.
UV printing can add:
- Button names
- Direction arrows
- Status icons
- Scales
- Operating instructions
- Safety information
Do not use UV-printed safety markings for regulated applications without appropriate material and durability validation.
Custom Badges and Nameplates
Create:
- Staff badges
- Event badges
- Equipment plates
- Door signs
- Desk nameplates
- Product identification labels
Variable data allows each piece to use a different name, number or department.
Cosplay Accessories
3D printing can create:
- Armor components
- Emblems
- Prop panels
- Decorative plates
- Device interfaces
UV printing can add:
- Fine patterns
- Artificial wear
- Small symbols
- Metallic-style artwork
- Control graphics
- Personalized details
For deeply curved components, print separate flat decorative inserts or use UV DTF transfers.
Model and Miniature Bases
UV printing can add:
- Terrain textures
- Labels
- Character names
- Game statistics
- Maps
- Decorative borders
Printing onto the flat base is generally easier than printing onto the full model.
Branded Prototypes
Startups and product designers may need:
- Logo samples
- Packaging mockups
- Control panels
- Product labels
- Investor presentation models
- Retail display prototypes
UV printing can make a single 3D-printed prototype look closer to a finished retail product.
Personalized Game Accessories
Possible products include:
- Card holders
- Token trays
- Score trackers
- Dice boxes
- Player markers
- Game organizers
UV printing can add artwork, numbers, instructions and player names.
Decorative Light Boxes
A 3D printer can produce the:
- Frame
- Housing
- Stand
- Internal structure
A UV printer can decorate a flat front panel or translucent insert with full-color artwork.
Custom Jigs for UV Printing
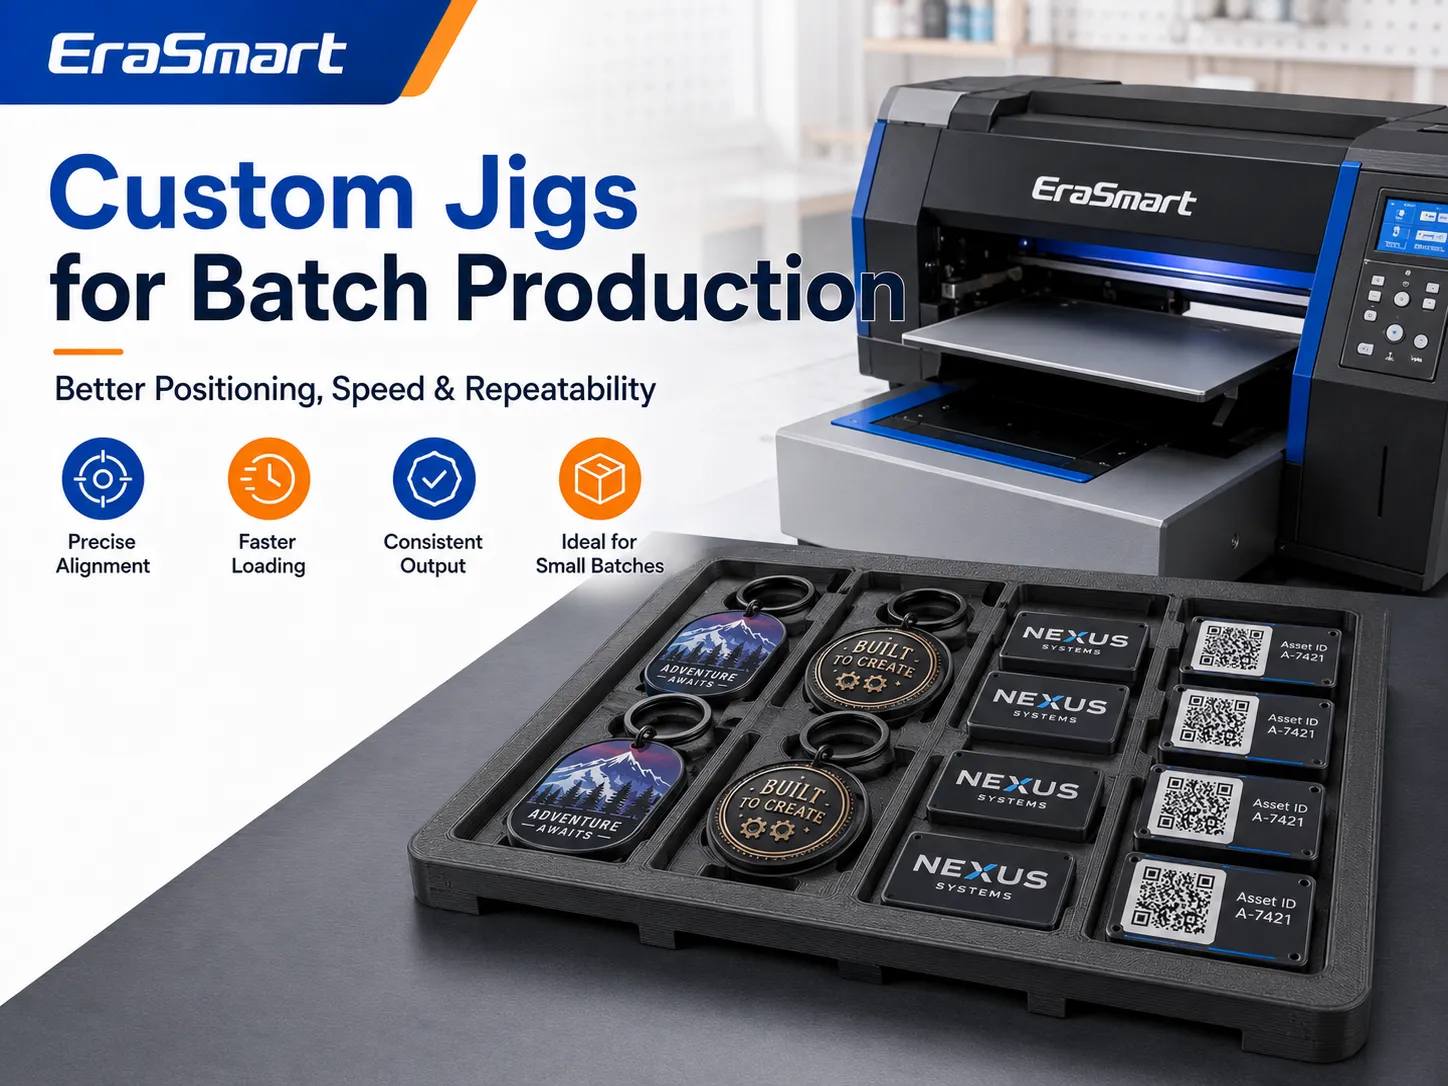
One of the most valuable uses of a 3D printer in a UV workshop is not producing the final product. It is producing the fixture.
3D-printed jigs can be created for:
- Phone cases
- Keychains
- Badges
- Nameplates
- Pens
- Small housings
- Tags
- Product lids
- Promotional gifts
A good jig can improve:
- Loading speed
- Alignment
- Repeatability
- Batch capacity
- Operator consistency
- Product protection
Jig Design Tips
Keep the Product Level
The printed surface should remain parallel to the printer bed.
Avoid High Fixture Walls
Fixture edges should not rise above the printing surface or create a printhead collision risk.
Include Removal Space
Add finger gaps or ejection holes so completed products can be removed without scratching them.
Use Registration Features
Include:
- Corner stops
- Pins
- Recesses
- Slots
- Product outlines
Label the Jig
Print or engrave:
- Product model
- Orientation
- Artwork file name
- Quantity
- Date or revision
Test Heat and Chemical Resistance
The jig should remain stable around UV light, ink, cleaning materials and normal workshop temperatures.
MAY BE YOU LIKE ALSO

Copyright 2020 © EraSmart. | Sitemap