Small Size Flatbed Inkjet Printer Manufacturer

How to Make UV DTF Stickers at Home: Step-by-Step Guide
UV DTF stickers are a practical way to add full-color graphics, white ink and decorative varnish effects to many smooth, hard surfaces without printing directly onto the final object.
A typical UV DTF workflow looks like this:
Prepare artwork → Print on Film A → UV cure during printing → Laminate with Film B → Trim → Apply to product → Peel carrier
Unlike textile DTF, UV DTF does not use hot-melt powder or a heat press.
Instead, UV-curable ink is printed onto film, cured by UV light, laminated with a transfer film and then applied to compatible hard surfaces.
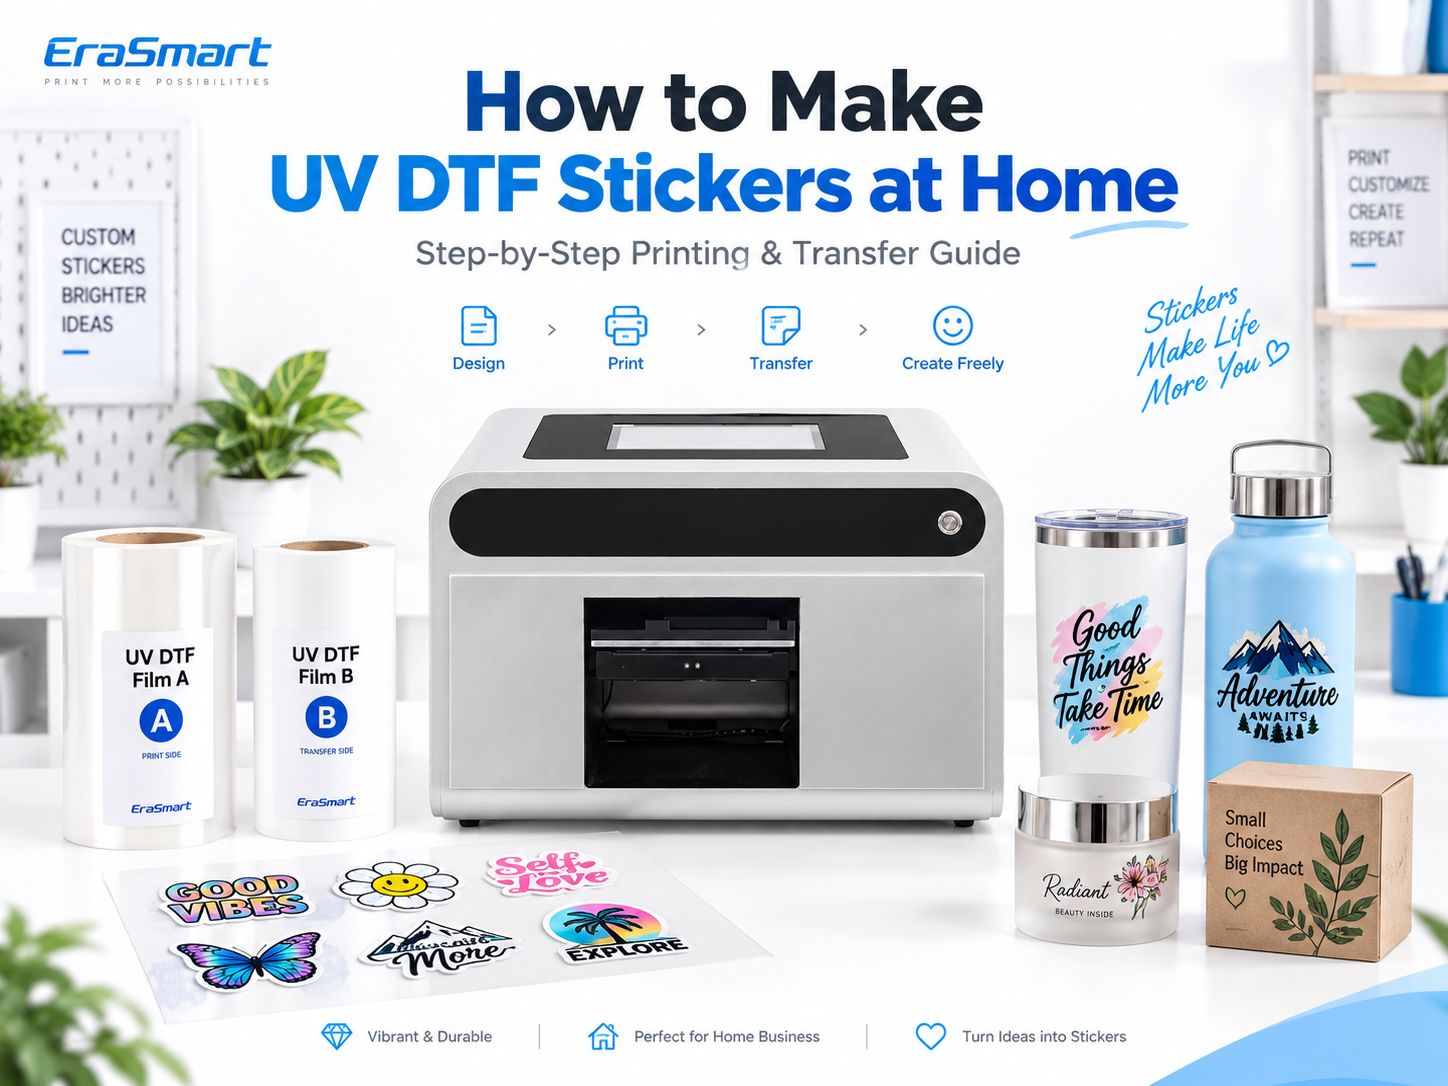
For small businesses, UV DTF can be used to customize products such as:
- bottles
- tumblers
- jars
- glassware
- acrylic
- metal products
- ceramic items
- plastic products
- coated wood
- packaging
- promotional gifts
But successful UV DTF production depends on more than simply pressing Print.
Film quality, white ink, varnish, lamination, surface preparation and final adhesion all affect the result.
Quick Answer: How Do You Make UV DTF Stickers?
The process is:
- Prepare the artwork.
- Load UV DTF Film A.
- Configure CMYK, white and varnish in RIP software.
- Print onto Film A.
- UV cure the ink during printing.
- Laminate the printed film with Film B.
- Trim the transfer.
- Clean the target product surface.
- Apply the transfer.
- Press and burnish.
- Peel the carrier film slowly.
- Inspect the finished result.
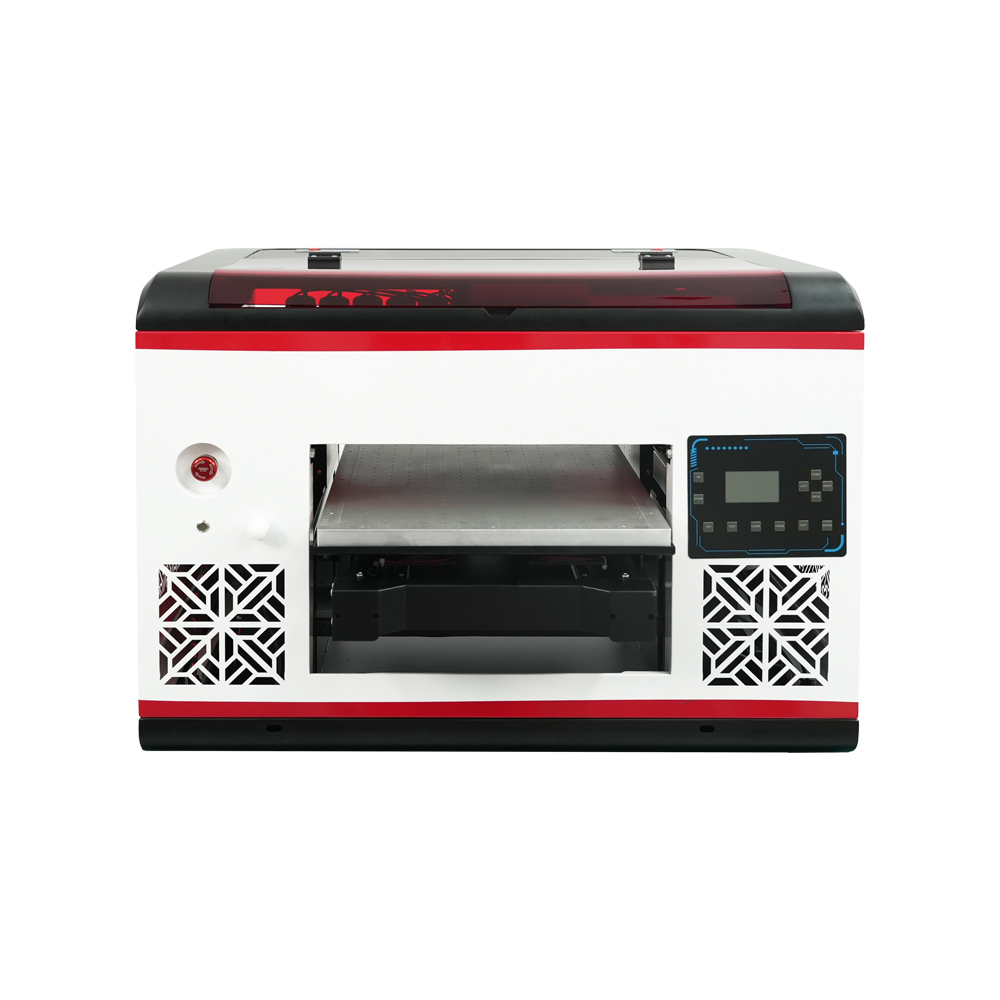
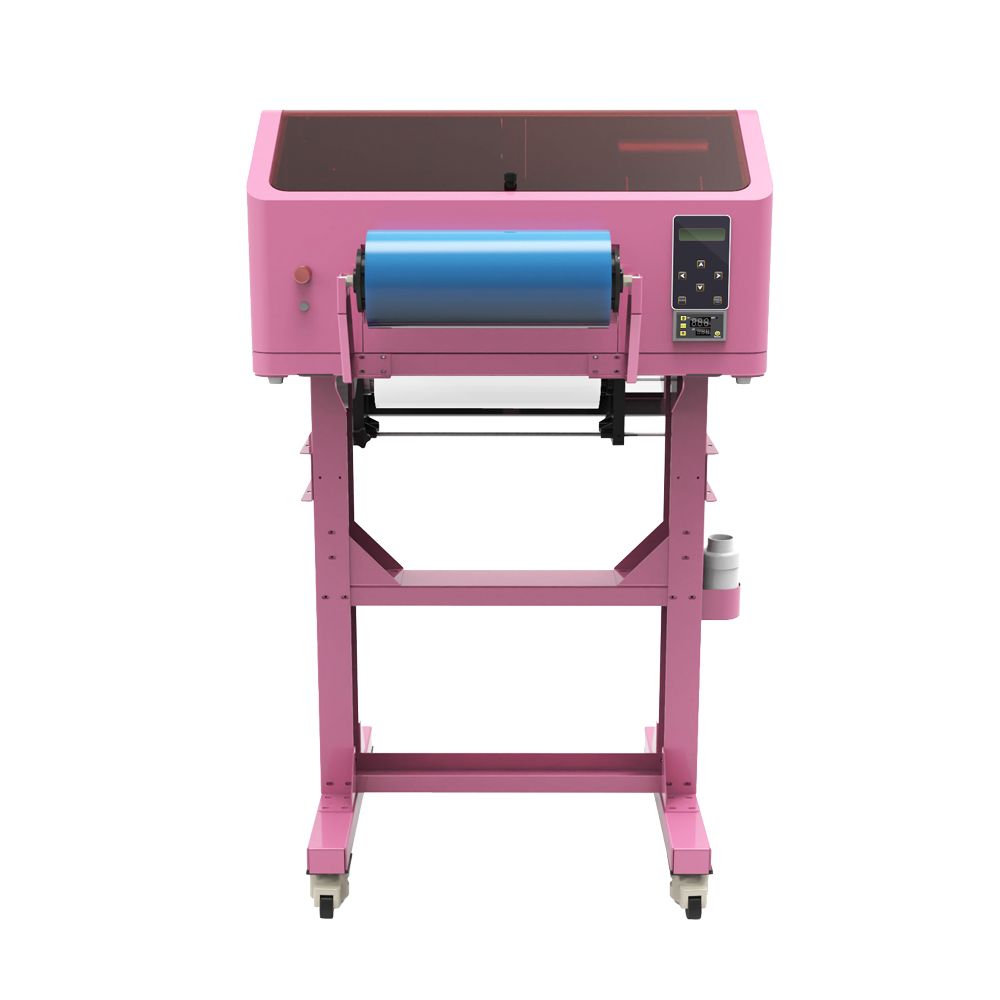
For a production machine designed for this workflow, see the EraSmart UV DTF Printer range.
What Do You Need to Make UV DTF Stickers?
Before printing, prepare the complete workflow rather than only the printer.
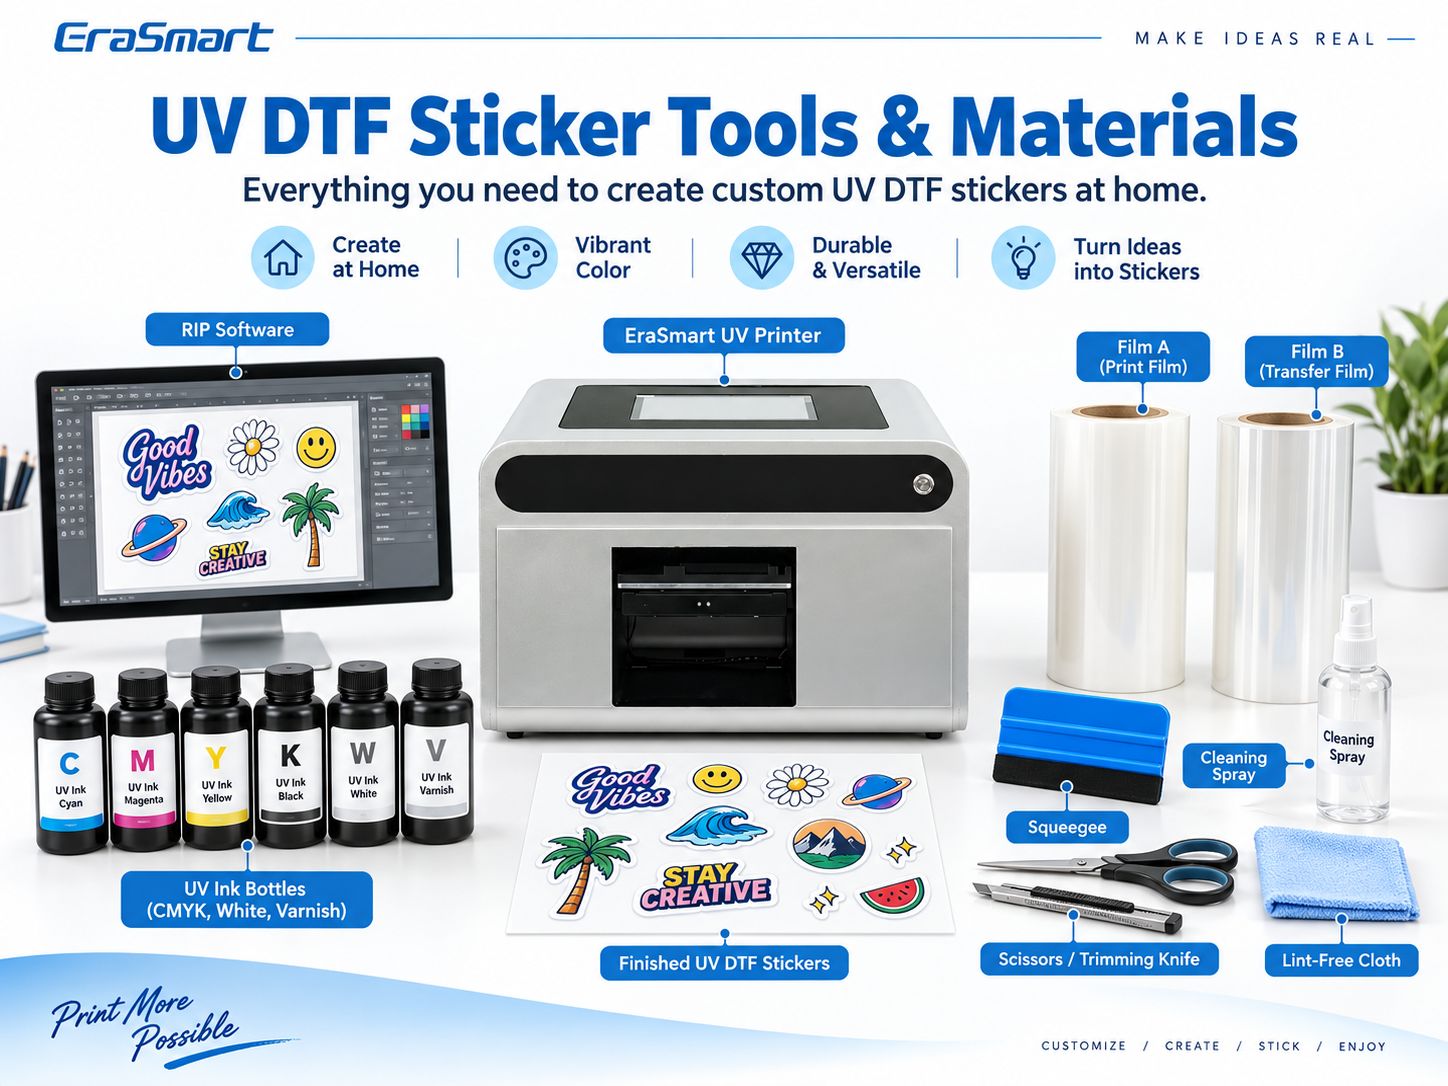
Typical requirements include:
- UV DTF printer
- CMYK UV ink
- white UV ink
- varnish
- Film A
- Film B
- RIP software
- lamination system
- squeegee or scraper
- trimming tools
- lint-free cloth
- suitable cleaning supplies
- test products
UV DTF Printer
A UV DTF printer prints the artwork onto Film A using UV-curable inks.
Depending on the machine configuration, the workflow can include:
- CMYK
- white ink
- varnish
- UV curing
- integrated or separate lamination
EraSmart offers dedicated UV DTF printers for this type of transfer production.
Film A
Film A is the print film.
The ink layers are printed onto its printable surface.
Keep it:
- clean
- flat
- free from fingerprints
- free from dust
Contamination can become visible in the finished transfer.
Film B
Film B is used during the lamination and transfer process.
After Film A has been printed, Film B is laminated to the printed transfer so the design can later be moved to the final product.
For UV DTF film products, see the EraSmart A/B Film range.
UV Ink
The typical ink system includes:
- CMYK
- white
- varnish
Each layer has a different purpose.
For a deeper explanation of UV-curable inks, see What Is UV Ink?.
RIP Software
RIP software controls:
- print size
- layer order
- white ink
- varnish
- print mode
- color management
The correct RIP setup is essential because UV DTF is not simply a standard CMYK print job.
Cleaning and Application Tools
Useful accessories include:
- lint-free cloth
- scraper
- squeegee
- scissors
- trimming knife
- suitable surface cleaner
A clean application surface is critical.
Step 1: Prepare Your Artwork
Good UV DTF production starts with the file.
Prepare the artwork at the final size you intend to transfer.
Use High-Quality Artwork
For raster images, use sufficient resolution at final size.
Around 300 DPI is a practical starting point for close-view artwork.
For:
- logos
- text
- icons
- QR codes
- line graphics
vector artwork is preferable.
Use Transparent Backgrounds Where Appropriate
If the final transfer should contain only the design rather than a rectangular printed background, prepare the artwork accordingly.
Check Small Details
Very thin lines and extremely small text can be difficult to transfer cleanly.
Always test fine artwork physically instead of judging only from the monitor.
Check QR Codes
If the design contains a QR code:
- create the final-size artwork
- print a test
- apply the transfer
- scan the finished product with multiple phones
Do not approve a production run based only on the digital file.
Step 2: Load Film A
Before loading Film A:
- identify the correct printable side
- avoid touching the printable area
- check for dust
- confirm film alignment
- make sure the film tracks correctly
Poor alignment can create:
- skewed printing
- lamination problems
- wasted film
- inconsistent transfer quality
Step 3: Configure CMYK, White and Varnish
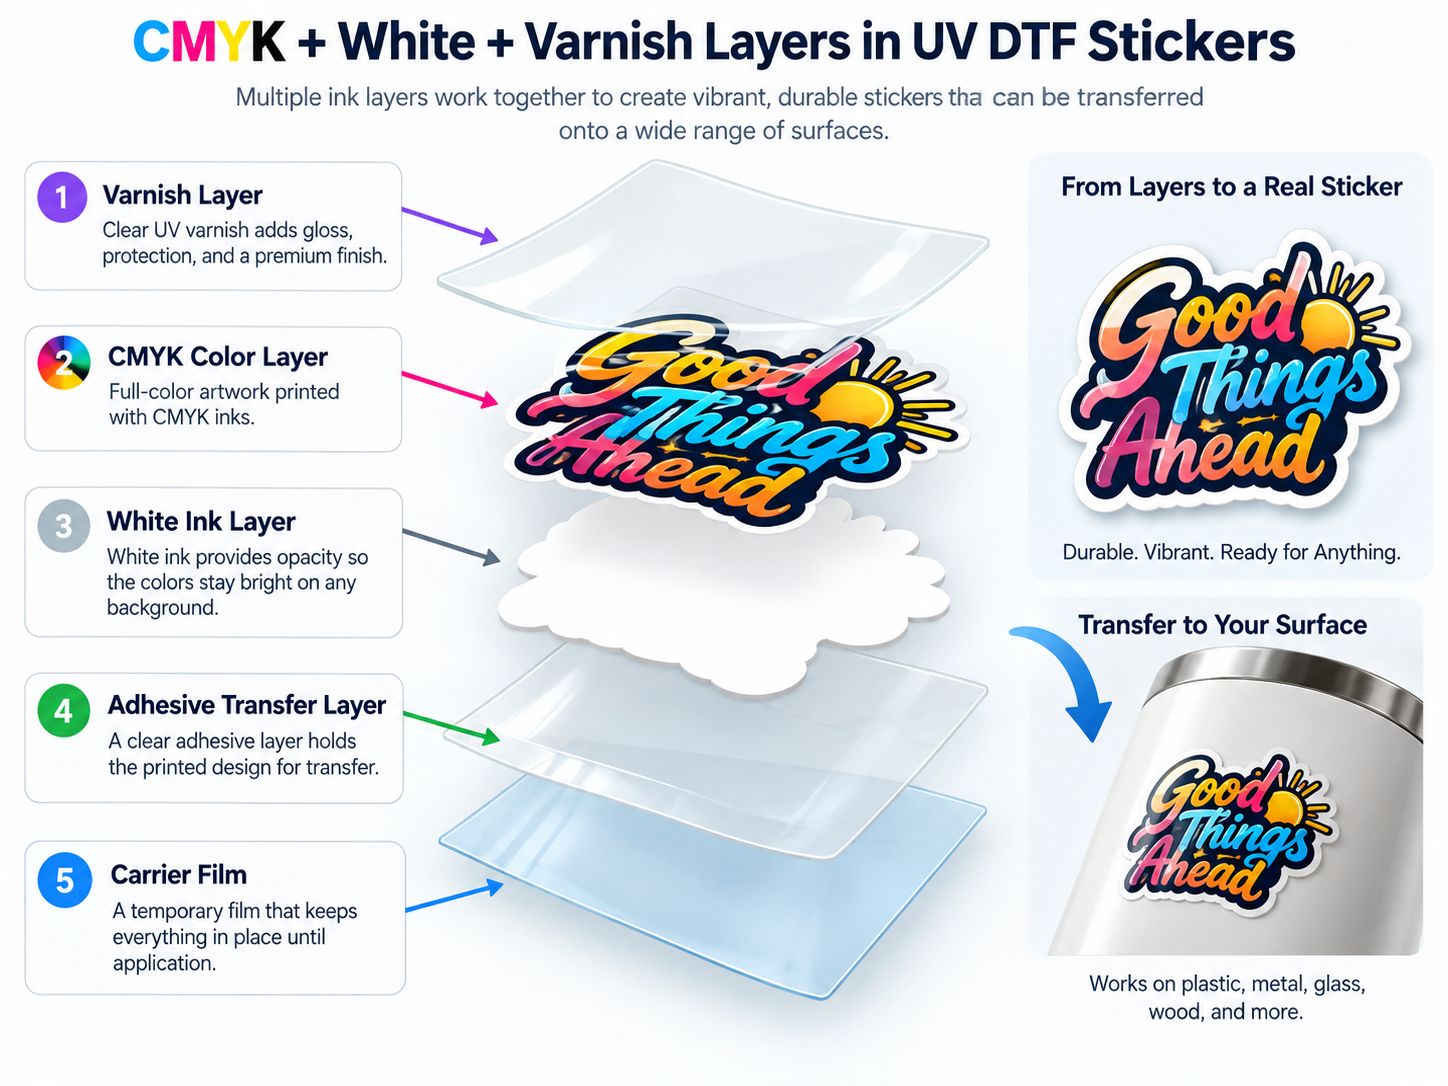
UV DTF stickers are built from multiple functional layers.
CMYK
CMYK creates the full-color artwork.
It controls:
- photographs
- gradients
- illustrations
- logos
- colored text
White Ink
White provides opacity.
This is especially important because the finished transfer may be applied to:
- black
- silver
- colored
- transparent
products.
Without white backing, the color underneath the transfer can influence the final appearance.
Varnish
Varnish can add:
- gloss
- tactile effect
- decorative texture
- selected highlights
But varnish should be treated as a design effect, not as a universal industrial protective coating.
For a more detailed explanation, see the EraSmart UV Ink Guide: CMYK, White and Varnish.
Step 4: Print on Film A and UV Cure the Ink
The printer jets the UV-curable ink onto Film A.
UV light cures the ink as part of the printing process.
This is an important difference from textile DTF.
UV DTF does not require:
- hot-melt powder
- powder shaker
- curing oven for powder
- garment heat press
The workflow is based on:
UV ink + UV curing + A/B transfer film
Check the Print Before Lamination
Inspect:
- color
- white coverage
- varnish
- fine text
- missing nozzles
- banding
- alignment
- dust contamination
Fix printing issues before continuing.
Lamination will not correct a poor print.
Step 5: Laminate with Film B
After printing, Film B is laminated onto the printed Film A.
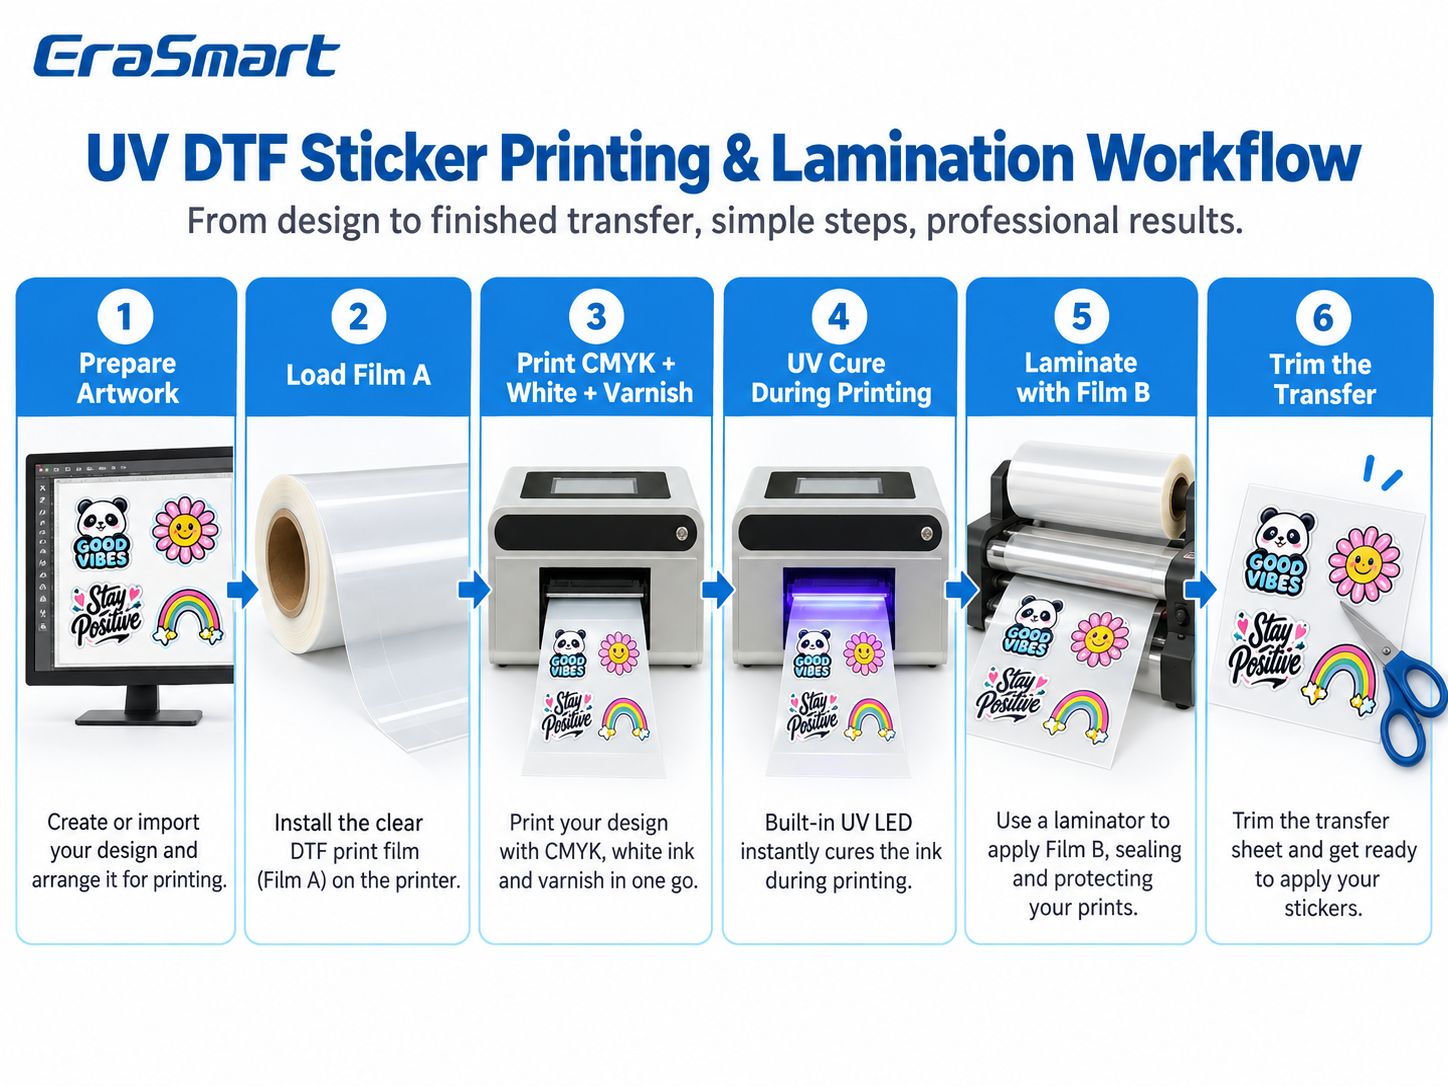
A simplified workflow is:
Artwork → Film A → CMYK/White/Varnish Print → UV Cure → Film B → Lamination → Finished Transfer
Why Lamination Quality Matters
Poor lamination can create:
- bubbles
- wrinkles
- incomplete transfer
- damaged fine details
- inconsistent adhesion
- waste
Keep the lamination area:
- clean
- stable
- free from dust
Use consistent alignment and pressure according to the machine and film system.
Integrated vs Separate Lamination
Some UV DTF systems integrate printing and lamination into one workflow.
Others may use a separate laminating process.
The principle remains the same:
the printed design must be transferred cleanly between the functional films before application.
Step 6: Trim the Finished UV DTF Transfer
Once laminated, trim the transfer sheet into manageable pieces.
You do not always need the same type of precise contour cutting used for traditional printable vinyl stickers.
That is one practical advantage of many UV DTF transfer workflows.
However, leave enough carrier area around the design to:
- position it accurately
- hold the transfer
- peel the carrier cleanly
Avoid cutting through critical design details.
Step 7: Prepare the Product Surface
Surface preparation is one of the most important steps in the entire workflow.
A perfect UV DTF transfer can still fail if the product surface is unsuitable.
The basic preparation process is:
Clean → Degrease → Dry → Test
Remove Dust
Dust can prevent proper contact between the adhesive layer and the product.
Remove Oil and Fingerprints
This is especially important on:
- glass
- metal
- acrylic
- coated plastic
Let the Surface Dry
Do not apply the transfer over:
- moisture
- cleaning fluid
- oily residue
Test the Exact Product
Do not assume that because one bottle works well, every bottle will behave the same.
Coatings and resin types vary.
Step 8: Apply the UV DTF Sticker
The application process should be slow and controlled.
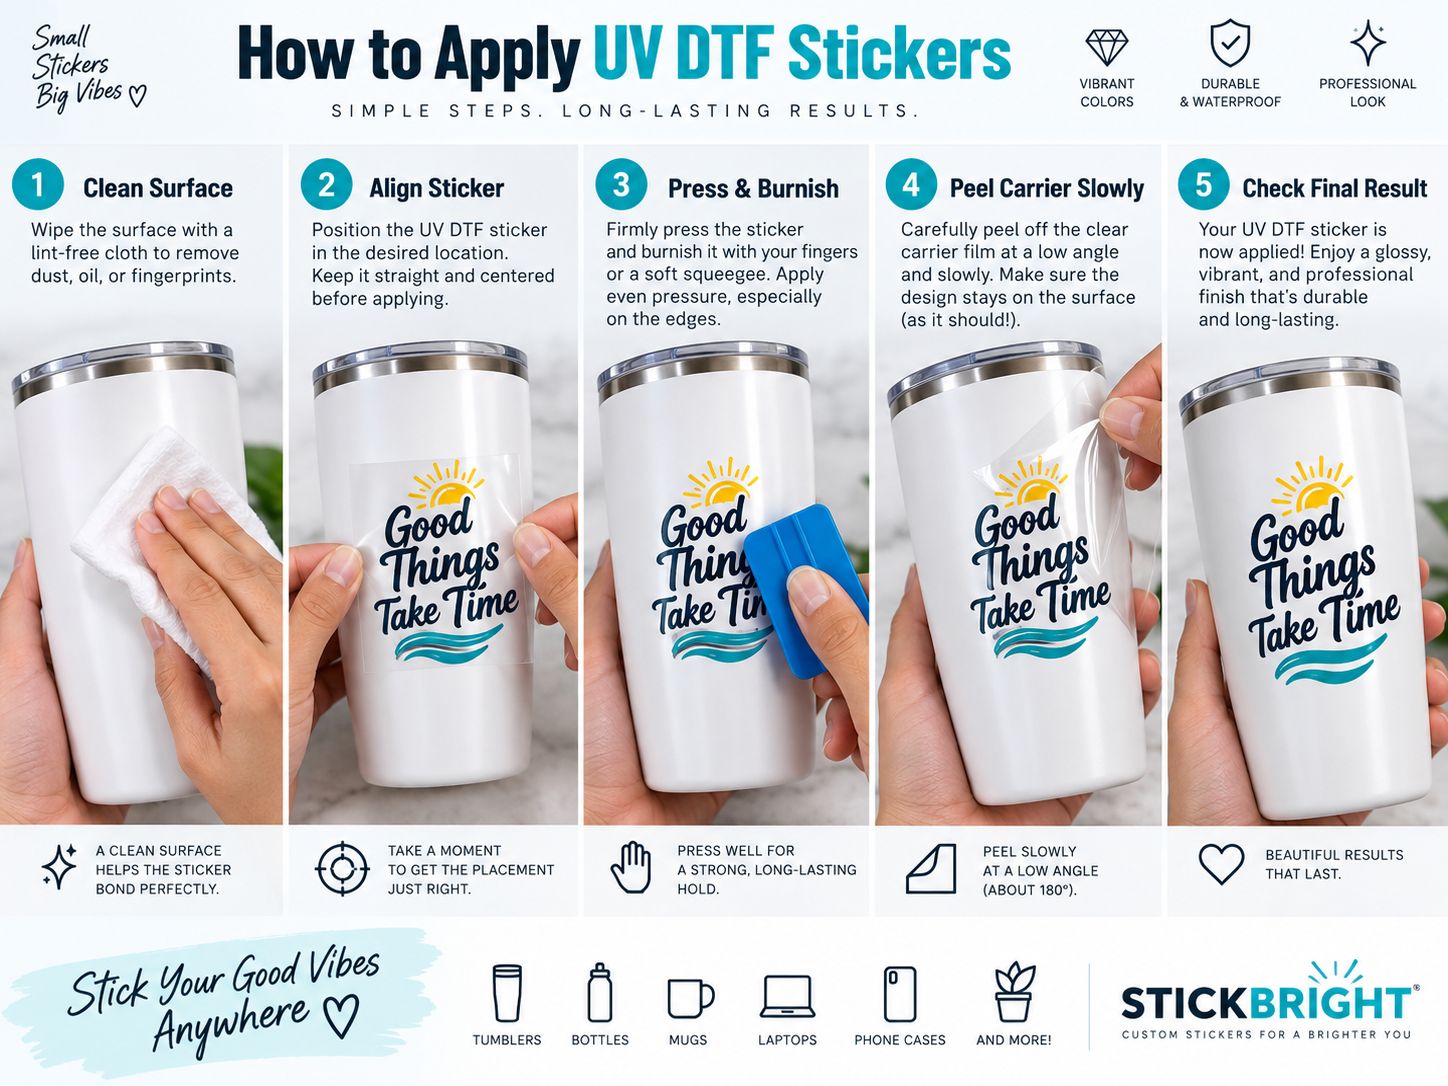
1. Clean the Surface
Make sure it is:
- clean
- dry
- free from oil
- free from fingerprints
2. Position the Transfer
Before pressing down fully, confirm:
- orientation
- alignment
- distance from edges
- visual position
Once the adhesive makes full contact, repositioning may be difficult.
3. Press and Burnish
Press the transfer evenly.
Use:
- fingers
- squeegee
- soft scraper
depending on the product.
Work across the entire design, especially:
- corners
- thin lines
- small text
4. Peel Slowly
Peel the carrier film slowly and carefully.
A low peeling angle is often easier for fine details, but the exact technique should follow the film system and transfer behavior.
If part of the design begins lifting:
- stop
- lay the carrier back down
- burnish again
- peel more slowly
5. Inspect the Result
Check:
- edges
- small text
- fine graphics
- bubbles
- incomplete transfer
Do this before packaging or delivery.
Step 9: Test Before Selling the Product
A transfer looking good immediately after application does not automatically prove it will perform adequately in real use.
Test according to the actual product.
Possible checks include:
- handling
- rubbing
- scratching
- edge lifting
- cleaning exposure
- moisture exposure
Avoid universal claims such as:
- waterproof
- dishwasher safe
- permanent outdoor
- chemical resistant
unless the complete film, ink, substrate and finished-product combination has actually been tested for that use.
What Surfaces Work with UV DTF Stickers?
UV DTF is generally best suited to suitable smooth, hard surfaces.
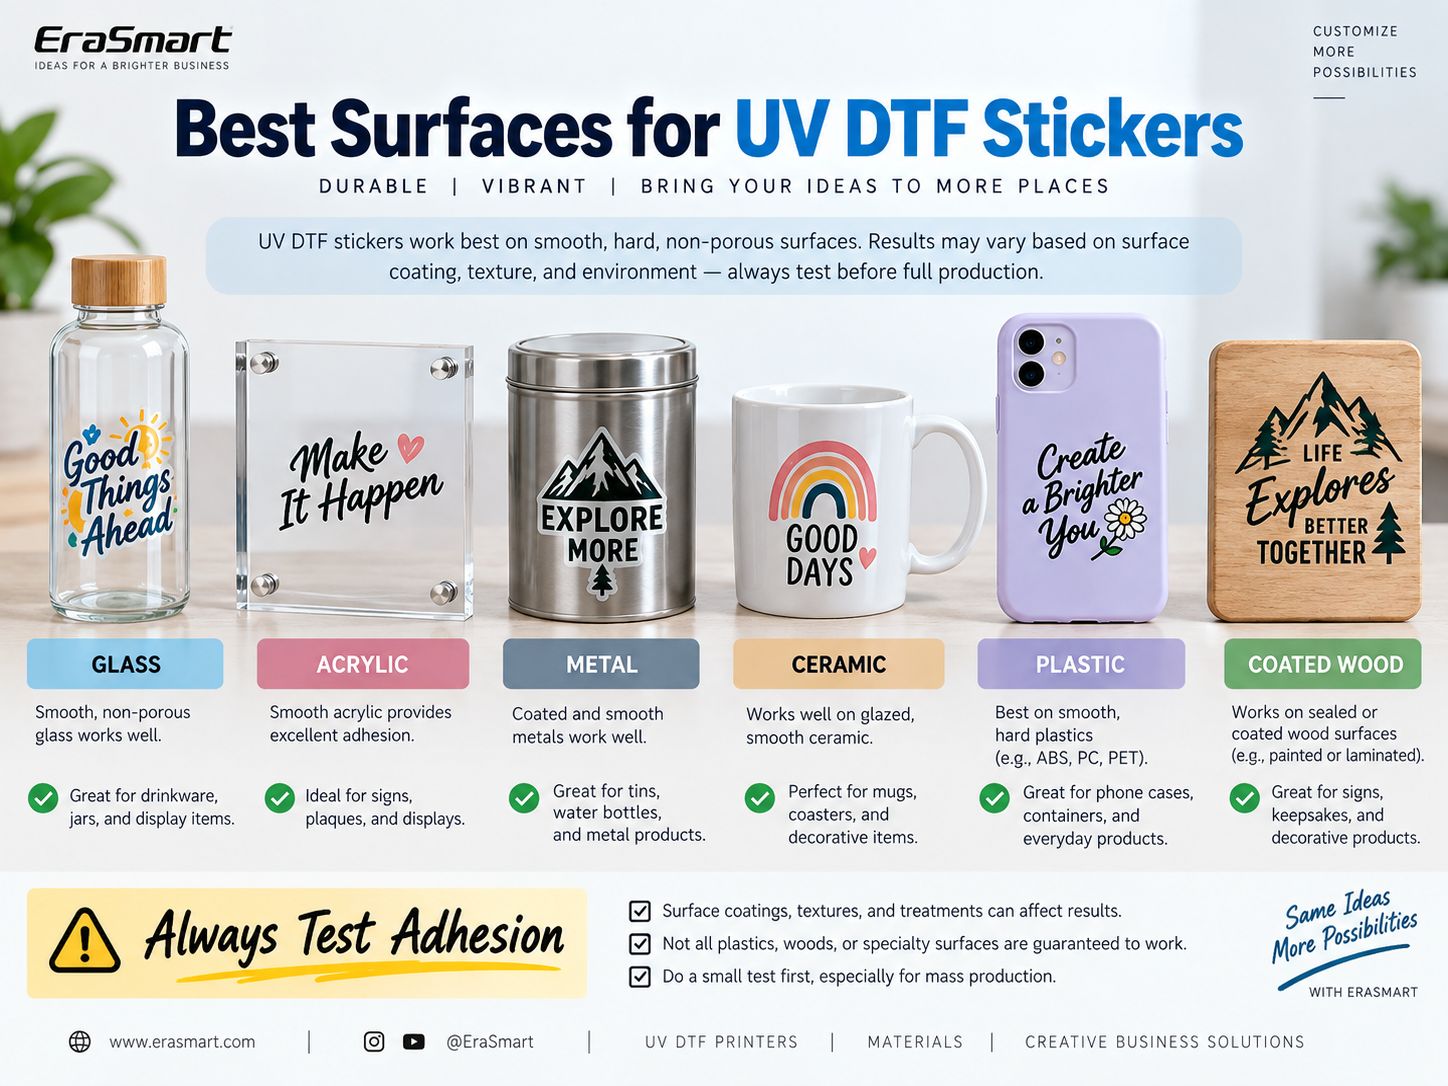
Common materials include:
Glass
Typical products:
- bottles
- jars
- decorative glass
- drinkware
Glass should be clean and free from oil.
Acrylic
Useful for:
- signs
- displays
- plaques
- promotional products
Metal
Suitable applications may include:
- tumblers
- bottles
- tins
- promotional products
Surface coatings still affect adhesion.
Ceramic
Possible products:
- mugs
- decorative objects
- glazed products
Always test the actual glaze.
Plastic
Plastic requires more caution because not all plastics behave alike.
ABS, PC and some PET products may be workable.
PP and PE are more challenging low-surface-energy plastics.
See our detailed guide to UV Printing on Plastic.
Coated Wood
Smooth, sealed or coated wood can sometimes work well.
Rough raw wood is much less suitable for transfer-style applications.
For direct wood printing, see How to Print on Wood.
Always Test Adhesion
Surface:
- coating
- texture
- resin
- finish
- contamination
can change performance significantly.
Which Surfaces Should You Be Careful With?
Take extra care with:
- rough surfaces
- heavily textured surfaces
- oily surfaces
- dusty surfaces
- silicone-treated products
- waxed products
- low-surface-energy plastics
- flexible surfaces
- fabric
UV DTF is mainly a hard-surface transfer technology.
For textiles, use a textile-oriented process such as DTF printing.
How to Make Raised or Textured UV DTF Stickers
UV varnish can be used to create additional visual and tactile effects in supported workflows.
Possible effects include:
- raised logos
- glossy text
- textured highlights
- selected decorative areas
The exact result depends on:
- RIP settings
- varnish passes
- printer configuration
- UV ink
- film
- artwork
Do not apply a universal varnish-layer thickness or height setting from another printer.
Use the settings validated for your EraSmart machine and consumable combination.
UV DTF Stickers vs Printable Vinyl Stickers
These are different production systems.
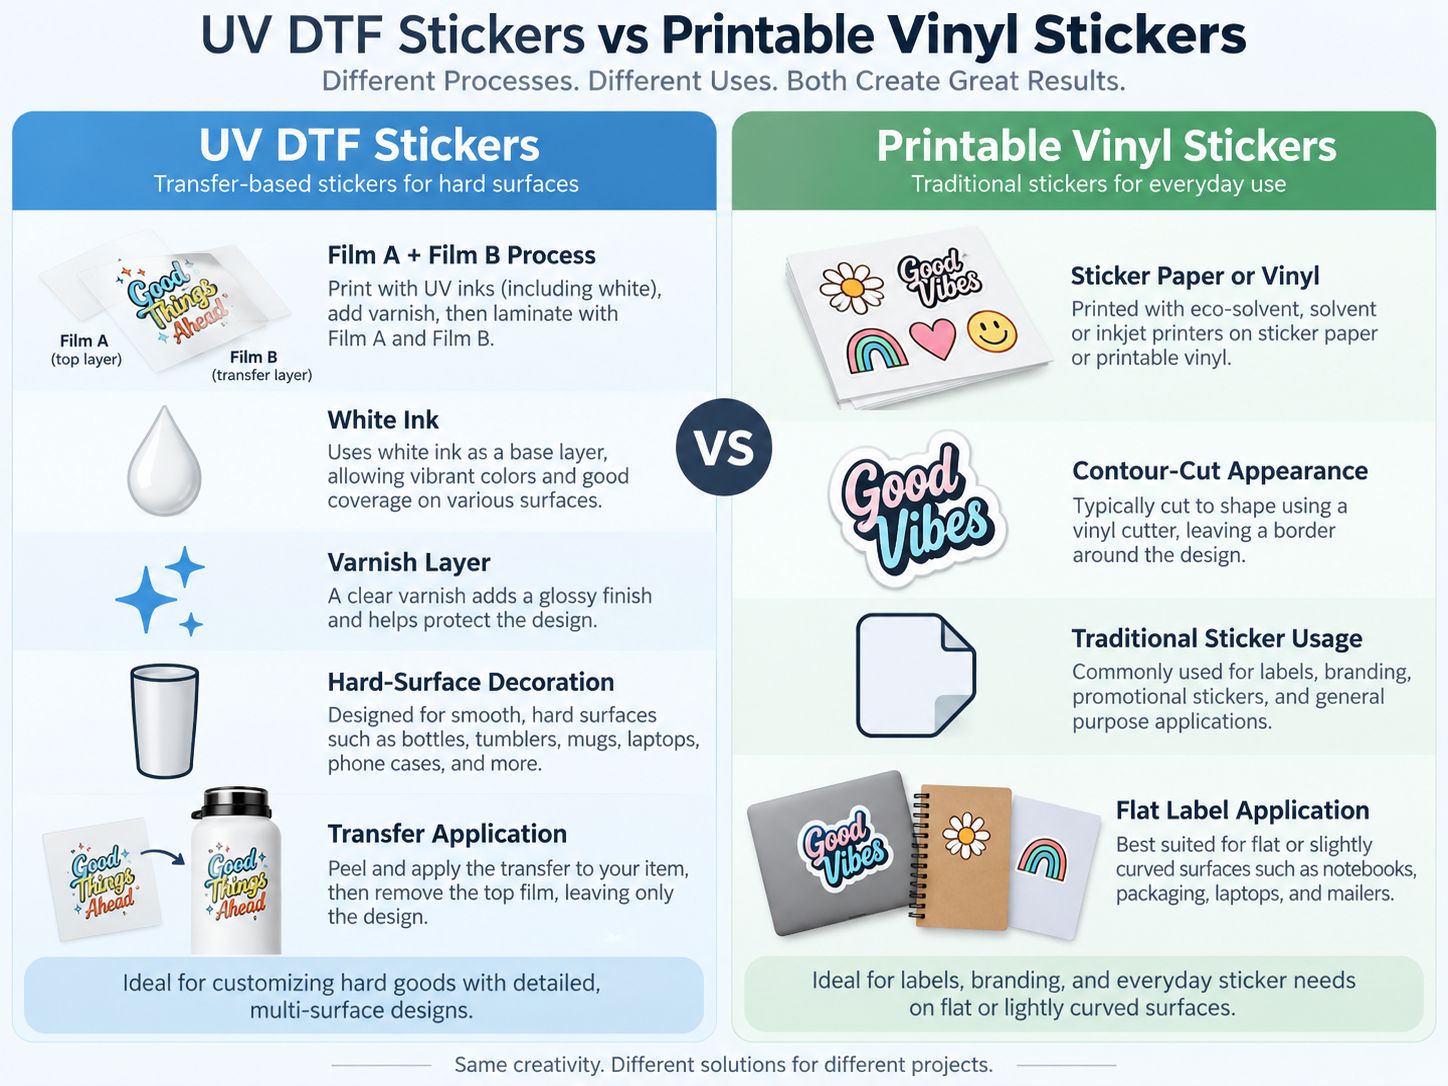
| Feature | UV DTF Stickers | Printable Vinyl Stickers |
|---|---|---|
| Main process | A/B film transfer | Print onto sticker/vinyl media |
| UV ink | Yes | Depends on printer |
| White ink | Common | Depends on system |
| Varnish | Possible | Usually separate |
| Contour cutting | Often not required in the same way | Frequently used |
| Transfer film | Yes | Depends on workflow |
| Main application | Hard-surface decoration | Labels and traditional stickers |
| Curved products | Useful on suitable surfaces | Depends on material |
| Textile application | No | No |
When UV DTF Makes More Sense
Choose UV DTF for:
- product decoration
- tumblers
- bottles
- jars
- promotional products
- hard-surface logos
- small-batch customization
When Printable Vinyl Makes More Sense
Traditional vinyl can be better for:
- flat product labels
- packaging labels
- paper-based stickers
- large sticker sheets
- removable graphics
- conventional label workflows
Neither method is universally better.
They serve different products.
UV DTF Sticker vs Direct UV Printing
UV DTF also differs from direct UV flatbed printing.
Direct UV Printing
The object goes directly onto the printer.
Best suited to:
- flat products
- plaques
- phone cases
- panels
- flat gifts
See the EraSmart UV Printer range.
UV DTF
The graphic is produced first and then transferred.
Useful when the object is:
- curved
- irregular
- finished
- difficult to position under a flatbed printhead
For many small custom-printing businesses, the two technologies can complement each other.
Common UV DTF Sticker Problems
Design Does Not Transfer Completely
Possible causes:
- insufficient burnishing
- difficult surface
- contamination
- fine artwork
- incorrect peeling technique
Press again and peel more slowly.
Sticker Edges Lift
Check:
- oil
- dust
- coating
- surface energy
- curvature
- film compatibility
Bubbles Appear During Application
Possible causes:
- uneven pressure
- poor positioning
- contamination
- wrinkles in the transfer
Apply from one direction and work outward.
Small Text Lifts with the Carrier
Try:
- stronger burnishing
- slower peel
- lower peel angle
- slightly more robust artwork
Color Looks Weak
Check:
- white layer
- nozzle condition
- ink density
- artwork
- RIP configuration
White Ink Looks Uneven
Check:
- white ink circulation
- nozzle condition
- maintenance
- RIP white layer
Lamination Has Wrinkles
Check:
- film alignment
- film tension
- roller pressure
- cleanliness
Can You Make UV DTF Stickers Without a Printer?
Yes—but in that case, you are not manufacturing the printed UV DTF transfer yourself.
You need to purchase:
- ready-made transfers
- gang sheets
- pre-printed UV DTF graphics
and then apply them to your products.
We have a separate guide explaining this workflow:
How to Use UV DTF Type B Film Without a Printer
This can be a practical way to test a product idea before investing in your own production equipment.
When Should You Buy Your Own UV DTF Printer?
Outsourcing can make sense when:
- order volume is low
- you are testing the market
- designs change infrequently
Owning a UV DTF printer becomes more attractive when you need:
- faster turnaround
- frequent customization
- small-batch production
- control over artwork
- control over white and varnish
- in-house sampling
- repeat orders
For a printer specifically focused on decal and sticker production, see:
EraSmart UV DTF Printer for Stickers
Can UV DTF Stickers Become a Small Business?
Yes.
Possible product categories include:
- custom bottle decals
- tumbler graphics
- business-logo transfers
- wedding decals
- cosmetic packaging decoration
- promotional products
- small-business branding kits
- personalized gifts
- ready-to-apply transfer sheets
You can sell:
Finished Products
For example:
- customized bottle
- decorated tumbler
- branded jar
Ready-to-Apply Transfers
Customers apply the transfer themselves.
Gang Sheets
Multiple designs arranged on one film area.
B2B Logo Transfers
Useful for local:
- cafés
- salons
- gift shops
- event businesses
- packaging companies
How to Reduce Waste When Printing UV DTF Stickers
Arrange multiple designs efficiently on one Film A layout.
This is often called a gang sheet.
Group:
- logos
- small icons
- customer names
- repeated designs
to make better use of film.
Also keep records of:
- film type
- ink
- RIP preset
- lamination settings
- substrate test results
Repeatable production is more valuable than repeatedly experimenting from zero.
Final Answer: How Do You Make UV DTF Stickers at Home?
The complete workflow is:
Design → Film A → CMYK + White + Varnish → UV Cure → Film B → Laminate → Trim → Clean Product → Apply → Burnish → Peel → Inspect
The three most important factors are:
1. Good artwork
Fine details must be suitable for transfer.
2. Good lamination
Poor lamination can damage an otherwise perfect print.
3. Good surface preparation
A transfer cannot bond reliably to a dirty or incompatible substrate.
For businesses producing UV DTF stickers regularly, an EraSmart UV DTF Printer provides an in-house workflow for customized hard-surface transfers.
If your main goal is stickers and decals, also see the EraSmart UV DTF Printer for Stickers.
FAQ
What is a UV DTF sticker?
A UV DTF sticker is a hard-surface transfer produced using UV-curable ink and an A/B film workflow. The printed graphic is transferred from the carrier film onto a compatible product surface.
Do UV DTF stickers need a heat press?
No. UV DTF is not a heat-transfer textile process.
Do UV DTF stickers use powder?
No. UV DTF does not use the hot-melt adhesive powder associated with textile DTF printing.
What are Film A and Film B?
Film A is used during printing. Film B is laminated with the printed film and helps create the transfer workflow used to apply the design to the final object.
Can UV DTF stickers use white ink?
Yes. White ink provides opacity and helps full-color artwork remain vivid on dark, colored or transparent products.
Can UV DTF stickers use varnish?
Yes, depending on the printer and RIP setup. Varnish can create gloss and selected textured effects.
What surfaces work best with UV DTF?
Smooth, hard surfaces such as suitable glass, acrylic, metal, ceramic and certain plastics are common applications.
Can UV DTF stick to PP or PE plastic?
Results can be difficult because PP and PE are low-surface-energy plastics. Test the exact product before production.
Are UV DTF stickers waterproof?
Do not assume universal waterproof performance. Water resistance depends on the film, ink, adhesive, substrate, application and exposure conditions.
Are UV DTF stickers dishwasher safe?
Do not make a universal dishwasher-safe claim unless the complete finished product has been specifically tested for that use.
Can I put UV DTF stickers on mugs?
Potentially, if the mug surface is compatible. Avoid direct food- or mouth-contact areas unless the complete system is qualified for that use.
Do UV DTF stickers need contour cutting?
Many UV DTF workflows do not require the same contour-cutting process used for traditional printable vinyl, although the finished transfer sheet still needs to be trimmed into usable pieces.
Can I make UV DTF stickers without owning a printer?
Yes. You can purchase ready-made UV DTF transfers and apply them yourself.
Which EraSmart printer is suitable for UV DTF stickers?
See the EraSmart UV DTF Printer range and the dedicated UV DTF Printer for Stickers page for sticker-focused production.
Start Your UV DTF Sticker Workflow
If you are planning to produce UV DTF transfers, tell EraSmart:
- expected sticker size
- monthly production volume
- target products
- materials
- roll or sheet workflow
- whether you need varnish effects
- whether you plan to sell finished products or transfers
We can help you compare the appropriate EraSmart UV DTF Printer and A/B film workflow.
MAY BE YOU LIKE ALSO

Copyright 2020 © EraSmart. | Sitemap